Movelist
(*) = EX OK
(!) = MAX OK
Throws
2 - close  /
/  +
+ 
3 - close  /
/  +
+ 
Command Normals
10 -  +
+ 
J -  +
+ 
Special Moves
Queen -  +
+  /
/  /
/ /
/  (*)
(*)
King -  +
+  /
/  (*)
(*)
Spade -  +
+  /
/  (*)
(*)
- (follow up) -
 +
+  /
/ 
Diamond -  +
+  /
/  (*)
(*)
- (follow up) -
 +
+  /
/ 
Club -  +
+  /
/ (*)
(*)
Heart -  +
+  /
/ (*)
(*)
Ace - [Heart (Derivation)]  +
+  +
+
Super Special Moves
Four Suits (Spade, Heart, Diamond, Club) -  ,
,  +
+  /
/ HOLD OK (!)
Royal Flush (10, Jack, Queen, King, Ace) - 
 +
+  /
/  (!)
(!)
Climax Super Special Move
JOKER - 
 +
+ 

Quick Combo Reference
Quick Combo Reference
Notation Key
(place notation here)
| 0 Meter
|
Anywhere
Low, Anywhere
Low, Anywhere
|
(Combo 1) = (damage number here) dmg
(Combo 2) = (damage number here) dmg
(Combo 3) = (damage number here) = 231 dmg
|
| 1 Meter
|
Corner
Anywhere
Low, Anywhere
|
(Combo 1) = (damage number here) dmg
(Combo 2) = (damage number here) dmg
(Combo 3) = (damage number here) dmg
|
| 2 Meters
|
Anywhere
|
(Combo 1) = (damage number here) dmg
|
Gameplay Overview
Health: 950
Normals
Far Standing Normals
| Far A
|
| Damage
|
Stun
|
Startup
|
Active
|
Recovery
|
Hit Adv
|
Block Adv
|
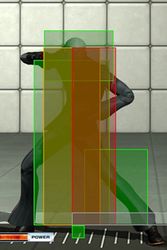
Hitbox
|
Invincibility
|
| 25
|
30
|
5
|
4
|
10
|
2
|
0
|
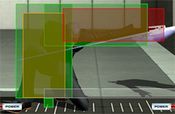
Hitbox
|
-
|
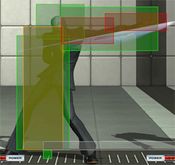
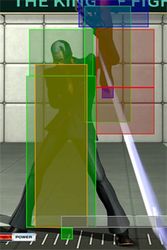
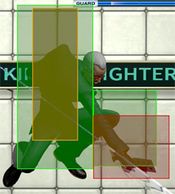
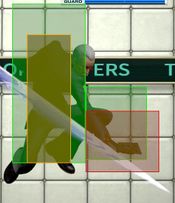
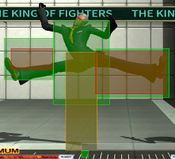
Quick jab with a playing card. Whiffs on crouching opponents, Decent horizontal range and speed to stop incoming hops. In 3.1, recovery is much quicker (4f), and is your go-to hop check.
|
|
| Far B
|
| Damage
|
Stun
|
Startup
|
Active
|
Recovery
|
Hit Adv
|
Block Adv
|
Hitbox
|
Invincibility
|
| 30
|
30
|
7
|
3
|
15
|
-3
|
-5
|
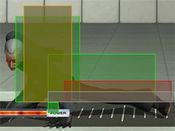
Hitbox
|
-
|
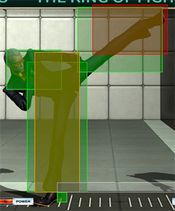
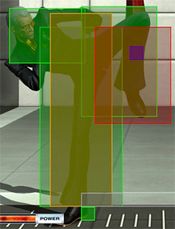
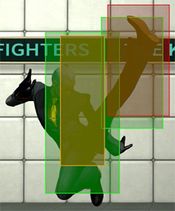
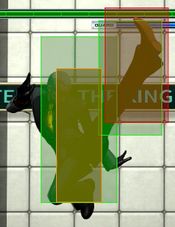
This high kick can stop random forward jumps directly in front of Oswald. Whiffs on crouching opponents. Hitbox is deceptively high, so hops are effective against this move, although it is a potent tool against jumps.
|
|
| Far C
|
| Damage
|
Stun
|
Startup
|
Active
|
Recovery
|
Hit Adv
|
Block Adv
|
Hitbox
|
Invincibility
|
| 70
|
70
|
8
|
6
|
21
|
-6
|
-8
|
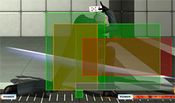
Hitbox
|
-
|
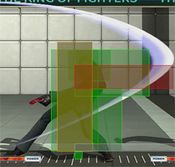
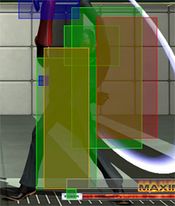
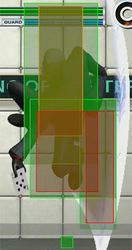
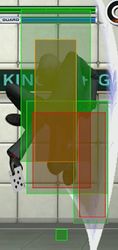
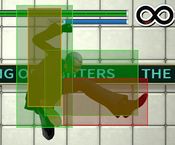
A fierce card slash. Good amount of push-back if blocked. Almost interchangeable with st. D, MAX mode starter if you aren’t in range for close C.
|
|
| Far D
|
| Damage
|
Stun
|
Startup
|
Active
|
Recovery
|
Hit Adv
|
Block Adv
|
Hitbox
|
Invincibility
|
| 80
|
70
|
13
|
3
|
24
|
-6
|
-8
|
Hitbox
|
-
|
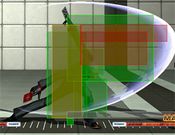
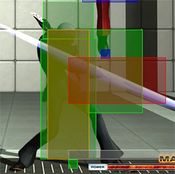
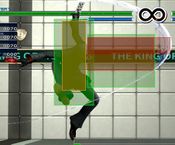
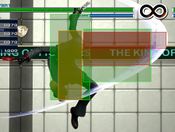
More horizontal and vertical range than st. C, but a bit less start-up. More recovery though.
|
|
Close Standing Normals
| Close A
|
| Damage
|
Stun
|
Startup
|
Active
|
Recovery
|
Hit Adv
|
Block Adv
|
Hitbox
|
Invincibility
|
| 25
|
30
|
4
|
3
|
12
|
0
|
-2
|
Hitbox
|
-
|
A quick close card slash that can be chained into cr. A, cl. B, cr. B. Special cancel-able as well. Also a nice move to stop hops, but not as effective as far A.
|
|
| Close B
|
| Damage
|
Stun
|
Startup
|
Active
|
Recovery
|
Hit Adv
|
Block Adv
|
Hitbox
|
Invincibility
|
| 30
|
30
|
6
|
5
|
6
|
4
|
2
|
Hitbox
|
-
|
Looks like st. B but uses his knee instead. Plus 2F on block. Special cancel-able.
|
|
| Close C
|
| Damage
|
Stun
|
Startup
|
Active
|
Recovery
|
Hit Adv
|
Block Adv
|
Hitbox
|
Invincibility
|
| 70
|
70
|
9
|
5
|
19
|
-3
|
-5
|
Hitbox
|
-
|
Looks like Mature’s and Iori’s close C. You will be using this as a confirm in his heavy standing combos, usually into J (or 3A, usure of notation we want here) You can also use this to stop opponents from re-hopping in from of your face, or trying to jump over you if they want to escape out of the corner.
|
|
| Close D
|
| Damage
|
Stun
|
Startup
|
Active
|
Recovery
|
Hit Adv
|
Block Adv
|
Hitbox
|
Invincibility
|
| 80
|
70
|
5
|
4
|
18
|
-1
|
-3
|
Hitbox
|
-
|
Faster start-up than cl.C, and less negative frames on block but has less multi-purpose use as cl. C. Not as useful due to less anti-air properties, but does 10 more damage, so if you’re 9000% sure a jumpin will connect, use this instead of cl.C.
|
|
Crouching Normals
| Crouching A
|
| Damage
|
Stun
|
Startup
|
Active
|
Recovery
|
Hit Adv
|
Block Adv
|
Hitbox
|
Invincibility
|
| 25
|
30
|
7
|
4
|
8
|
3
|
1
|
Hitbox
|
-
|
A chain-able long range crouching jab. About as long as his far A, this will be part of your light confirms, usually into 3A.
|
|
| Crouch B
|
| Damage
|
Stun
|
Startup
|
Active
|
Recovery
|
Hit Adv
|
Block Adv
|
Hitbox
|
Invincibility
|
| 30
|
30
|
5
|
3
|
8
|
4
|
2
|
Hitbox
|
-
|
Decent range for a crouching light kick. Can chain into cr.A. Your main low starter, typically into cr.A, although it links into itself. You can’t cancel this directly into 3A, so cr.A cr.B is better overall.
|
|
| Crouch C
|
| Damage
|
Stun
|
Startup
|
Active
|
Recovery
|
Hit Adv
|
Block Adv
|
Hitbox
|
Invincibility
|
| 70
|
70
|
13
|
6
|
22
|
-7
|
-9
|
Hitbox
|
-
|
Oswald slashes the opponent’s shins. Decent horizontal range. Doesn’t hit low. Special and super cancel-able. Mostly obsoleted by cr.D due to its range, but safer on whiff although it’s a mid.
|
|
| Crouch D
|
| Damage
|
Stun
|
Startup
|
Active
|
Recovery
|
Hit Adv
|
Block Adv
|
Hitbox
|
Invincibility
|
| 40 + 40
|
40 + 30
|
9
|
4(7)4
|
33
|
SKD (2nd Hit Only)
|
-18
|
Hitbox
|
-
|
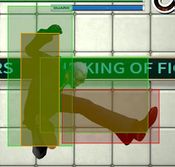
Hits low twice. The first hit doesn’t knock down, while the second hit causes a soft knockdown. Great horizontal vertical range and can be canceled into his df+A command normal. -18F on block. A wonderful MAX starter on the first hit (even when blocked), a very long sweep if you let it finish. However, good spacing is needed as on whiff this move is extremely punishable.
|
|
Jump Normals
| Jump A
|
| Damage
|
Stun
|
Startup
|
Active
|
Recovery
|
Hit Adv
|
Block Adv
|
Hitbox
|
Invincibility
|
| 45
|
30
|
7
|
8
|
(Landing)+1
|
-
|
-
|
Hitbox
|
-
|
A short-ranged diagonal downward card slash. Good for air-to-ground approaches at hop height, also great for tick throwing people.
|
|
| Jump B
|
| Damage
|
Stun
|
Startup
|
Active
|
Recovery
|
Hit Adv
|
Block Adv
|
Hitbox
|
Invincibility
|
| 45
|
30
|
5
|
11
|
(Landing)+1
|
-
|
-
|
Hitbox
|
-
|
A high aiming kick that is best for ground-to-air defensive situations.
|
|
| Jump C
|
| Damage
|
Stun
|
Startup
|
Active
|
Recovery
|
Hit Adv
|
Block Adv
|
Hitbox
|
Invincibility
|
| 70
|
70
|
12
|
6
|
(Landing)+1
|
-
|
-
|
Hitbox
|
-
|
A super deep cross-up slash, buffed in 3.10 to serve as a good air-to-ground with its increased horizontal range. This button is oswald’s main jump-in when the opponent’s on defense, although j.A and j.CD have their merits too.
|
|
| Jump D
|
| Damage
|
Stun
|
Startup
|
Active
|
Recovery
|
Hit Adv
|
Block Adv
|
Hitbox
|
Invincibility
|
| 70
|
70
|
11
|
4
|
(Landing)+1
|
-
|
-
|
Hitbox
|
-
|
Good horizontal range to use as an air-to-air attack. Although j.CD gets the CH juggle properties, jump back j.D is good for when you need to challenge a jump-in but you either don’t trust K or they’re too close for 3A to work.
|
|
Hop Normals
| Hop A
|
| Damage
|
Stun
|
Startup
|
Active
|
Recovery
|
Hit Adv
|
Block Adv
|
Hitbox
|
Invincibility
|
| 40
|
30
|
7
|
6
|
(Landing)+1
|
-
|
-
|
Hitbox
|
-
|
A short-ranged diagonal downward card slash. Good for air-to-ground approaches at hop height, also great for tick throwing people.
|
|
| Hop B
|
| Damage
|
Stun
|
Startup
|
Active
|
Recovery
|
Hit Adv
|
Block Adv
|
Hitbox
|
Invincibility
|
| 40
|
30
|
5
|
9
|
(Landing)+1
|
-
|
-
|
Hitbox
|
-
|
A high aiming kick that is best for ground-to-air defensive situations.
|
|
| Hop C
|
| Damage
|
Stun
|
Startup
|
Active
|
Recovery
|
Hit Adv
|
Block Adv
|
Hitbox
|
Invincibility
|
| 70
|
70
|
12
|
6
|
(Landing)+1
|
-
|
-
|
Hitbox
|
-
|
A super deep cross-up slash, buffed in 3.10 to serve as a good air-to-ground with its increased horizontal range. This button is oswald’s main jump-in when the opponent’s on defense, although j.A and j.CD have their merits too.
|
|
| Hop D
|
| Damage
|
Stun
|
Startup
|
Active
|
Recovery
|
Hit Adv
|
Block Adv
|
Hitbox
|
Invincibility
|
| 70
|
70
|
11
|
3
|
(Landing)+1
|
-
|
-
|
Hitbox
|
-
|
Good horizontal range to use as an air-to-air attack. Although j.CD gets the CH juggle properties, jump back j.D is good for when you need to challenge a jump-in but you either don’t trust K or they’re too close for 3A to work.
|
|
Blowback
| Standing CD
|
| Damage
|
Stun
|
Startup
|
Active
|
Recovery
|
Hit Adv
|
Block Adv
|
Hitbox
|
Invincibility
|
| 75
|
100
|
13
|
8
|
26
|
HKD (Gnd)/ SKD (Air)
|
-11
|
Hitbox
|
Low: 5 to 30 (26 Frames)
|
Whiff cancel-able and crushes low and evades ground skimming projectiles. Hits behind him.
|
|
| Jump CD
|
| Damage
|
Stun
|
Startup
|
Active
|
Recovery
|
Hit Adv
|
Block Adv
|
Hitbox
|
Invincibility
|
| 90
|
80
|
14
|
7
|
(Landing)+1
|
SKD
|
-
|
Hitbox
|
-
|
Same angle as j.A but longer and deeper horizontal and vertical range. Best used to build up guard gauge/blockstun as a hop normal, particularly to put you in range for a hop C left/right during a blockstring.
|
|
| Hop CD
|
| Damage
|
Stun
|
Startup
|
Active
|
Recovery
|
Hit Adv
|
Block Adv
|
Hitbox
|
Invincibility
|
| 80
|
80
|
14
|
5
|
(Landing)+1
|
SKD
|
-
|
Hitbox
|
-
|
Same angle as j.A but longer and deeper horizontal and vertical range. Best used to build up guard gauge/blockstun as a hop normal, particularly to put you in range for a hop C left/right during a blockstring.
|
|
Throws
Normal Throws
| 2 - (close, ← or → + C)
|
| Damage
|
Stun
|
Startup
|
Active
|
Recovery
|
Hit Adv
|
Block Adv
|
Hitbox
|
Invincibility
|
| 100
|
0
|
1
|
1
|
0
|
HKD
|
Unblockable
|
Hitbox
|
-
|
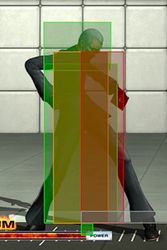
- Oswald grabs the opponent, then slashes them with a card. The opponent falls to their knees right in front of Oswald.
- Can be broken
|
|
| 3 - (close, ← or → + D)
|
| Damage
|
Stun
|
Startup
|
Active
|
Recovery
|
Hit Adv
|
Block Adv
|
Hitbox
|
Invincibility
|
| 100
|
0
|
1
|
1
|
0
|
HKD
|
Unblockable
|
Hitbox
|
-
|
- Pretty much the same as his f+C throw, but places the opponent behind him.
- Can be broken
- Both throws get you LP Q into a mixup guaranteed due to the hard knockdown.
|
|
Command Moves
Command Moves
| 10 - (↘ + A)
|
| Version
|
Damage
|
Stun
|
Startup
|
Active
|
Recovery
|
Hit Adv
|
Block Adv
|
Hitbox
|
Invincibility
|
| Without Cancel
|
70
|
60
|
10
|
4
|
32
|
SKD
|
-17
|
Hitbox
|
-
|
- Oswald will launch the opponent into the air. This version can be followed by Hk ♣ (↓↙← + D), EX ♣ (↓↙← + BD), or any version of Q.
|
| Version
|
Damage
|
Stun
|
Startup
|
Active
|
Recovery
|
Hit Adv
|
Block Adv
|
Hitbox
|
Invincibility
|
| With Cancel
|
30
|
30
|
7
|
2
|
25
|
-6
|
-8
|
Hitbox
|
-
|
- Oswald can confirm into 10 from cr. A or cl. A.
|
|
| J - (→ + A)
|
| Version
|
Damage
|
Stun
|
Startup
|
Active
|
Recovery
|
Hit Adv
|
Block Adv
|
Hitbox
|
Invincibility
|
| Without Cancel
|
70
|
60
|
39
|
1
|
30
|
2
|
0
|
Hitbox
|
-
|
- Oswald throws a card to the ground. On hit, there is enough hitstun to connect any version of ♣ to hit the opponent on the ground.
- Oswald performs a low attack.
|
| Version
|
Damage
|
Stun
|
Startup
|
Active
|
Recovery
|
Hit Adv
|
Block Adv
|
Hitbox
|
Invincibility
|
| With Cancel
|
40
|
40
|
15
|
3
|
28
|
2
|
-6 (point blank)/ -4 (furthest after cl. C/D and cr. C)
|
Hitbox
|
-
|
- Oswald throws a card to the ground. On hit, there is enough hitstun to connect any version of ♣ to hit the opponent on the ground.
- Oswald performs a mid attack attack.
|
|
Special Moves
| Queen (→↓↘ + A/B/C/D)
|
| Version
|
Damage
|
Stun
|
Startup
|
Active
|
Recovery
|
Hit Adv
|
Block Adv
|
Hitbox
|
Invincibility
|
| A/B
|
40
|
40
|
57
|
14
|
Recovers 8 frames before activation
|
34:(Earliest) to 42:(Latest)
|
32:(Earliest) to 40:(Latest)
|
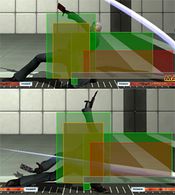
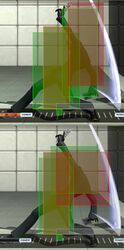
Hitbox - A Version / Hitbox - B Version
|
-
|
| Version
|
Damage
|
Stun
|
Startup
|
Active
|
Recovery
|
Hit Adv
|
Block Adv
|
Hitbox
|
Invincibility
|
| C/D
|
40
|
40
|
66
|
14
|
Recovers 8 frames before activation
|
41:(Earliest) to 48:(Latest)
|
39:(Earliest) to 46:(Latest)
|
Hitbox - C Version / Hitbox - D Version
|
-
|
|
| EX Queen (→↓↘ + AC/BD)
|
| Damage
|
Stun
|
Startup
|
Active
|
Recovery
|
Hit Adv
|
Block Adv
|
Hitbox
|
Invincibility
|
| 40 (x4)
|
0
|
53
|
23
|
Recovers 22 frames before activation
|
48:(Earliest) to 65:(Latest)
|
46:(Earliest) to 63:(Latest)
|
Hitbox - AC Version / Hitbox - BD Version
|
-
|
|
| King (←↓↙ + B/D)
|
| Damage
|
Stun
|
Startup
|
Active
|
Recovery
|
Hit Adv
|
Block Adv
|
Hitbox
|
Invincibility
|
| -
|
-
|
5
|
12 (Counter Window)
|
34
|
Upper Body Counter
|
-
|
Hitbox
|
-
|
- When the counter activates for the B version, Oswald appears behind opponent on the ground.
- When the counter activates for the D version, Oswald appears behind opponent in the air.
|
|
| EX King (←↓↙ + BD)
|
| Damage
|
Stun
|
Startup
|
Active
|
Recovery
|
Hit Adv
|
Block Adv
|
Hitbox
|
Invincibility
|
| -
|
-
|
3
|
16 (Counter Window)
|
24
|
Upper Body Counter
|
-
|
Hitbox
|
Full: 1 to 2 (2 Frames)
|
- When the counter activates, Oswald appears behind opponent on the ground.
|
|
| Spade (↓↙← + A/C)
|
| Version
|
Damage
|
Stun
|
Startup
|
Active
|
Recovery
|
Hit Adv
|
Block Adv
|
Hitbox
|
Invincibility
|
| A
|
40
|
30
|
13
|
12 (Proximity Box Detection) / 5 (Active Attack)
|
25 (Proximity Box Whiff) / 31 (After Active Attack)
|
-15 (As Rekka Starter) / SKD (As 2nd or 3rd hit of Rekka)
|
-17
|
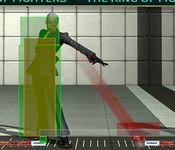
Hitbox - Proximity Box Whiff / Hitbox - Active Attack
|
-
|
| Version
|
Damage
|
Stun
|
Startup
|
Active
|
Recovery
|
Hit Adv
|
Block Adv
|
Hitbox
|
Invincibility
|
| C
|
72
|
30(x2)
|
6
|
2 (27 :(Proximity Box Detection)) / 2 (7) 5:(Active Attack)
|
25:(Proximity Box Whiff) / 33 :(After Active Attack)
|
-17 (As Rekka Starter) / SKD (As 2nd or 3rd hit of Rekka)
|
-19
|
Hitbox - Proximity Box Whiff / Hitbox - Active Attack
|
-
|
|
Spade - (qcb + A/C)
EX: (description here)
- (follow up) - (qcb + A or C)
Diamond - (qcf + A/C)
- Oswald slashes forward with his cards
EX: (description here)
- (follow up) - (qcf + A or C)
Club - (qcb + B/D)
EX: (description here)
Club - (qcb + B/D)
EX: (description here)
Heart - (qcf + B/D)
EX: (description here)
Ace - [Heart (Derivation)] (qcf + C+D)
Super Special Moves
Four Suits (Spade, Heart, Diamond, Club) - (qcf, hcb + A/C) HOLD OK
Max:
Royal Flush (10, Jack, Queen, King, Ace) - (hcbx2 + A or C)
Climax Super Special Moves
JOKER - (qcf, qcf + A+C)
Combos
- (any special information about the character combos if needed)
Notation
Rush Auto Combo
Meterless: description here
1 Meter: description here
EX: description here
0 meter
Anywhere
- cr. B, cr. A, df+A, qcb+A, delay qcf+A, qcb+B = (175 dmg)
- cr. B, cr. A, df+A, qcb+A, qcf+A, qcb+C, qcb+C = (182 dmg)
- cr. D (1 hit), f+A, qcb+B, qcf+A, qcb+C, qcb+C = (204 dmg)
Midscreen Only
- cr. B, cr. A, df+A, qcb+A, qcf+B, qcb+B = (183 dmg)
- cr. B, cr. A, df+A, qcb+A, qcf+A, qcf+D, qcf+CD = (262 dmg) - 6
Corner
- cr. D (1 hit), f+A, qcb+B, qcb+C, qcf+C, qcf+C = (220 dmg)
1 meter
1000 Max Mode and up/ All Positions/ Anywhere
- cr. B, cr. A, df+A, qcb+A, qcf+A, qcb+C, qcb+C (SC), qcf, hcb+A/C = (301 dmg) - 8
- cr. B, cr. A, df+A, (BC), cr. D (1 hit), f+A, qcb+BD, qcf+BD, qcf+CD = (306 to 308 dmg)
- cr. B, cr. A, df+A, (BC), cr. D (1 hit), f+A, qcb+BD, df+A, qcb+D, qcf+A, qcb+D = (297 dmg)
- cr. B, cr. A, df+A, (BC), cl. D, df+A, qcb+AC, qcf+BD, qcf+CD = (322 dmg)
- cr. B, cr. A, df+A, (BC), cl. D, f+A, qcb+AC, qcf+BD, qcf+CD = (339 to 341 dmg)
1000 Max Mode and up/ All Positions/ Midscreen Only
- cr. B, cr. A, df+A, qcb+A, qcf+D, qcf+C (SC), qcf, hcb+A/C (Hold and Release) = (306 to 310 dmg)
- cr. B, cr. A, df+A, (BC), cr. D (1 hit), f+A, qcb+BD, qcf+BD, delay df+A, qcb+D, delay qcb+C, qcb+D = (320 dmg) - 14
- cr. B, cr. A, df+A, (BC), cr. D (1 hit), f+A, qcb+BD, df+A, qcf+BD, qcf+CD = (336 dmg)
- cr. B, cr. A, df+A, (BC), cr. D (1 hit), f+A, qcb+BD, df+A, qcf+BD, qcb+C, qcf+D, qcf+CD = (374 dmg) - 16
1000 Max Mode and up/ All Positions/ Corner
- cr. D (1 hit), f+A, qcb+B, qcb+C, qcf+C, qcf+C (SC), qcf, hcb+A/C (Hold and Release) = (352 to 360 dmg)
- cr. B, cr. A, df+A, (BC), cr. D (1 hit), f+A, qcf+AC, qcb+BD, df+A, qcb+D, qcf+C, qcb+B = (305 dmg)
- cr. B, cr. A, df+A, (BC), cr. D (1 hit), f+A, qcb+BD, df+A, dp+AC, qcb+C, qcf+C, qcb+B = (320 dmg) - 19
1250 Max Mode and up/ 2nd and 3rd Positions/ Anywhere
- cr. B, cr. A, df+A, (BC), cr. D (1 hit), f+A, qcb+BD, delay qcb+AC, qcb+BD, df+A, qcb+D, delay qcb+C, qcb+B = (313 dmg)
1250 Max Mode and up/ 2nd and 3rd Positions/ Midscreen Only
- cr. B, cr. A, df+A, (BC), cr. D (1 hit), f+A, qcb+BD, delay qcb+AC, qcb+BD, df+A, qcb+D, qcf+D, qcf+CD = (382 dmg) - 21
2 meters
1000 Max Mode and up/ All Positions/ Anywhere
- cr. B, cr. A, df+A, qcb+A, qcf+A/C, qcb+C, qcf+C (SC), qcf, hcb+AC (Hold and Release) = (406 dmg) - 22
- cr. D (1 hit), f+A, qcb+B, qcf+C, qcb+C, qcf+C (SC), qcf, hcb+AC (Hold and Release) = (446 to 448 dmg) - 23
- cr. B, cr. A, df+A, (BC), cr. D (1 hit), f+A, qcb+BD, df+A, qcb+D, qcf+C (SC), qcf, hcb+AC (Hold and Release) = (475 to 479 dmg)
1000 Max Mode and up/ All Positions/ Corner
- cr. B, cr. A, df+A, (BC), cr. D (1 hit), f+A, qcb+BD, df+A, dp+C (SC), hcb(x2)+AC, qcf+A, qcb+C, qcb+B = (443 dmg) - 25
1250 Max Mode and up/ 2nd and 3rd Positions/ Anywhere
- cr. B, cr. A, df+A, (BC), cr. D (1 hit), f+A, qcb+BD, df+A, qcb+D, delay qcb+C, qcf+C (SC), qcf, hcb+AC (Hold and Release) = (486 to 490 dmg) - 26
1250 Max Mode and up/ 2nd and 3rd Positions/ Corner
- cr. B, cr. A, df+A, (BC), cr. D (1 hit), f+A, qcb+BD, df+A, dp+AC, hcb(x2)+AC, qcb+C, qcf+C, qcb+B = (472 dmg)- 27
- cr. B, cr. A, df+A, (BC), cr. D (1 hit), f+A, qcb+BD, df+A, qcb+D, delay qcb+C, qcf+A, qcf+C (SC), qcf, hcb+AC = (502 dmg) - 28 **
1500 Max Mode/ 3rd Position/ Midscreen Only
- cr. B, cr. A, df+A, (BC), cr. D (1 hit), f+A, qcb+AC, qcf+BD, df+A, qcb+D, qcf+C (SC), qcf, hcb+AC (Hold and Release) = (511 dmg) - 29
1500 Max Mode/ 3rd Position/ Corner
- cr. B, cr. A, df+A, (BC), cr. D (1 hit), f+A, qcf+BD, df+A, dp+BD, qcf+B, qcf+C (SC), qcf, hcb+AC (Hold and Release) = (517 dmg) - 30
3 meters
- (place combo here) = (place damage amount here)
(place combo description here)
4 meters
- (place combo here) = (place damage amount here)
(place combo description here)
5 meters
1500 Max Mode/ 3rd Position/ Corner
- cr. B, cr. A, df+A, (BC), cr. D (1 hit), f+A, qcb+BD, df+A, dp+AC, hcb(x2)+AC, qcb+C, delay qcf+A, delay qcf+C (SC), qcf(X2)+AC = (707 dmg) - Link
Misc
Oswald’s Rekka Routes
Outside of Max Mode, Oswald has four moves that chain together in combination up to 3. Meaning that he can perform up to three moves, in one rekka route with some conditions:
A move can be used twice in a rekka route only as the starter and ender.
a. The starter will never knockdown. It can be used as a juggle after raw df+A.
b. Mid and Ender will always knockdown with their intended effects:
- qcb+K will hard knockdown.
- qcf+K will wall bounce. Its follow-up, qcf+CD can be used as an ender or as the fourth move after qcf+K ender.
- qcb+P and qcf+P will soft knockdown but can juggle as well. Their follow-ups, (qcb+P, qcb+P) or (qcf+P, qcf+P), are considered enders and can be used as fourth moves.
EX Rekka
Inside Max Mode, Oswald has access to EX versions of his rekka moves, which he can perform a combination up to 3 EX moves followed by a combination up 3 normal rekka moves in one route. These are the conditions applied to EX moves in an EX rekka route:
- An EX move can be used twice in an EX route only as the start and ender.
- Starter EX moves will always knockdown with the intended effects.
- EX rekka route will end immediately after performing a normal rekka move.
- EX rekka move follow-ups can be used as fourth moves in EX rekka routes.
- The first normal rekka, after ex rekkas, will knockdown.
Frame Data
Oswald KOFXIV Frama Data Link
Videos
Contributors
External Links
Help improve this wiki by adding suggestions and comments to this google doc:
https://docs.google.com/document/d/1DgNAKi7BnhMa1R5DgvMtrdCG7_EFzLHA6riyZ9Zaz2Y/edit
Twitter feed:
https://docs.google.com/spreadsheets/d/12zWIWuEvZ6gpWk6tShej9erCI26I-80Oawhkoh-5oGk/edit#gid=1230529347
Discussion Threads
Discuss at http://dreamcancel.com/forum/index.php/board,171.0.html
![]() +
+ ![]() +
+![]()
![]() ,
, ![]() +
+ ![]() /
/![]() HOLD OK (!)
HOLD OK (!)
![]()
![]() +
+ ![]() /
/ ![]() (!)
(!)

