Gameplay Overview
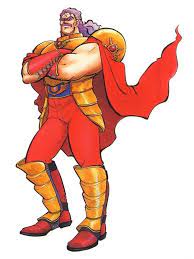
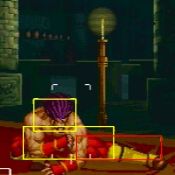
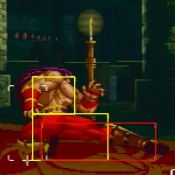
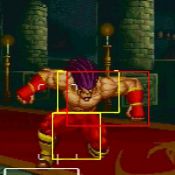
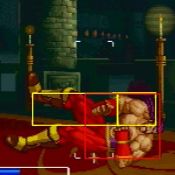
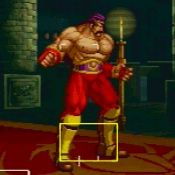
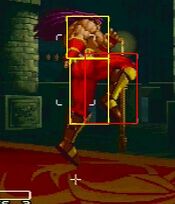
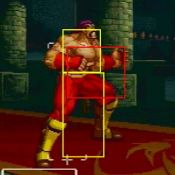
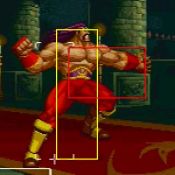
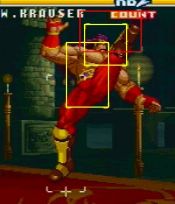
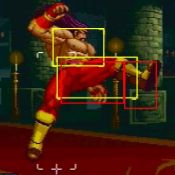
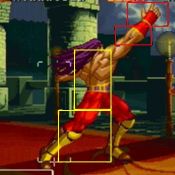
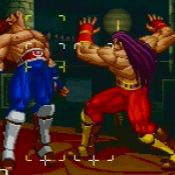
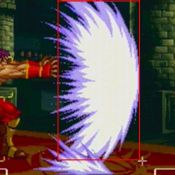
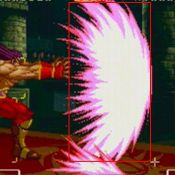
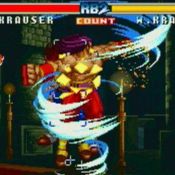
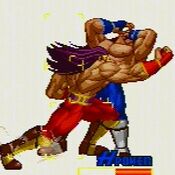
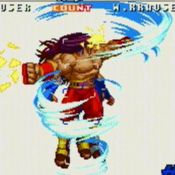
Wolfgang Krauser is a versatile character with several good ways of breaking his opponent's defence. Krauser can also control space effectively with fireballs and long ranged attacks, but suffers when under heavy pressure and in corners. His AB attack is among the best in the game.
| Pros |
Cons
|
- Has several overheads and special throws.
- Great damage output.
- Good at controlling space.
- Strong supers.
|
- Attacks have slow startup.
- No reliable reversals.
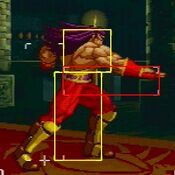
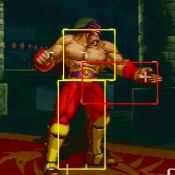
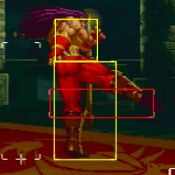
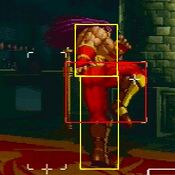
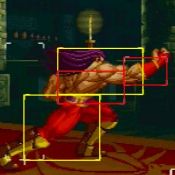
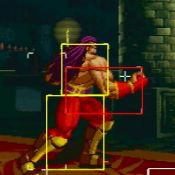
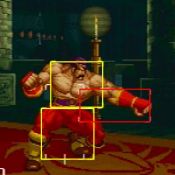
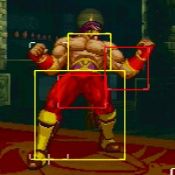
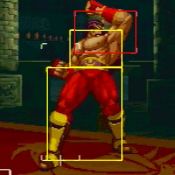
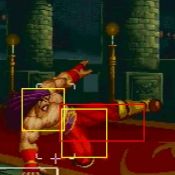
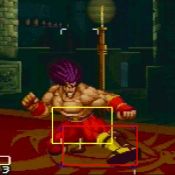
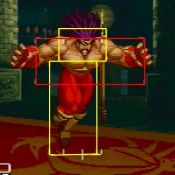
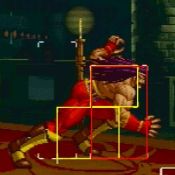
- Big hurtbox.
- His viable breakshots lack knockdown.
|
Normals
Standing
| 5A
|
| Damage
|
Stun
|
Startup
|
Active
|
Recovery
|
Hit Advantage
|
Block Advantage
|
Guard
|
Cancel
|
BS
|
Juggle
|
| 10
|
-
|
8
|
5
|
12
|
-1
|
-5
|
HL
|
Y
|
-
|
-
|
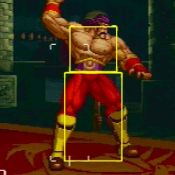
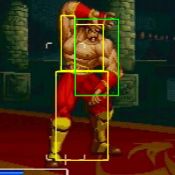
A medium ranged, slow punch attack. Can be followed up with C which is only cancellable on block. Standing B is usually a better choice since it has better reach.
|
|
n.5A
(within 72 px of opponent)
|
| Damage
|
Stun
|
Startup
|
Active
|
Recovery
|
Hit Advantage
|
Block Advantage
|
Guard
|
Cancel
|
BS
|
Juggle
|
| 10
|
-
|
6
|
2
|
10
|
4
|
0
|
HL
|
Y
|
-
|
-
|
Krauser's fastest normal along with crouching A. Only useful for following up with C into specials. Crouching A is a better choice always.
|
|
| 5B
|
| Damage
|
Stun
|
Startup
|
Active
|
Recovery
|
Hit Advantage
|
Block Advantage
|
Guard
|
Cancel
|
BS
|
Juggle
|
| 12
|
-
|
8
|
4
|
17
|
-5
|
-9
|
HL
|
Y
|
-
|
-
|
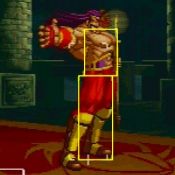
A decent poke. Has good range and can be followed by C for ok damage.
|
|
n.5B
(within 85 px of opponent)
|
| Damage
|
Stun
|
Startup
|
Active
|
Recovery
|
Hit Advantage
|
Block Advantage
|
Guard
|
Cancel
|
BS
|
Juggle
|
| 12
|
-
|
8
|
4
|
12
|
0
|
-4
|
HL
|
Y
|
-
|
-
|
A short knee attack. Can be followed by C. Use crouching A instead.
|
|
| 5C
|
| Damage
|
Stun
|
Startup
|
Active
|
Recovery
|
Hit Advantage
|
Block Advantage
|
Guard
|
Cancel
|
BS
|
Juggle
|
| 26
|
-
|
10
|
7
|
22
|
0
|
-6
|
HL
|
N
|
-
|
-
|
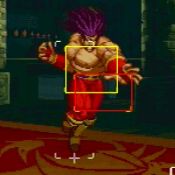
A very slow, yet very useful poke. Great range and a very big hitbox means this move will beat out a lot at long range. Any trade will usually be beneficial to Krauser because of his higher damage output.
|
|
n.5C
(within 72 px of opponent)
|
| Damage
|
Stun
|
Startup
|
Active
|
Recovery
|
Hit Advantage
|
Block Advantage
|
Guard
|
Cancel
|
BS
|
Juggle
|
| 14,14
|
-
|
12
|
3,4
|
22
|
0
|
-6
|
-
|
Y
|
-
|
-
|
Krauser's main move for doing punishing combos. All his most powerful combos start with this move. Horrible startup makes this hard to use except when it is guaranteed. If you intend to combo into this from the air, the air move must hit very deep.
|
|
Crouching
| 2A
|
| Damage
|
Stun
|
Startup
|
Active
|
Recovery
|
Hit Advantage
|
Block Advantage
|
Guard
|
Cancel
|
BS
|
Juggle
|
| 10
|
-
|
6
|
2
|
10
|
4
|
0
|
HL
|
Y
|
-
|
-
|
Krauser's most important close-range move. Can chain into itself several times, and chains into standing C. This is Krauser's fastest normal and will be one of his most used moves.
|
|
| 2B
|
| Damage
|
Stun
|
Startup
|
Active
|
Recovery
|
Hit Advantage
|
Block Advantage
|
Guard
|
Cancel
|
BS
|
Juggle
|
| 12
|
-
|
8
|
4
|
12
|
0
|
-4
|
L
|
Y
|
-
|
-
|
On the slower side for being a low B, this move is still useful for offence. Can chain into crouching C which hits low, or cancel into Leg Tomahawk which is an overhead. The latter is not a combo, but can be a useful mixup from time to time.
|
|
| 2C
|
| Damage
|
Stun
|
Startup
|
Active
|
Recovery
|
Hit Advantage
|
Block Advantage
|
Guard
|
Cancel
|
BS
|
Juggle
|
| 26
|
-
|
10
|
3
|
20
|
KD
|
-3
|
L
|
Y
|
-
|
-
|
Has one of the best ranges in the game for a sweep. Startup is ok, recovery is very slow, so be careful. Use feint cancel on block for a very effective low poking tool.
|
|
Command
6A
|
| Damage
|
Stun
|
Startup
|
Active
|
Recovery
|
Hit Advantage
|
Block Advantage
|
Guard
|
Cancel
|
BS
|
Juggle
|
| 16
|
-
|
17
|
3,5
|
22
|
-3
|
-9
|
H
|
N
|
-
|
-
|
A short-ranged overhead that deals medium damage. Occasionally useful when the opponent becomes afraid of hitting buttons, and has a cancel window before the attack comes out for kara throws. If you meaty the opponent with the second hitbox, this becomes unblockable.
|
|
Elbow Drop
2C while opponent is knocked down
Pursuit
|
| Damage
|
Stun
|
Startup
|
Active
|
Recovery
|
Hit Advantage
|
Block Advantage
|
Guard
|
Cancel
|
BS
|
Juggle
|
| 16
|
-
|
27
|
3
|
39
|
-
|
-
|
N
|
-
|
-
|
-
|
Krauser's pursuit move. Because of the extremely slow startup and recovery on this move, there are only a few viable setups for this move, and they all require very precise timing. Learn the timing or get punished. Guaranteed after special throws if spaced and timed correctly. Can also be used after hitting an airborne opponent with a Kaiser Wave or a high Blitzball, but the latter is unsafe.
|
|
Hook Uppercut
5AB
High Avoid Attack
|
| Damage
|
Stun
|
Startup
|
Active
|
Recovery
|
Hit Advantage
|
Block Advantage
|
Guard
|
Cancel
|
BS
|
Juggle
|
| 14
|
-
|
10
|
3,5
|
15
|
3
|
-3
|
HL
|
Y
|
-
|
-
|
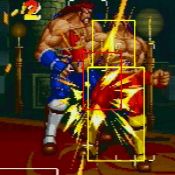
Krauser's AB move is one of the better ones in the game. Both range and hitbox are very good, the move is safe on block and has great upper body invincibility. Krauser's main defensive option at close range.
|
|
Body Splash
j.2C
Crossup
|
| Damage
|
Stun
|
Startup
|
Active
|
Recovery
|
Hit Advantage
|
Block Advantage
|
Guard
|
Cancel
|
BS
|
Juggle
|
| 19
|
-
|
16
|
till landing
|
12
|
+11
|
+4
|
H
|
N
|
-
|
-
|
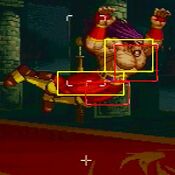
Can only be done from a high jump and has huge startup. Damage is also lower than the C, but this move can crossup without switching directions with D. Not very useful because of its slow speed.
|
|
Jumping
| j.A
|
| Version
|
Damage
|
Stun
|
Startup
|
Active
|
Recovery
|
Hit Advantage
|
Block Advantage
|
Guard
|
Cancel
|
BS
|
Juggle
|
| Neutral Hop
|
10
|
-
|
7
|
till landing
|
6
|
+8
|
+4
|
H
|
N
|
-
|
-
|
| Diagonal Hop
|
10
|
-
|
8
|
till landing
|
6
|
+8
|
+4
|
H
|
-
|
-
|
-
|
| Neutral Jump
|
10
|
-
|
7
|
9
|
6
|
+8
|
+4
|
H
|
-
|
-
|
-
|
| Diagonal Jump
|
10
|
-
|
7
|
11
|
6
|
+8
|
+4
|
H
|
-
|
-
|
-
|
Krauser's best air-to-air move. Horizontal hitbox and decent speed.
|
|
| j.B
|
| Version
|
Damage
|
Stun
|
Startup
|
Active
|
Recovery
|
Hit Advantage
|
Block Advantage
|
Guard
|
Cancel
|
BS
|
Juggle
|
| Neutral Hop
|
12
|
-
|
8
|
till landing
|
6
|
+8
|
+4
|
H
|
-
|
-
|
-
|
| Diagonal Hop
|
12
|
-
|
8
|
till landing
|
6
|
+8
|
+4
|
H
|
-
|
-
|
-
|
| Neutral Jump
|
12
|
-
|
8
|
7
|
6
|
+8
|
+4
|
H
|
-
|
-
|
-
|
| Diagonal Jump
|
12
|
-
|
8
|
9
|
6
|
+8
|
+4
|
H
|
-
|
-
|
-
|
A decent air move with good range, but a hitbox that will often miss against a jumping opponent.
|
|
| j.C
Diagonal Jump/Hop Neutral Jump/Hop
|
| Version
|
Damage
|
Stun
|
Startup
|
Active
|
Recovery
|
Hit Advantage
|
Block Advantage
|
Guard
|
Cancel
|
BS
|
Juggle
|
| Neutral Hop
|
22
|
-
|
10
|
4,5
|
8
|
+15
|
+9
|
H
|
-
|
-
|
-
|
| Diagonal Hop
|
22
|
-
|
10
|
4,5
|
8
|
+15
|
+9
|
H
|
-
|
-
|
-
|
| Neutral Jump
|
22
|
-
|
10
|
7
|
8
|
+15
|
+9
|
H
|
-
|
-
|
-
|
| Diagonal Jump
|
22
|
-
|
10
|
9
|
8
|
+15
|
+9
|
H
|
-
|
-
|
-
|
Very slow and short range. The timing to hit with this move is a bit trickier than most air moves. Has the ability to cross up, but this is extremely hard to do on purpose and usually happens rarely and usually unintentionally.
|
|
Oversway Actions
5D
(opponent in oversway)
|
| Damage
|
Stun
|
Startup
|
Active
|
Recovery
|
Hit Advantage
|
Block Advantage
|
Guard
|
Cancel
|
BS
|
Juggle
|
| 18
|
-
|
5
|
2,2
|
15
|
+5
|
+2
|
H
|
Y
|
-
|
-
|
|
2D
(opponent in oversway)
|
| Damage
|
Stun
|
Startup
|
Active
|
Recovery
|
Hit Advantage
|
Block Advantage
|
Guard
|
Cancel
|
BS
|
Juggle
|
| 18
|
-
|
11
|
2
|
19
|
KD
|
0
|
L
|
Y
|
-
|
-
|
|
A
(from oversway)
|
| Damage
|
Stun
|
Startup
|
Active
|
Recovery
|
Hit Advantage
|
Block Advantage
|
Guard
|
Cancel
|
BS
|
Juggle
|
| 12
|
-
|
22
|
6
|
12
|
+1
|
-1
|
H
|
-
|
-
|
-
|
|
B
(from oversway)
|
| Damage
|
Stun
|
Startup
|
Active
|
Recovery
|
Hit Advantage
|
Block Advantage
|
Guard
|
Cancel
|
BS
|
Juggle
|
| 12
|
-
|
22
|
6
|
12
|
+1
|
-1
|
L
|
-
|
-
|
-
|
|
C
(from oversway)
|
| Damage
|
Stun
|
Startup
|
Active
|
Recovery
|
Hit Advantage
|
Block Advantage
|
Guard
|
Cancel
|
BS
|
Juggle
|
| 22
|
-
|
28
|
4
|
14
|
9
|
-3
|
HL
|
-
|
-
|
-
|
|
Throw
Knee Smash
4/6C
|
| Damage
|
Stun
|
Startup
|
Active
|
Recovery
|
Hit Advantage
|
Block Advantage
|
Guard
|
Cancel
|
BS
|
Juggle
|
| 26
|
-
|
-
|
-
|
-
|
-
|
-
|
-
|
-
|
-
|
-
|
Krauser's regular throw. The opponent lands at optimal poke range in front of Krauser. Usually you'd use his special throws instead.
|
|
Feints
Feint Blitz Ball
2AC
|
| Damage
|
Stun
|
Startup
|
Active
|
Recovery
|
Hit Advantage
|
Block Advantage
|
Guard
|
Cancel
|
BS
|
Juggle
|
| -
|
-
|
-
|
-
|
-
|
-
|
-
|
-
|
-
|
-
|
-
|
Krauser performs the startup of his C version Blitzball. This is his best fake for cancelling the recovery of his normals. Fast, and works well in his zoning game as well.
|
|
Feint Kaiser Wave
2BC
|
| Damage
|
Stun
|
Startup
|
Active
|
Recovery
|
Hit Advantage
|
Block Advantage
|
Guard
|
Cancel
|
BS
|
Juggle
|
| -
|
-
|
-
|
-
|
-
|
-
|
-
|
-
|
-
|
-
|
-
|
Krauser performs the startup of his Kaiser Wave. Good as an actual feint but for pressure you would use Feint Blitz Ball instead.
|
|
Special Moves
Blitz Ball
214A/C
High Low
|
| Version
|
Damage
|
Stun
|
Startup
|
Active
|
Recovery
|
Hit Advantage
|
Block Advantage
|
Guard
|
Cancel
|
BS
|
Juggle
|
| A
|
16
|
-
|
19
|
-
|
total 55
|
+4
|
+2
|
HL
|
-
|
Y
|
N
|
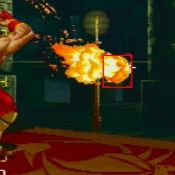
Krauser fires a burning shard of rock from his hands. Startup, projectile speed, and recovery are all medium. The projectile travels higher than other projectiles in the game, meaning that it cannot be low jumped, but can be ducked under by characters that aren't too tall. A decent projectile that is useful for zoning. Causes soft knockdown on airborne opponents.
|
| C
|
16
|
-
|
19
|
-
|
total 55
|
+4
|
+2
|
L, HL
|
-
|
Y
|
-
|
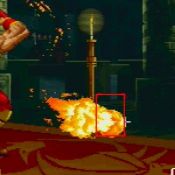
Identical to the A version with two exceptions: 1. Krauser grunts instead of shouting "Blitzball!". 2. The first active frame hits low, making it occasionally useful as a mixup in combo strings up close.
|
|
Leg Tomahawk
236B
|
| Damage
|
Stun
|
Startup
|
Active
|
Recovery
|
Hit Advantage
|
Block Advantage
|
Guard
|
Cancel
|
BS
|
Juggle
|
| 24
|
-
|
19
|
5,6
|
21
|
1
|
-5
|
H
|
-
|
Y
|
-
|
Krauser's most important special move. Leg Tomahawk is an excellent move that travels a good distance of the screen, hopping over ground projectiles and low moves, and hits as an overhead. The move is safe on block if spaced correctly, hits as an overhead, and is hard to counter with breakshots because it only hits once. Punishable on block if used at close range. Can also be reliably stuffed by certain moves if used against a knowledgeable opponent.
|
|
To The Moon Blow
63214B
|
| Damage
|
Stun
|
Startup
|
Active
|
Recovery
|
Hit Advantage
|
Block Advantage
|
Guard
|
Cancel
|
BS
|
Juggle
|
| 35
|
-
|
0
|
-
|
48
|
KD
|
-
|
-
|
-
|
-
|
-
|
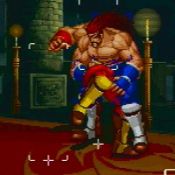
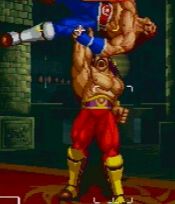
A fairly damaging special throw that switches sides with the opponent and allows for a guaranteed pursuit attack followup. The easiest command throw to be used from a dash-in, and the knockdown is good, but its damage output is less than what Scum Gale allows.
|
|
Kaiser Claw
623C
|
| Damage
|
Stun
|
Startup
|
Active
|
Recovery
|
Hit Advantage
|
Block Advantage
|
Guard
|
Cancel
|
BS
|
Juggle
|
| -
|
-
|
14
|
7
|
21
|
KD
|
-
|
-
|
-
|
-
|
Y
|
Kaiser Claw is a useful anti-air tool with great range, but is too slow to be used on reaction and is bad on hit trades. Good when incorporated into Krauser's zoning game. A pursuit attack is guaranteed after this wither near corners or with a quick dash-in. The timing on the latter is very tight however.
|
|
Phoenix Thrust
41236C
|
| Damage
|
Stun
|
Startup
|
Active
|
Recovery
|
Hit Advantage
|
Block Advantage
|
Guard
|
Cancel
|
BS
|
Juggle
|
| 35
|
-
|
3
|
17
|
21
|
KD
|
-
|
-
|
-
|
-
|
-
|
A counter move that can stop all high moves, specials, and supers. Does not work against anything that hits low, and not against projectiles. Unfortunately for Krauser, there's a small startup before the active frames where he can be hit. This means that the move won't work as a reversal and is only useful as a prediction counter.
|
|
Scum Gale
41236A
|
| Damage
|
Stun
|
Startup
|
Active
|
Recovery
|
Hit Advantage
|
Block Advantage
|
Guard
|
Cancel
|
BS
|
Juggle
|
| 0
|
-
|
0
|
-
|
-
|
+14
|
-
|
-
|
-
|
-
|
-
|
A throw attack that switches sides with the opponent without dealing any damage on its own. The move has a followup string that does good damage, and can also be followed by a normal combo. This opens up your most damaging throw opportunities, if combo'd into Unlimited Desire.
|
|
Storm Uppercut
66C during Scum Gale
|
| Damage
|
Stun
|
Startup
|
Active
|
Recovery
|
Hit Advantage
|
Block Advantage
|
Guard
|
Cancel
|
BS
|
Juggle
|
| 8,8,8(19)
|
-
|
14
|
2,2,30
|
13
|
KD
|
-21
|
HL
|
-
|
-
|
-
|
Krauser punches the opponent into the air. Can be followed with Kaiser Claw for good damage and a potential pursuit attack setup.
|
|
S-Power
Kaiser Wave
[4]6BC
|
| Damage
|
Stun
|
Startup
|
Active
|
Recovery
|
Hit Advantage
|
Block Advantage
|
Guard
|
Cancel
|
BS
|
Juggle
|
| 76/86/96
|
-
|
32
|
-
|
73 total
|
+14
|
-1
|
HL
|
-
|
Y
|
-
|
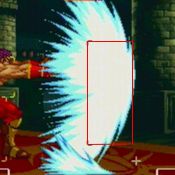
Krauser charges up and fires a huge projectile covering almost the entire height of the screen. The speed and recovery of this move is very good considering its size and power. Red health allowing free use of this lets Krauser be more threatening on zoning. The move can also be charged by holding down the BC button, leading to three levels of charge:
- The uncharged wave is cyan in colour and can be jumped over.
- The wave turns blue and can no longer be jumped.
- The final version is red, cannot be jumped, and hits both planes.
Fancy as this may sound, there's never really any reason to charge the wave since the opponent can just wait for it to be fired and block. One other interesting feature of this move is that it can be used as a Breakshot. The startup of the move is too slow for this to be useful against most normal combos, but can work well as a surprise move after blocking a projectile.
|
|
P-Power
Gigatech Cyclone
360C
|
| Damage
|
Stun
|
Startup
|
Active
|
Recovery
|
Hit Advantage
|
Block Advantage
|
Guard
|
Cancel
|
BS
|
Juggle
|
| 96
|
-
|
0
|
-
|
-
|
-
|
-
|
-
|
-
|
-
|
-
|
A very damaging, instant-startup throw with good range. Can be hard to land because most players will try to pressure Krauser rather than playing defensively against him. However, if you have enough time left on your P-Power meter, you will get more damage from using Scum Gale and comboing into Unlimited Desire. So this move is mostly useful for its slightly increased range and easier inputs compared to the Scum Gale combo.
|
|
Unlimited Desire
632146A
Deadly Rave
|
| Damage
|
Stun
|
Startup
|
Active
|
Recovery
|
Hit Advantage
|
Block Advantage
|
Guard
|
Cancel
|
BS
|
Juggle
|
| 8,(10*7/65)
|
-
|
1+8
|
20
|
-
|
0/KD
|
-6
|
HL
|
-
|
-
|
-
|
After the initial hit, the player must input a predetermined chain of attack buttons. If the buttons are pressed at the wrong time the combo will stop. This can be done on purpose at some points to start a new normal combo for additional damage, making this one of the most damaging combinations in the game. Krauser can take away around 90% of his opponent's life using this move. Scum Gale allowing combos into this makes P-Power Krauser an extremely scary character.
The 2 normal combinations:
A>B>C>B>C>A>B>C>C = Krauser finishes with a grounded version of his Leg Tomahawk followed by his 5C animation.
A>B>C>B>C>A>B>C 421AC = Krauser finishes with a Gigatech Cyclone, knocking the opponent down. This is the more damaging combination of the two.
God 2.0's preferred version:
A>B>C>B>C>A>B n5C>3C xx Kaiser Claw, Elbow Drop = Drop the combo before the Tomahawk and start a new close C combo for additional damage. The pursuit is easy near corners and very tight outside of corners.
|
|
Chain Attacks
Combos
Meterless
cr.A (1-3x),C xx Leg Tomahawk or Low Blitzball or Deadly Rave
A safe combo that can alternate the ending between a low move, an overhead, or a hit confirmed P.Power.
Combo 2
Cr.B,cr.C
or
Cr.B xx Leg Tomahawk
The first variant is a true combo that hits low twice and knocks down. The second variant is not a true combo, but is a useful mixup because it forces the opponent to switch guard after the first hit.
Combo 3
Far A,C
A short two-hit combo that deals decent damage and has pretty good range. Useful for poking purposes. The last hit can be cancelled into supers or specials on block only.
Combo 4
B,C
Similar to Combo 3, but has better range and can be done from both versions of standing B. The second hit cannot be cancelled.
Punishing Combos
Combo 5
Close C,C (2 hits)QCF+C
A very damaging combo that will push the opponent back quite a bit both on hit and on block. This makes it safe on block, but highly susceptible to breakshots.
Combo 6
Close C,C (2 hits)df+C xx Kaiser Claw, Leg Tomahawk, Blitzball
The most damaging normal punishing combo that does not utilize Deadly Rave. The Kaiser Claw ender does the most damage, Leg Tomahawk resets the opponent allowing for continued mixup, and the Blitzball causes a very stylish soft knockdown but does lower damage.
Metered
Strategy
Krauser's gameplay can be split into 2 very different playing styles, and a good player would be wise to master both. The style you want to use can be depending on character matchup, player matchup, or the current situation in-game. All in all, these styles are best combined and should be changed between as the game flow changes.
Mixup Style
This style utilizes Krauser's mixup options and special throws for a highly effective pressure game. Krauser's overhead options are powerful, his special throws damaging, and his basic combos, though inflexible, deal good damage.
Common ways to start your offence is to do a short jump C attack or a well spaced Leg Tomahawk from long range. These will both force the opponent into blocking high and will allow Krauser to get in his opponents face, keeping the initiative. At close range, Krauser's best options are to use Combo 1 and Combo 2 since they are his fastest and safest attacks. Use the AB attack if your opponent is fond of pressing buttons in order to disrupt Krauser's slower attacks.
If your opponent starts to block a lot and generally is afraid, try doing a quick dash-in To the Moon Blow, Scum Gale, or Gigantic Cyclone.
Zoning Style
This style focuses on controlling space and punishing mistakes. Krauser has many good tools for this purpose, but lacks anti air moves with invincibility frames, so any anti air you use is going to be based on prediction rather than reactions. The main tools you will be using for this style will be standing C, Combo 3, Combo 4, Blitzball, Kaiser Claw, Phoenix Counter, Kaiser Wave, and crouching C cancelled into Fake Blitzball.
Fake Blitzball and Fake Kaiser Wave can be good for occasionally tricking your opponent into jumping in.
