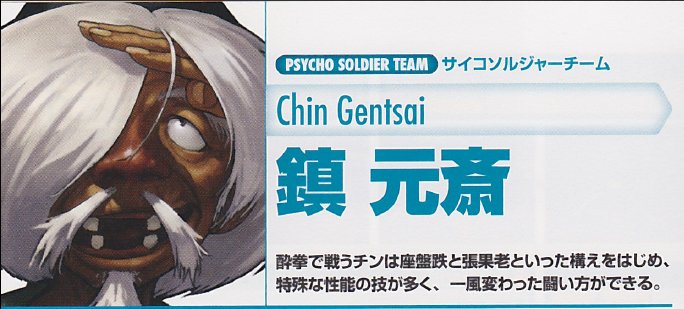
The King of Fighters XIII/Chin Gentsai
Gameplay Overview
Gameplay Notes
First of all, why Chin? He's the only small character in XIII yet he doesn't have the typical advantages of being small which is annoying (In XII, he was small enough to duck certain moves without doing anything, such as Robert's forward A which now hits a standing Chin in XIII). The purpose, is to annoy the hell out of people with the limited, but well thought-out moveset he has. Although he mainly has one combo with many variations to it, he has many combo starters as mentioned in the combo section (Overhead, d.B combos, hcf+K, df.B as an anti air, counter and so forth). Master him and people will stop underestimating "just the gimmicky old guy".
Pros
-Great against mid-projectilers (or similar) like Andy, Ash, Ryo, Robert, Takuma, Mature, Elisabeth, King, Mai, Yuri, K', Athena, Kensou and Leona.
-Amazing Ex counter
-Strong HD combos
-Good option selects / mind games
-Overhead that leads to damaging combos
Cons
-Significantly weaker without drive cancels and stocks
-Hard to get in
-Even if you do, normals have short reach
-Floaty jump (which makes crossups easy to read / react to as well)
-Specials are mostly unsafe
-Neo Max not that effective at all
-Overhead cannot activate HD
-Overhead can be punished if blocked
-Lacks anti-air if you don't want to risk his counters
Normals
Standing
st. A: Standing forward poke, average range, fast, chains into s.A/d.B and is cancelable.
- Chain/Cancelable
- Hit Detection: High
- Damage: 25
st. B: Standing low kick to the shin, must be blocked low, is cancelable but does not link to any normal. Great for his high low game since it needs to be blocked low --> df + B.
- Cancelable
- Hit Detection: Low
- Damage: 30
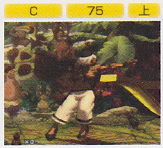
far C: New horizontal with a slight upwards swing with both arms (very drunken fist like), has deceivingly good range (in Chin terms) and it cancels as well (great to cancel into df + D, but not a true combo). If anticipated early enough, use this for anti-hops into df + B.
- Cancelable
- Hit Detection: High
- Damage: 80
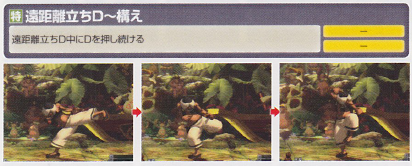
far D: Longest range move for Chin, solid kick to the gut, button can be held to go into his kick stance. Also used for HD activations explained later.
- Hit Detection: High
- Damage: 80
s.A/B: Same as their far versions.
cl. C: His combo starter of choice, double palm to the chest--comes out fast, cancelable, good priority, feels meaty.
- Cancelable
- Hit Detection: High
- Damage: 70
cl. D: Leans back drunkenly while kicking forward (very drunken fist like). Comes out slower, still cancels.
- Cancelable
- Hit Detection: High
- Damage: 80
Crouching
cr. A: Quick low hit, can still be blocked high, pretty standard, used in his BnB combos. Chains into d A, d B, st A, fast and is cancelable.
- Chain/Cancel-able
- Hit Detection: High
- Damage: 25
cr. B: Front sweep, slightly slower than his d A, about the same range, is cancelable and chains into d B, d A, s A. Since it can be canceled, play around with his d.B into df.D overhead.
- Chain/Cancelable
- Hit Detection: Low
- Damage: 30
cr. C: Slight diagonal upward elbow, not that good for anti air, and the new far C does a better job for that role. Nevertheless, it's cancelable so it's somewhat useful.
- Cancelable
- Hit Detection: High
- Damage: 70
cr. D: Real low sweep as Chin basically lies on his back and does a double thrust with his feet. Good range, good recovery but is not cancelable.
- Hit Detection: Low
- Damage: 80
Jumping
j. A: Horizontal punch with a slight upward angle, fast and is a great choice for air-to-air. Use this instead of j. CD if they are already above you or started jumping before you.
- Hit Detection: Mid
- Damage: 45(40)
j. B: Standard martial arts fly kick, comes out slower but stays out longer than any of his jump attacks. Decent range.
- Hit Detection: Mid
- Damage: 45(40)
j. C: Chin lies horizontally in the air, good solid j. C, great priority and crosses up well.
- Hit Detection: Mid
- Damage: 72(70)
j. D: Jumps and kicks backwards while facing backwards himself drinking at the same time, it's actually a really funny animation. Good horizontal reach, decent air to air, good priority, good move for a vertical jump too. More difficult to use as a crossup but still good.
- Hit Detection: Mid
- Damage: 70(68)
Blowback Attack
st. CD: Leans forward and hits with one arm, good speed, cancelable, good range for Chin. It should be noted that due to the strange crossup mix up of XIII, avoid using his GCCD on jump ins as much since it tends to miss a lot. Use his counter qcb + B/BD instead.
- Cancel-able
- Hit Detection: High
- Damage: 75
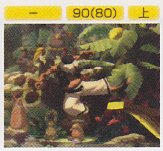
j.CD: Real quick horizontal swing of the foot, good horizontal range, extremely good j.CD overall (I would put it in the top 5 due to it's speed an amazing priority). One of his key tools in zoning.
- Cancelable
- Hit Detection: High
- Damage: 90(80)
Throw
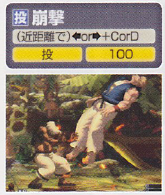
Bangeki = b/f+C/D
- Chin grabs the opponent and does a double palm to the chest.
- Hit Detection: Close
- Damage: 100
Command Moves
Uronkochu = df+D
- Overhead flipkick. Comboable by itself, to slow to combo into unless maybe off a counter (in XII it was possible off a counter) to count as a combo. If you press and hold the D it cancels, OR if you tap D again it cancels. You can be throw during this animation strangely, but it's all worth it because this is one of his key combo starters. Automatically puts you into his kick stance if you don't do anything, but most of the time press punch and it'll do his quickie punches, d, dx + punch, punch , right after (can do 2-3 sets and canceled out of).
- Hit Detection: Mid
- Damage: 45
Kamae = far.D (hold)
- Goes into kick stance.
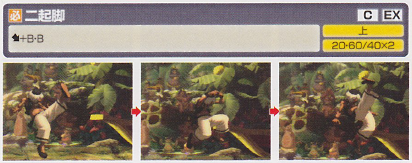
Nikiyaku = df + B. B
(EX) = df.BD
- Kyo-like kick diagonally upwards, you can press B again during the first kick to kick again. Landing automatically puts you into the kick stance, you can cancel the landing frames into anything. Must anticipate early on if you want to use df B as an anti-air, but do not use if they they are nearly above you. Cancel the landing frames into another df B or qcb + A.
- Cancelable
- Hit Detection: High
- Damage: 20+60/40x2
Special Moves
Chokaroh = d,d+K
- Chin hops into one foot. Pressing f and b makes him hop rapidly in that direction. You can hop or jump out of it (the jump is new to XIII) but you can not block. Can be free canceled into any special. Has multiple follow ups.
∟ Standing A (Press A during Chokaroh)
- Chain/Cancelable
- Hit Detection: High
- Damage: 25
∟ Nikiyaku (Press B during Chokaroh)
(EX) = df.BD
- Cancelable
- Hit Detection: High
- Damage: 20+60/40x2
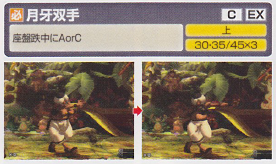
∟ Getsugasosho aka Quickie Punch (Press C during Chokaroh)
- The follow up is two a quick hits with both hands. It can be free canceled into any special. EX version does 3 hits and draws the opponent near him and you can follow that up with a s.C (Perfect for HD activation)
(EX) = AC (after doing d x2+P)
- Cancelable
- Hit Detection: High
- Damage: 30+35/45x3
∟ Far D (Press D during Chokaroh)
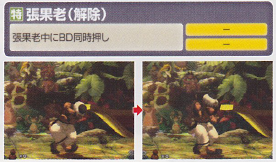
∟ Chou Karou (Kaijou) = BD
- Cancels his stance (Press BD during Chokaroh)
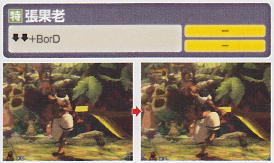
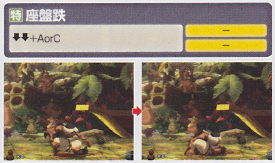
Zanbantetsu = d,d+P
- Chin crosses his feet and squats down real low. Apparently, he has total upper body invincibility, even d As and jump attacks miss him. New to XIII, he can now throw an opponent by pushing forward C, but this does have a whiff animation. In trade, he has lost his ability to cancel the stance into a d B. You can free cancel his stance into any special.
∟ Getsugasosho (Press A/C during Zanbantetsu)
(EX) = AC (after doing d x2+P)
- Cancelable
- Hit Detection: High
- Damage: 30+35/45x3
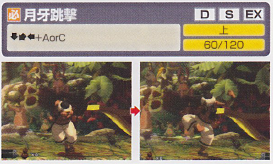
Suiho = qcb+P
- A quick hit to the face with the back of his fist. A version is quick, C version might be a little slower and used only for specific juggles. Deceivingly good range and recovery but not safe especially if done close. You can drive/super/Ex cancel out of it.
(EX) = qcb+AC
- Drive/Super Cancel-able
- Hit Detection: High
- Damage: 60/120
Ryu Sogeki = qcb+K
- Chin walks backwards 2-3 steps (last for about 2 second) in a seemingly drunken state with his head down awaiting for an attack; this move is a counter. For the B counter, he'll do one cancelable s.D (note, if you don't cancel the s.D the opponent will have frame advantage) . The B counter counters all specials, and air attacks and even counters projectiles, it'll trigger the kick however neither party takes damage and the projectile passes thru. The D counter counters normals, it will do the same only he'll flip backwards immediately so a df + B might work, or a well timed hcf + K. EX Counter counters everything, he'll do a series of four hits that end in a qcb + A or C that can be free-cancelled into hcf + B or D. Follow ups for the D version counter AFAIK, is only df.B; the B version I believe you can do whatever you want (hcf B into df.B is recommended). The EX counter does 26% alone (not factoring canceling out of it and extra damage from drinking).
(EX) = qcb+BD
- Cancelable
- Hit Detection: Hit (High), Hit (High), Hit (Guard)
- Damage: 80/40/40+70x2+80
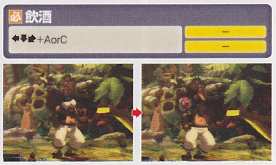
Drink = rdp+P
- Drink. Chin takes a swig from his gourd and he gets darker in color as his drink counter increases; the max you can drink is 5 drinks. Every drink Chin increases his offense damage by 10% however he also take more damage per drink. The damage increase opponents can do TO him is as follows: 105%->111%->117%->125%->to a final 133% more damage to Chin (vs Chin doing 150% to his opponents)
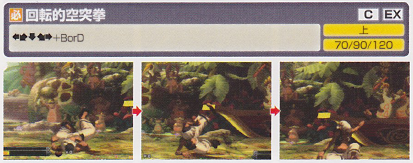
Kaitenteki Kutotsuken = hcf+K
- Chin rolls across the ground and ends in a backfast to the chest area. B doesn't go as far although D seems to startup quicker. This move radicalized Chin's gameplay from XII (which one strong already) since it allows you to free cancel into any special (no stances/supers). Of course you can chose to deplete a cancel and super cancel into one of his DMs if you like. Mid fireballers have to watch or even stop throwing them completely lest they want to eat a 40%+ combo. EX version is much faster and is invincible. Most common specials to free cancel into are qcb + A or df B. If you distance yourself correctly, even if they block hcf + D, qcb + A, most of the time, you can qcb + A (again) them in time while they try to punish you.
- Cancelable
- Hit Detection: High
- Damage: 70/90/120
Desperation Moves
Tohkuhitenhoh = qcfx2+P
- Chin flies forward with a spinning headbut a la Jackie Chan. Normally does 8 hits if they all connect and the EX version does 16 hits. The EX versions combos off a d B, d A, and off a df + B but the normal version can only be comboed off a df + BD or super canceled off a hcf + B or C.
(EX) = qcfx2+AC -
- Max Cancel-able
- Hit Detection: High
- Damage: 30x8/20x16
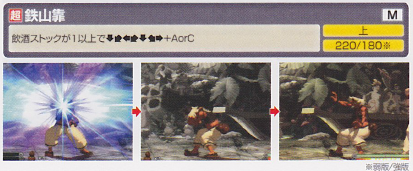
Tetsuzankou = (Drunk) qcb hcf+P
- Chin turns around and slams his back into the opponent a la Xiang Fei. A version is quicker and combos off df + Bs. C version is slower but has wire damage and can be followed up into the A version or into qcb + A juggle combos. C version also combos off his Getsugasosho.
- Max Cancel-able
- Hit Detection: High
- Damage: 220/180
Neomax
Suisou Gouran Enbu = qcfx2+BD (also in air)
- Chin breathes fire out like 2k2UM. The player can control the direction of the flames. This move can be performed in the air.
- Hit Detection: High
- Damage: 14x27(14x24)
Combos
Chin has mainly one combo that has many different variations to it. They all revolve around his df.B and hcf+K. The key is to learn all of his combo starters and you'll see the pattern soon enough:
Starters
a) j.B / j.C / j.D / crossup C, s.C,
b) d.C / far C,
c) d.B, d.A / s.A,
d) (s.A), d.B, Quickie Punches (dwn x2+P.P),
e) df.D, into Quickie Punches x1~3,
f) df.D, Quickie Punches, Ex Quickie Punch, s.C,
g) hcf+K (for mid projectiles),
h) Ex hcf+K for ground projectiles and low hits (Ex hcf+K has invincibility), (not cancelled) hcf+B,
i) D Counter,
j) B counter, hcf B
k) df.B as an anti air
Middle
a~j) df.B, qcb+A, [DC] hcf+K, {df.BD, hcf B,} df.B x n
k) qcb+A, [DC] hcf+K, df.BD, hcf B, df.B x n
-After the first df.B, just goto neutral and press B)
-{df.BD, hcf+B,} can be repeated as many times as you have stocks
Corner/Finisher
-s.A
- Great reset option, usually best ender unless you're going for the kill
-qcb+A/df.B.B
- Both do the same damage
-qcb~hcf+A (must drink first)
- Only worthwhile way to spend one stock for a DM
-Ex qcf x2+P DM
- Good damage if you're not doing a long combo otherwise it suffers from damage scaling
Note: Doing most of the combos mentioned, will replenish approximately 80% of his stock guage!
If you're near the corner you can do a special variation:
-s.C, df.B, qcb A, [DC], hcf B, (earliest cancel as possible) df.BD, hcf+B, df.B, hcf, df.BD, hcf B, df.B x n, s.A /qcb A / df.B.B / (Ex) DM
Drink DM combos
-(drink) df.D, Quickie Punches, qcb~hcf+C (wires), qcb~hcf+A (has to be the opposite direction)
-(drink) df+D, Quickie Punches, qcb~hcf+C (wires), qcb+A, [DC] hcf+B, Ex df+BD, hcf+B, df+B, qcb~hcf+A 64% damage (3 stocks, 1 drive, 1 drink)
Double Ex starter
Thanks to the good ole Japanese BBS (http://jbbs.livedoor.jp/bbs/read.cgi/game/50324/1270390677/l50) a new set of Chin "starters" that setups Chin for some good juggles.
Starter a) s.C, HD, s.C, hcf BD, qcb AC, (hcf B, qcb C, [HDC] hcf D, df.B) x4, hcf B ~
1 - df.B ×2, qcb A [815]
2 - df.B, qcf x2 A [904]
3 - df.B ×3, qcf x2+AC [967]
4 - df.BD, hcf B, df.B ×4, qcf x2+AC [1001]
Starter b) df.D, d x2+P.P, hcf BD, qcb AC, (hcf B, qcb C, [DC] hcf D, df.B) ×2, hcf B ~
1 - [626]
2 - [717]
3 - [807]
4 - [818]
Starter c) qcb BD, hcf BD, qcb AC, (hcf B, qcb C, [DC] hcf D, df.B) ×2, hcf B ~
1, [723]
2, [812]
3, [875]
Here's a quick video of hcf BD, qcb AC, (hcf B, qcb C, [DC] hcf D, df.B) ×2, hcf B, df.BD, hcf B, df.B ×4, qcf x2+AC: http://www.youtube.com/watch?v=E-lg5g9bUhQ
-You can omit the qcb+AC if you don't have the extra stock.
HD
-Chin's overhead does not cancel into BC for some annoying reason
- Remember in XIII, if you press the BC activation slightly delayed (as the hit is about to retract) then it'll perform a s.C, otherwise if you press BC early (as the hit connects), it'll do an auto-dash which you can cancel yourself into a s.C
Starters
-s.C, HD, s.C-->
-d.B, d.A / s.A, (slight delay) BC--> will perform d.B, d.A / s.A, (HD) s.C-->
-A little more challenging is s.C, Kick Stance.Far D, HD, s.C-->
- The trick is to hold down, neutral C, down D (goes into Kick Stance), Neutral D. If done correctly he's s.C then far D for a 2 hit combo.
-You can also tack on the Far D after the Quickie Punches: Quickie Punches x1~3, Far D, HD, s.C-->
-Quickie Punches, Kick Stance, s.A x2, HD, s.C
-df.D, Quickie Punches, Ex Quickie Punches, s.C, HD, s.C
-You can do s.C, qcb+BC and it'll do his qcb C+HD.
Varitations
-->qcb A, [HDC] hcf B, qcb A, [HDC] hcf D, (df.B, qcb C, hcf D) x3, df.B x5, qcf x2+AC DM (785dmg, 35hits) http://www.youtube.com/watch?v=zJZ-1UF_qWg
-->(qcb A, [HDC] hcf D) x2, (df.B, qcb C, [HDC] hcf D) x2, df.B, qcf x2+P DM [6hits], [MC] qcf x2+BD, df.B, qcfx2+P DM (929dmg, 5 stocks, if you drink it'll go over 1000).
3 stock+HD+drink 100%
-j.D, s.C, qcb~hcf+BC, (qcb A, [HDC] hcf D) x2, (df.B, qcb C, hcf D) x3, df.B x5, qcf x2+AC DM (http://www.youtube.com/watch?v=GPrA1SboKgk)
Double Ex HD
-s.C, HD, s.C, Ex hcf K, Ex qcb P, (hcf B, qcb C, [HDC] hcf D, df.B) x4, hcf B, df.B x4, s.A ~816dmg
Strategies
Let's start with far range. There's not much you can do here except prepare to hcf+K any whiffed moves. The D version goes about 60% of the screen IIRC, and of course if they have mid fireballs which roughly 1/3 of the cast do, remind them not to mess around with you. If they have a ground fireball like Terry and Kyo, only his Ex version will be suffice (note, Ryo, Robert and Takuma's HSKK projectile is still consider a mid fireball despite the size). In the meantime, while near full screen away, steal drinks when you can. After one or two drinks usually, the opponent will approach you to prevent you from drinking.
Another useful tool from fireball happy opponents is to use his qcb+B counter to prevent any block damage (Chin triggers his counter but neither party takes damage and the projectile passes through him). Eventually opponents wise up and will try to punish you if you go for the counter. Against characters like Robert or Andy, use his punch stance (d x2+P) to crouch under the projectile, if they use any attack afterwards like Zaneiken or Robert's Flying Kick HSPK, cancel his stance into his qcb+B counter--punish him at will.
Often times you can bait them to throw a mid fireball without them really thinking. e.g. Try hcf+D (blocked), qcb+B (blocked). Chin will proceed to walk backwards. You'll be surprised how many people try to punish you which is when you remind them about your hcf+K.
Mid range - Now we enter more of Chin's comfort zone. df.B covers good horizontal distance and as long as you're not dead close--it's not punishable. Of course if used preemptively, it's a good anti-air and another good anti-air is his vertical j.CD. Play around with his Far C into df+B and you'd be surprised how effective it is against hops. Against jump-ins use his qcb+B counter. On the offense use Far C into df.D, good reach and deceptive. Sometimes, it's even good to use hcf+K to escape underneath your opponent as they jump towards you. Be prepared to publish with hcf+K or the Ex version.
Close range - Chin's sweet spot. Here's when the mix up games begin. Crossup C and jump B mixups, d.Bs with overheads loops mixups can seriously drive your opponent mad. When they are tired of your barrage of attacks, let loose a well timed Ex counter and let them think again about attacking. Don't forget Chin's d x2+P now has a foward+C followup which is a normal C throw. Since, Chin will not correct his direction for the follow up throw if the opponent is behind you (he'll whiff the throw grabbing forward even if you hold back+C), you can do the overhead db.D if they are behind you.
So you start with a Crossup C, they block it, you can either go for a d.B into overhead, or s.C into overhead, both are relatively safe but they can still throw you if they're paying attention. If your d.B connects you can go for s.A x1~2 into qcb+A... or just go for another overhead. If they block your d.B, d.A/s.A, you can do the overhead feint (df.D and hold the D) into d.B combos.
If they start blocking high too much, sweep them with a down D and start the crossup/overhead/d.B/counter mix ups again. Don't forget, holding df.D or pressing D again does Chin's overhead fake so you can do d.B combos or just throw them.
Sometimes when they wake up it's good to go for his punch stance and either Quickie Punch them/ throw them/ or cancel into his counter. Don't forget both of his stances cancel into any special.
Let's say they block your overhead, tack on at least one set of Quickie Punches (coming from an overhead, you just tap C but mash d x2 and P after the first set if you wish to continue). If they block your quickie punch you can go for another overhead (!) or cancel into his kick stance (d x2+K) and jump over them and start attacking once more.
A more advance block string is j.C, s.C, kick stance, cancel into crossup C. To perform the s.C --> kick stance simply hold down in the air (when pressing j.C), neutral standing C, down+D immediately. You can even press D again in the kick stance to perform a far D for a 3 hit combo. To add to the challenge, activate HD on his far D and use the autodash feature (after pressing BC on any normal or command attack your character will run forward briefly. When you press s.C or s.D it'll cancel his dash so you can carry on your HD combo) and start your favorite HD combo with s.C.
Coming from a Chin user, Chin is real annoying to fight against once you really understand how many different options you have at your disposal. After some reflection, what's annoying about Chin isn't necessary his damage (which I'd put average damage at best) but simply coz of the sheer amount of time he keeps you juggled is where most opponents get frustrated (it's ok, I get a dose of my own medicine playing against Lizzies) and lose their composure. You factor in his different options to administer this torture, and you're grinning from ear to ear.
Guidelines and Tips
I've spent most of the time talking about block strings and mind-game mix ups since you can read the combo section about what to do if it connects. Basically...
-Try to drink whenever you can but remember you are pretty vulnerable during the drink so do it after j.CDs and qcb+As.
-As long as I have one drink, I'll try to finish the df.B combos with his qcb~hcf+A.
-If I have only one power stock, I'll save it for his Ex df.K combos, or his Ex counter (his qcfx2+P DM is pretty much not worth using, and will not connect after his df.B anymore (unlike XII). I'll even go for an Ex hcf K starter (which can only be started from a strong hit or QP) into hcf B -->
-Make sure you have 1 drive gauge otherwise it severely limits his options (s.C, df.B, qcb+A, [DC], hcf+K...) hence Chin as a 2nd or 3rd character is almost always a better choice than being first.
-If you find yourself without drive or gauge: s.C, df.B, qcb+A, rdp+P x1~2 (after knocking away the opponent sneak some drinks in)
-If you find yourself without drive or gauge starting a light string, it's better to do d.B, s.A x1~2, qcb A, (then drink) than to do d.B, s.A, df.B, qcb A. Just remember not to finish with qcb A if the first 3 light hits are blocked. Not only does s.A do more damage than df.B, but it's safer if blocked (df.B is not safe if blocked unless at maxed distance).
-If you really lack a drive gauge, go for Quickie Punch into qcb~hcf+C (wires opponent), then perform the light version qcb~hcf+A (but remember to do it the opposite direction due to the wire). If you don't have another stock do qcb+A then steal a drink after.
-Anytime you connect with qcb~hcf+A, drink away safely (even in the corner).
-Don't under estimate 5 drinks = 150% damage. A normal 40-60% combo is now 60-80% best illustrated here: (http://www.youtube.com/watch?v=mplBTuiJOc8#t=0m22s)
-Under too much pressure and have 3 stocks? Ex counter, hcf+B, df.B, Ex qcf x2+AC.
-Personally, I don't use NeoMax too much but that can change in the future.
-If I have more than 3 stocks I'll either save it for combos or if I'm playing someone I better finish off, extend your [i]df.BD, hcf B loop[/i]s. e.g. df.B, qcb A, [DC], hcf+B, (df.BD, hcf+K)x [b]1~3[/b], df.B x2, Ex qcf x2+AC.
-Full drive gauge and if the opportunity arises, go for his HD which is good considering he does 60%+ damage with no stock.
-Quickie Punches only combos off strong attacks or 1 light hit; exception if d.A / s.A, d.B, QP because the d.B moves him slightly forward.
-The timing for Ex hcf+K after the QP is real tight, basically as fast as you can. When you do the first hit of the QP start inputing the motion.
-Due to the quick nature, it's sometimes advisable to do two sets of QP before doing Ex hcf K (and due to damage scaling, do as few QP as possible if you're going to do a long combo--which is most of the time). s.A, d.B, QP x2, Ex hcf K would be a good example of adding the extra QP to time the Ex hcf K.
-The trick for s.A, d.B, QP is: s.A, d.B, release to neutral then down+P x2 immediately.
Miscellaneous
Character Sprite
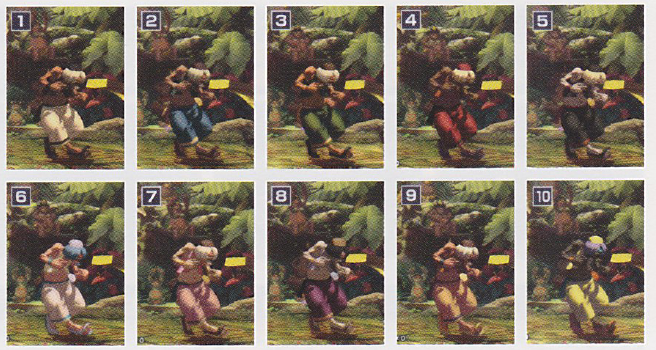
Colors
Other
Taunt
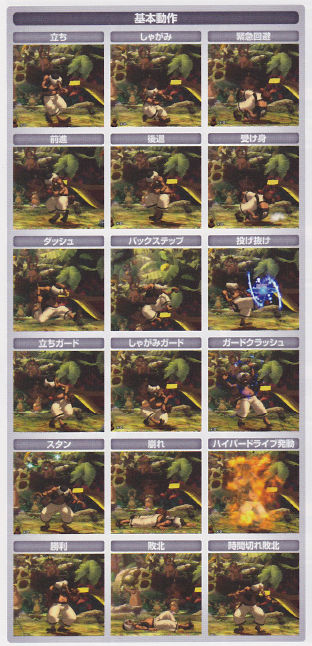
First Row: Standing/Crouching/Evasive Roll
Second Row: Walking (forward/Walking (Backward)/Safe Roll
Third Row: Running/Back Step/Throw Break
Fourth Row: Standing Guard/Crouching Guard/Guard Crush
Fifth Row: Dizzy/Downed/Hyper Drive Activation
Last Row: Win Pose/Knock Out/Time Up Pose
Links & References
Technical Reference
