Difference between revisions of "XV Broken/Ryuji Yamazaki"
Jump to navigation
Jump to search
(cleanup edit) |
|||
| (41 intermediate revisions by 5 users not shown) | |||
| Line 1: | Line 1: | ||
{{CharNavbox_XV}} | {{CharNavbox_XV}} | ||
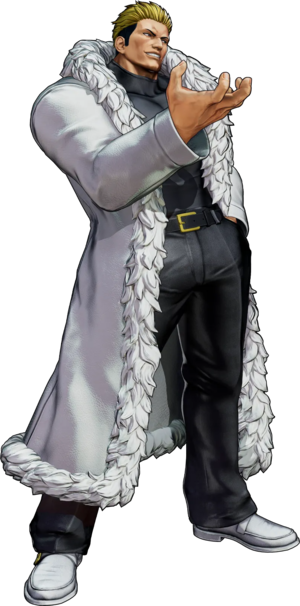
[[File:KOFXV_Yamazaki_Profile.png|thumb|Ryuji is a lone outlaw who made a name for himself as a broker in the underground. He is also one of Orochi's Eight Hakkesshu, but he lives only for his own gain. In this tournament, he seems to have been hired by the Howard Connection for a certain purpose, though as to what could be anyone’s guess.]] | <section begin="image"/>[[File:KOFXV_Yamazaki_Profile.png|thumb|Ryuji is a lone outlaw who made a name for himself as a broker in the underground. He is also one of Orochi's Eight Hakkesshu, but he lives only for his own gain. In this tournament, he seems to have been hired by the Howard Connection for a certain purpose, though as to what could be anyone’s guess.]]<section end="image"/> | ||
{{TOClimit|3}} | {{TOClimit|3}} | ||
==Gameplay Overview== | ==Gameplay Overview== | ||
{{StrengthsAndWeaknesses | {{StrengthsAndWeaknesses | ||
| intro = {{SUBPAGENAME}} is a devastating | | intro = {{SUBPAGENAME}} is a devastating mid-range character who excels at picking his opponents off before running them down with stance cancels, high/lows, command grabs, and frame traps. With many tools at his disposal, there's hardly a situation Yamazaki can't account for. However, a weak wakeup game and harsh, punishing execution can make Yamazaki more tricky to pick up than most other characters. Regardless, if you master everything Yamazaki has to offer, your enemies are sure to cower in fear. | ||
| pros= | | pros= | ||
* '''Incredible Meter Economy:''' Yamazaki's meter gain is top-notch when combined with his big juggles and special-bound neutral and offense. A keen Yamazaki will almost always have enough meter for the situation at hand. | * '''Incredible Meter Economy:''' Yamazaki's meter gain is top-notch when combined with his big juggles and special-bound neutral and offense. A keen Yamazaki will almost always have enough meter for the situation at hand. | ||
* '''Unmatched Anti Air Game:''' Serpent Slash, a variety of massive buttons, and Yamazaki's combo routes all lend fantastically to anti air conversions. Better yet, if he gets a | * '''Nigh Unmatched Anti-Air Game:''' Serpent Slash, a variety of massive buttons, and Yamazaki's combo routes all lend fantastically to anti-air conversions. Better yet, if he gets a Counter Hit he can go straight into BnB combos. | ||
* '''Incredible Neutral:''' Yamazaki's combination of messed up | * '''Incredible Neutral:''' Yamazaki's combination of messed up mid-range, a powerful reflect, relative safety, massive range and speed on many buttons, and great conversions gives Yamazaki the capabilities to outplay almost anyone in neutral and oftentimes get away with murder. | ||
* '''Insane Pressure:''' Yamazaki's Serpent Slash cancels allow him to stay advantageous as long as the player has the execution. Additionally, | * '''Insane Pressure:''' Yamazaki's Serpent Slash cancels allow him to stay advantageous as long as the player has the execution. Additionally, 623D into Serpent Slash allows him to get ambiguous pressure extensions that deal high guard damage and keep him close. Coupled with a massive command grab, an instant overhead, a fantastic j.D, great meter economy, and ridiculous CD conversions, Yamazaki's pressure is nothing short of spectacular, and is comfortably among the best in the game. | ||
* '''High Damage | * '''High Damage Across the Board:''' Whether he's on point, mid, or anchor, Yamazaki's damage is well above average. His basic BnBs deal good damage with or without meter, but his supers deal unbelievable amounts of damage. Pit Viper in particular deals bleed damage over a period of time, making his meter dumps extremely powerful. The average super confirm with Yamazaki will deal ''at least'' 100 more damage than any other character's, and that's assuming a weak starter. | ||
* '''Uncanny Reward From Standing Overhead:''' Pit Viper allows Yamazaki to deal ''unscaled damage'', making it a prime candidate for extremely high damage conversions off Yamazaki's standing overhead. | |||
* '''Any Position:''' Because of the previously mentioned pros, Yamazaki's able to fall within any position on a team you want. Point, mid, or anchor, Yamazaki performs highly and excels. | * '''Any Position:''' Because of the previously mentioned pros, Yamazaki's able to fall within any position on a team you want. Point, mid, or anchor, Yamazaki performs highly and excels. | ||
* | * 🔥🔥🔥: Just look at that coat. | ||
| cons= | | cons= | ||
* '''Weak Midscreen Okizeme:''' Yamazaki's midscreen oki leaves a lot to be desired, meaning you'll have to get a few more hits before running safejump pressure. | * '''Weak Midscreen Okizeme:''' Yamazaki's midscreen oki leaves a lot to be desired, meaning you'll have to get a few more hits before running safejump pressure. | ||
* '''Weak Corner Carry:''' Yamazaki's combos may throw the opponent far, but the lack of okizeme he gets off them means his corner carry is below average. | * '''Weak Corner Carry:''' Yamazaki's combos may throw the opponent far, but the lack of okizeme he gets off them means his corner carry is below average as he cannot push you past the screen's edge. | ||
* ''' | * '''High Difficulty:''' While every aspect of Yamazaki is strong, every aspect of him also requires a lot of forethought and executional prowess. | ||
* ''' | ** '''Complex Combos:''' Stance cancels, special to special cancels, and the horrid thought of being punishable on hit if you mess up a 6B cancel confirm can make Yamazaki terrifying to play in high-pressure situations, as a drop can spell the round or the game. | ||
** '''Committal Neutral''': Of the characters with good neutral, Yamazaki probably has the most difficult neutral of them all ''by far''. Yamazaki has numerous neutral tools that are all good, but all of them are extremely committal and require heavy forethought before use. It can be very easy to predict a Yamazaki and punish his poor neutral plays. | |||
** '''Bad Defense''': A lack of a meterless reversal and slow abare buttons make it so that Yamazaki crumbles on pressure if you aren't careful. His huge frame makes him a prime target for overheads and defensive air-to-airs if he tries to jump out of the corner, so defending as him can be a nightmare. | |||
}} | }} | ||
| Line 119: | Line 121: | ||
|description=Big jab. | |description=Big jab. | ||
* Great anti-hop. | * Great anti-hop. | ||
Main anti hop normal for getting out of pressure in a safe way. | Main anti-hop normal for getting out of pressure in a safe way. | ||
}} | }} | ||
| Line 129: | Line 131: | ||
|description= Main confirm tool after crouching lights. | |description= Main confirm tool after crouching lights. | ||
* Has much higher hitstun than 2A. | * Has much higher hitstun than 2A. | ||
* | * Frame traps from 2A on block while comboing on hit with correct timing. | ||
The most threatening 5B in the game. On block, it's a pressure situation. On hit, you might just die. Yamazaki can easily hit-confirm this into 623D~214C to get ridiculous damage off a super confirm. Go-to frame trap tool. Go-to close poke. If it caught hoppers this button would be broken. | |||
}} | }} | ||
| Line 137: | Line 140: | ||
|name=far C | |name=far C | ||
|input=f.C | |input=f.C | ||
|description=Incredibly slow whiffing far | |description=Incredibly slow whiffing far normal. | ||
* Cancelable on hit or whiff. | |||
* Leads to very, very good reward on hit. Use this to punish from afar. | * Leads to very, very good reward on hit. Use this to punish from afar. | ||
* You should be | * You should be canceling this into Serpent Slash all the time, especially on whiff. | ||
Good for punishes and limited poking. But it's a bit slow and linear. | |||
}} | }} | ||
| Line 147: | Line 152: | ||
|name=far D | |name=far D | ||
|input=f.D | |input=f.D | ||
|description= | |description= Supermassive kick. | ||
* | * Doesn't catch hops. | ||
This button exists to make Yamazaki work on anchor. The reach cannot be understated, as it is nearly as long as Krohnen's 2C. Because of the strength of Yamazaki's MAX Mode confirms, you probably won't hit this a lot vs many opponents, as they'll be too scared to try and be around it. But that just means you control an insane amount of space by merely existing. | |||
}} | }} | ||
| Line 157: | Line 163: | ||
|name=close A | |name=close A | ||
|input=cl.A | |input=cl.A | ||
|description= | |description= Generic close A. | ||
* | * Not much to say about this. | ||
}} | }} | ||
====close B==== | ====close B==== | ||
{{FrameDataCargo-KOFXV | {{FrameDataCargo-KOFXV | ||
| Line 165: | Line 172: | ||
|name=close B | |name=close B | ||
|input=cl.B | |input=cl.B | ||
|description= | |description= Very plus close B. | ||
* | * The height of this button means it can catch characters with lower aerial hurtboxes like Geese and Vanessa. | ||
You won't find much use out of this as a button in and of itself due to Yamazaki's pressure game being better than just utilizing this. But mixing something 'lower level' in between harsher pressure is indeed a good privilege to have. | |||
}} | }} | ||
====close C==== | ====close C==== | ||
{{FrameDataCargo-KOFXV | {{FrameDataCargo-KOFXV | ||
| Line 194: | Line 203: | ||
|description= Frame 5 jab with good advantage. | |description= Frame 5 jab with good advantage. | ||
* Can frame trap into command normals. | * Can frame trap into command normals. | ||
Your main | Your main confirm tool. 2B2A5B 623D 214C will be your main low confirm for the most part. While you can get a 236AC off 2B2A, this isn't really an easy confirm. | ||
}} | }} | ||
| Line 202: | Line 211: | ||
|name=crouch B | |name=crouch B | ||
|input=2B | |input=2B | ||
|description= | |description=The rare 5f even on block low. | ||
* | * Quite long, actually. | ||
Not only is this long, but unlike many lows it's not minus on block while also being frame 5 ''AND'' having good confirm options. | |||
}} | }} | ||
====crouch C==== | ====crouch C==== | ||
{{FrameDataCargo-KOFXV | {{FrameDataCargo-KOFXV | ||
| Line 210: | Line 221: | ||
|name=crouch C | |name=crouch C | ||
|input=2C | |input=2C | ||
|description=Best-er anti-hop normal that doubles as an anti air. Slightly slower than 5A and with trash range but great reward. | |description=Best-er anti-hop normal that doubles as an anti-air. Slightly slower than 5A and with trash range but great reward. | ||
* Can be canceled on hit and whiff. | * Can be canceled on hit and whiff. | ||
* Leads to insane reward on | * Leads to insane reward on Counter Hit with special cancels. | ||
* Like f.C, it has so much recovery you always want to cancel this into something. | * Like f.C, it has so much recovery you always want to cancel this into something. | ||
Incredible anti-air thanks to its speed and reward. When | Incredible anti-air thanks to its speed and reward. When stance cancelled it will give you a lot more advantage than most anti-airs, and on Counter Hit you can react with 236AC or 214A for big damage. Learn to use this. | ||
}} | }} | ||
| Line 222: | Line 233: | ||
|name=crouch D | |name=crouch D | ||
|input=2D | |input=2D | ||
|description= | |description= Long sweep that's rather slow. | ||
* | * Canceling this into 214[C] delay release allows you to get an OTG HKD. Great for ending corner combos. | ||
}} | }} | ||
| Line 232: | Line 243: | ||
|name=jump A | |name=jump A | ||
|input=j.A | |input=j.A | ||
|description2= | |description2= Average jump jab. | ||
* | * Quite active. | ||
Not much reason to use this over his j.B for counter poking, but it is good at catching whiffs and has a nice angle. | |||
}} | }} | ||
====Jump B==== | ====Jump B==== | ||
{{FrameDataCargo-KOFXV | {{FrameDataCargo-KOFXV | ||
| Line 240: | Line 253: | ||
|name=jump B | |name=jump B | ||
|input=j.B | |input=j.B | ||
|description2= | |description2= REALLY LONG and relatively fast air normal. Great as an air-to-air and even as a jump-in due to these aspects. | ||
* | * So big that it'll stuff out most air approaches. | ||
* Can still hit crouchers for some reason. | |||
* Farthest range jumping normal. | |||
Because Yamazaki is slow, this normal is incredible for jump-ins from a distance where his other normals won't hit. | |||
}} | }} | ||
| Line 249: | Line 265: | ||
|name=jump C | |name=jump C | ||
|input=j.C | |input=j.C | ||
|description2= | |description2=Air-to-air and pretty much just that. Very active and hits above him, good shit. | ||
* | * Kinda stubby. | ||
}} | }} | ||
====Jump D==== | ====Jump D==== | ||
{{FrameDataCargo-KOFXV | {{FrameDataCargo-KOFXV | ||
| Line 257: | Line 274: | ||
|name=jump D | |name=jump D | ||
|input=j.D | |input=j.D | ||
|description2=Great jump | |description2=Great jump pressure normal that synergizes well with Yamazaki's jump arc and height. | ||
* Because Yamazaki is a massive guy who lands quite quickly, this move can be used in a way where it won't combo on hit, but will catch late | * Because Yamazaki is a massive guy who lands quite quickly, this move can be used in a way where it won't combo on hit, but will catch late abare and still give you advantage. | ||
Absolutely incredible normal for pressure. Great for making braindead frame traps (a godsend as Yamazaki), normal jump-in pressure, and instant overheads that most characters cannot punish (hop back j.D). | |||
}} | }} | ||
| Line 277: | Line 295: | ||
|description=Decent stand CD that's great cause of Yamazaki's toolkit. | |description=Decent stand CD that's great cause of Yamazaki's toolkit. | ||
* Doesn't catch jumps as well as some other 5CDs. | * Doesn't catch jumps as well as some other 5CDs. | ||
You almost always want to | You almost always want to stance cancel this button. On whiff or block it'll recover quicker. On hit, follow up with dash > 6B > 623D > 214A > ender. If you suspect they will jump high over you can cancel into 214A for a cheeky anti-air. | ||
}} | }} | ||
==== | ====Shatter Strike==== | ||
{{FrameDataCargo-KOFXV | {{FrameDataCargo-KOFXV | ||
|moveId=yamazaki_236cd | |moveId=yamazaki_236cd | ||
|name= | |name=Shatter Strike | ||
|input=236CD | |input=236CD | ||
|description= | |description= Average SS but with good reward. | ||
* | * Air connect can mess with routing, get good at judging how high they were bounced. | ||
Because of Yamazaki's juggle combos, his Shatter Strike has very good reward, especially with meter. Shatter Strike > juggle > Pit Viper is truly diabolic in nature. | |||
}} | }} | ||
====jump CD==== | ====jump CD==== | ||
{{FrameDataCargo-KOFXV | {{FrameDataCargo-KOFXV | ||
| Line 293: | Line 313: | ||
|name=jump CD | |name=jump CD | ||
|input=j.CD | |input=j.CD | ||
|description2= | |description2= Pretty good j.CD because of its coverage. | ||
* | * Whiffs on small crouchers. | ||
}} | }} | ||
| Line 304: | Line 324: | ||
|input=(close) 4/6C | |input=(close) 4/6C | ||
|description= Forward throw with bad midscreen oki as per Yamazaki normality. | |description= Forward throw with bad midscreen oki as per Yamazaki normality. | ||
* 2C after grants a full jump | * 2C after grants a full jump safe jump. | ||
}} | }} | ||
| Line 325: | Line 345: | ||
* Highest potential damage in the game of any standing overhead. | * Highest potential damage in the game of any standing overhead. | ||
* Also quite safe. | * Also quite safe. | ||
The speed is bad on paper, but you will eventually get this to land due to Yamazaki's pressure game. While the cancel version loses its overhead property, it's still a great automatic frame trap from a 2A or close B; 6A (cancel) > 623D > 214[C] is an extremely hit-confirmable and safe sequence that can lead to big damage if they mash into it. | |||
}} | }} | ||
| Line 346: | Line 367: | ||
(A/B/C hold OK) | (A/B/C hold OK) | ||
|description4= Fast, quick, long ranged strike. | |description4= Fast, quick, long ranged strike. | ||
* B version is punishable on hit | * B version is punishable on hit. | ||
* A version cannot hit standing. | * A version cannot hit standing. | ||
* C version will out-poke most moves and even CDs. | * C version will out-poke most moves and even CDs. | ||
This move is your bread and butter. A and C versions are fantastic in combos, conversions, and neutral, with C version even hitting OTG in certain circumstances ( | This move is your bread and butter. A and C versions are fantastic in combos, conversions, and neutral, with C version even hitting OTG in certain circumstances (this is your main corner combo ender, with 2D into 214[C] delay release to get the OTG). B version is slightly less useful due to its horrible frame data on hit, but it can come in handy sometimes. EX version is absolutely crazy as it leads to high damage combos both in corner and midscreen and can be used as a large, active poke that leads to crazy damage on ground hit. | ||
|description5= Stance cancel. | |description5= Stance cancel. | ||
* Leaves Yamazaki -5 on block and -3 on hit when canceled from light normals | * Leaves Yamazaki -5 on block and -3 on hit when canceled from light normals. | ||
* Leaves Yamazaki +1 on block and +3 on hit when canceled from heavies and command normals | * Leaves Yamazaki +1 on block and +3 on hit when canceled from heavies and command normals. | ||
* Leaves Yamazaki +5 on block when canceled from stand CD. | |||
This move is ''also'' your bread and butter. This is what makes Yamazaki's pressure so scary, as he can mix between frame traps, staggers, and pressure resets at an incredibly quick pace. It is also highly useful for making pokes safer and allowing conversions off stand CD. | This move is ''also'' your bread and butter. This is what makes Yamazaki's pressure so scary, as he can mix between frame traps, staggers, and pressure resets at an incredibly quick pace. It is also highly useful for making pokes safer and allowing conversions off stand CD. | ||
}} | }} | ||
| Line 361: | Line 383: | ||
|name=Bombshell Badda-Bing | |name=Bombshell Badda-Bing | ||
|input=632146A/C/AC | |input=632146A/C/AC | ||
|captions= You'll only see this animation if you whiffed. Just reminding you not to do that. | |||
|description2=Decent damage command grab that gives good oki. | |description2=Decent damage command grab that gives good oki. | ||
* EX version just deals more damage and gives | * EX version just deals more damage and gives better oki. | ||
* EX version can be landed meaty in the corner after EX Todome. | * EX version can be landed meaty in the corner after EX Todome. | ||
One of your few tools midscreen that grants a safe jump, though it has to be manually timed. In the corner you can follow up with an OTG for some extra damage. Good for mixups. Has so much range that after most 623D214CD cancels you can microwalk and connect this. | |||
}} | }} | ||
| Line 376: | Line 399: | ||
* A version absorbs and stores a fireball that can be launched by using 236A again. Flames appear around Yamazaki's hand in his pocket to show that he has a fireball stored. | * A version absorbs and stores a fireball that can be launched by using 236A again. Flames appear around Yamazaki's hand in his pocket to show that he has a fireball stored. | ||
* C version immediately launches the fireball instead. | * C version immediately launches the fireball instead. | ||
* AC version launches notably faster and | * AC version launches notably faster and sets up a juggle. | ||
* A/C versions of the fireball function like EX projectiles. | * A/C versions of the fireball function like EX projectiles. | ||
* EX version of the fireball | * EX version of the fireball functions like a super projectile. | ||
}} | }} | ||
| Line 398: | Line 421: | ||
|input=623D | |input=623D | ||
|description=Very slow whiffing, very active far poke, combo and confirm tool. | |description=Very slow whiffing, very active far poke, combo and confirm tool. | ||
* Places the opponent in approximately a year of hitstun to let you confirm into | * Places the opponent in approximately a year of hitstun to let you confirm into Serpent Slash with ease. | ||
* Combos into 623B in corners during juggles. | * Combos into 623B in corners during juggles. | ||
* Has barely any pushback and moves you forward, making it great for staying close during pressure. | * Has barely any pushback and moves you forward, making it great for staying close during pressure. | ||
| Line 408: | Line 431: | ||
|moveId=yamazaki_623b,yamazaki_623bd | |moveId=yamazaki_623b,yamazaki_623bd | ||
|name=Fight of Tempering | |name=Fight of Tempering | ||
|captions= | |captions= RIGHT FOOT LET'S STOMP | ||
|input=623B/BD | |input=623B/BD | ||
|description2= Weird overhead move. | |description2= Weird overhead move. | ||
* BD version is safe and unreactable. | * BD version is safe and unreactable. | ||
The B version of this is your staple easy ender in corner juggles, as it leads to a | The B version of this is your staple easy ender in corner juggles, as it leads to a safe jump that's kind of easy to time. The BD version on the other hand is a stupid instant overhead that you can just whip out as the pushback makes it safe despite its negativity. It has a 4f gap between the two hits but Yamazaki wins the trade and WILL combo you after due to frame advantage. The way you counteract this is by throwing the move, but it's easier said than done. A staple in his corner pressure due to its range and speed. | ||
}} | }} | ||
| Line 419: | Line 442: | ||
|moveId=yamazaki_632146k,yamazaki_632146bd | |moveId=yamazaki_632146k,yamazaki_632146bd | ||
|name=Todome | |name=Todome | ||
|captions= | |captions=LEFT FOOT LET'S STOMP | ||
|input=632146B/D/BD | |input=632146B/D/BD | ||
|description2= OTG. | |description2= OTG. | ||
* Normal version kicks them away and switches sides, EX version gives you a little oki and kicks them in front of you while also lasting longer. | * Normal version kicks them away and switches sides, EX version gives you a little oki and kicks them in front of you while also lasting longer. | ||
Go-to for forcing the opponent to take full damage from Pit Viper. | Go-to for forcing the opponent to take full damage from Pit Viper. EX version is particularly potent in the corner; despite leaving Yamazaki at only +5, it creates the perfect spacing to allow close B, 2C, or command throw to connect with no additional movement. This gives Yamazaki a strike/throw mixup opportunity that, while not without counterplay, can lead to massive damage and/or a loop into the same situation as long as Yamazaki has at least 0.5 meter (SPOILER: he always does) if the opponent guesses incorrectly. | ||
}} | }} | ||
| Line 433: | Line 456: | ||
|input=236236A/C/AC | |input=236236A/C/AC | ||
|description2= | |description2= | ||
* | * Deals more damage than his Pit Viper super, but does not see common use in combos. | ||
* Essentially an extremely damaging anti-air super. | |||
Yamazaki leaps into the air with an uppercut. If he grabs an opponent, he will slam them into the ground and drag them across the stage before tossing them far off. In previous games this super has been used to anti-air opponents and as a combo ender, but due to the return of Yamazaki's OTG stomp move, this super does not see as much use as Pit Viper does. | |||
}} | }} | ||
| Line 445: | Line 471: | ||
* Value in [] indicate unscaled bleed damage. Bleed damage is applied twice a second and cannot KO opponents. Bleed damage stops if Yamazaki is hit by any attack. | * Value in [] indicate unscaled bleed damage. Bleed damage is applied twice a second and cannot KO opponents. Bleed damage stops if Yamazaki is hit by any attack. | ||
* Normal version lets you OTG after. | * Normal version lets you OTG after. | ||
* Excellent range. | |||
Probably the best level 1 super in the game. Yamazaki lunges forward with a knife-hand strike, afflicting any enemies hit with an Orochi curse that deals "bleed" damage. Because of this bleed damage, this super is typically chosen over his Guillotine super, as it leads to a hard knockdown right in front of Yamazaki and allows him to follow up with his Todome OTG special, letting him tack on extra damage that he otherwise cannot do with his Guillotine super and causing the opponent to sustain all of Pit Viper's bleed damage. He can also use low Serpent Slash to get less damage with more oki, enough for a manually timed safe jump. | |||
}} | }} | ||
| Line 453: | Line 482: | ||
|name=Drill | |name=Drill | ||
|input=2141236CD (mash A and C) | |input=2141236CD (mash A and C) | ||
|description= | |description= Frame 1 command grab super. | ||
* Either Level 3 or Level 4 Drill does more damage depending on scaling percentage. | * Mash the punch buttons to deal more damage. | ||
* Either Level 3 or Level 4 Drill does more damage depending on scaling percentage. Use Level 3 if you activated from Quick Max. | |||
Yamazaki slams the opponent to the ground and enters a pose before rushing the opponent with a barrage of attacks and launching them far off. By mashing the punch buttons, the player can cause Yamazaki to enter a more aggressive pose followed by a sound which signifies that Yamazaki will perform a different move that deals more damage. Most people will choose to perform the Level 3 if they activate the Climax during Quick Max, but outside of that, you are probably better off using Level 4. | |||
'''Level 1:''' Performs his Slam command normal, followed by his Fight of Tempering special and lastly his Todome special, before kicking the opponent into the air and performing his Drill uppercut. | |||
'''Level 2:''' Causes a cinematic where Yamazaki stomps the opponent (shown from their point of view) before kicking them into the air and performing his Drill uppercut. | |||
'''Level 3:''' Whacks the opponent with a randomly chosen object (could be a giant fish, a bench, a traffic cone, a billboard, or an animatronic head) that launches them into the air; Yamazaki follows up with his Drill uppercut. | |||
'''Level 4:''' Yamazaki goes insane and viciously assaults the opponent with a barrage of Serpent Slashes, before grabbing them and slamming them into the ground with his Drill attack. | |||
}} | }} | ||
Revision as of 23:04, 27 November 2022

Ryuji is a lone outlaw who made a name for himself as a broker in the underground. He is also one of Orochi's Eight Hakkesshu, but he lives only for his own gain. In this tournament, he seems to have been hired by the Howard Connection for a certain purpose, though as to what could be anyone’s guess.
Gameplay Overview
| Ryuji Yamazaki is a devastating mid-range character who excels at picking his opponents off before running them down with stance cancels, high/lows, command grabs, and frame traps. With many tools at his disposal, there's hardly a situation Yamazaki can't account for. However, a weak wakeup game and harsh, punishing execution can make Yamazaki more tricky to pick up than most other characters. Regardless, if you master everything Yamazaki has to offer, your enemies are sure to cower in fear. | |
| Pros | Cons |
|
|
Movelist
(*) = EX OK
(!) = MAX OK
Throws
Kachikomi - ![]() /
/ ![]() +
+ ![]()
Whackdown Wallop - ![]() /
/ ![]() +
+ ![]()
Command Normals
Eviscerator - ![]() +
+ ![]()
Slam - ![]() +
+ ![]()
Special Moves
Serpent Slash - ![]() +
+ ![]() /
/ ![]() /
/ ![]() (*)
┗Serpent Slash (Keep) (After
(*)
┗Serpent Slash (Keep) (After ![]() /
/ ![]() /
/ ![]() Serpent Slash) - Hold Button
Serpent Slash) - Hold Button
- ┗Serpent Slash Cancel (After Serpent Slash (Keep)) -

Bombshell Badda-bing - ![]()
![]() +
+ ![]() /
/ ![]() (*)
(*)
Double Return - ![]() +
+ ![]() /
/ ![]() (*)
(*)
Sadomaso - ![]() +
+ ![]() /
/ ![]() (*)
(*)
Spray Sand - ![]() +
+ ![]()
Fight of Tempering - ![]() +
+ ![]() (*)
(*)
Todome - ![]()
![]() +
+ ![]() /
/ ![]() (*)
(*)
Super Special Moves
Guillotine - ![]()
![]() +
+ ![]() /
/ ![]() (!)
(!)
Pit Viper - ![]()
![]()
![]() +
+ ![]() /
/ ![]() (!)
(!)
Climax Super Special Moves
Drill - ![]()
![]()
![]() +
+![]() +
+![]() (Mash
(Mash ![]() /
/ ![]() )
)
Quick Combo Reference
| 0 Meter |
Placeholder |
x DMG |
| ½ Meter |
Placeholder |
x DMG |
| 1 Meter |
Placeholder |
x DMG |
| 2 Meters |
Placeholder |
x DMG |
Normals
Far Standing Normals
far A
| far A
f.A
f.A  |
|---|
far B
| far B
f.B
f.B  |
|---|
far C
| far C
f.C
f.C  |
|---|
far D
| far D
f.D
f.D  |
|---|
Close Standing Normals
close A
| close A
cl.A
cl.A  |
|---|
close B
| close B
cl.B
cl.B  |
|---|
close C
| close C
cl.C
cl.C  |
|---|
close D
| close D
cl.D
cl.D  |
|---|
Crouch Normals
crouch A
| crouch A
2A
2A  |
|---|
crouch B
| crouch B
2B
2B  |
|---|
crouch C
| crouch C
2C
2C  |
|---|
crouch D
| crouch D
2D
2D  |
|---|
Jump Normals
Jump A
| jump A
j.A
j.A  |
|---|
Jump B
| jump B
j.B
j.B  |
|---|
Jump C
| jump C
j.C
j.C  |
|---|
Jump D
| jump D
j.D
j.D  |
|---|
Rush
| rush
cl.AA/cl.AAX
cl.AA/cl.AAX   |
|---|
Blowback
Blowback
| Blowback
CD
CD  |
|---|
Shatter Strike
| Shatter Strike
236CD
236CD  |
|---|
jump CD
| jump CD
j.CD
j.CD  |
|---|
Throws
Kachikomi
| Kachikomi
(close) 4/6C
(close) 4/6C  |
|---|
Whackdown Wallop
| Whackdown Wallop
(close) 4/6D
(close) 4/6D  |
|---|
Command Moves
Eviscerator
| Eviscerator
6A
6A  |
|---|
Slam
| Slam
6B
6B  |
|---|
Special Moves
Serpent Slash
| Serpent Slash 214A/B/C/AC (A/B/C hold OK)214A/B/C/AC (A/B/C hold OK)    |
|---|
Bombshell Badda-Bing
| Bombshell Badda-Bing
632146A/C/AC
632146A/C/AC   |
|---|
Double Return
| Double Return
236A/C/AC
236A/C/AC   |
|---|
Sadomaso
| Sadomaso
41236B/BD
41236B/BD  |
|---|
Spray Sand
| Spray Sand
623D
623D  |
|---|
Fight of Tempering
| Fight of Tempering
623B/BD
623B/BD  |
|---|
Todome
| Todome
632146B/D/BD
632146B/D/BD  |
|---|
Super Special Moves
Guillotine
| Guillotine
236236A/C/AC
236236A/C/AC   |
|---|
Pit Viper
| Pit Viper
2141236A/C/AC
2141236A/C/AC  |
|---|
Climax Super Special Moves
Drill
| Drill
2141236CD (mash A and C)
2141236CD (mash A and C)  |
|---|
Misc
| Scaling | Initial Slam | Level 3 | Level 4 |
|---|---|---|---|
| 100% | 40 | 450 | 470 |
| 95% | 38 | 421 | 417 |
| 90% | 36 | 405 | 408 |
| 85% | 34 | 376 | 385 |
| 80% | 32 | 360 | 376 |
| 75% | 30 | 331 | 323 |
| 70% | 28 | 315 | 314 |
| 65% | 26 | 286 | 291 |
| 60% | 24 | 270 | 282 |
| 55% | 22 | 241 | 229 |
| 50% | 20 | 225 | 220 |


