The King of Fighters XIII/King
Gameplay Overview
King is a mixed bag character. She can keep an opponent at bay by utilizing her projectile game, though predictability in this area can work against her favor. Her rushdown isn't terribly exceptional since she doesn't have any real mixup options. Because of this, her neutral game is very important. Using EX moves and drive cancels, King is able to get the opponent to the corner, where she can get her best damage with either HD combos or EX Surprise Rose. King's difficult matchups are those against rushdown characters. Having poor normals and lack of a decent reversal without meter really hurts King in the defensive department. Coupled with the fact that she is generally poor at building meter, King works best when not used as a point(1st) character.
Gameplay Notes
Pros
- Good zoning tools (projectiles)
- Good EX moves
- Easy BnBs and HD combos
- Fast movement speed (backdash/run)
Cons
- Slow normals (short range, low priority)
- Poor mixup game (no overhead/proximity unblockable)
- Low damage potential compared to a majority of the cast
- Requires corner for high damage
- Needs meter for damage/reversals
- Not good at building meter
Normals
Standing
st. A - A standard jab attack, good for stopping hops
- Cancel/Chain-able
- Hit Detection: High
- Damage: 30
st. B - A standing kick aimed low, useful for chaining into slide kick
- Chainable
- Hit Detection: Low
- Damage: 30
st. C - A straight punch, not very useful outside of pokes or a combo ending reset
- Hit Detection: High
- Damage: 80
st. D - A high angled kick with very slow startup and recovery
- Hit Detection: High
- Damage: 80
cl. C - A high arc-ing uppercut, decent as an anti-air against neutral jumps when cornered
- Cancel-able
- Hit Detection: High
- Damage: 70
cl. D - A two-hit angled kick similar to st.D. Kings best normal for combos and blockstrings. Cancel with Venom Strike to make it safe
- Cancel-able
- Hit Detection: High
- Damage: 40+45
Crouching
cr. A - A crouching jab, good in combos
- Chain/Cancel-able
- Hit Detection: High
- Damage: 25
cr. B - A crouching low kick, arguably one of her best pokes and ground combo starters
- Chainable
- Hit Detection: Low
- Damage: 30
cr. C - A crouching uppercut, can be used as a pseudo anti-air
- Cancel-able
- Hit Detection: High
- Damage: 70
cr. D - A crouching low kick, similar to cr.B, with greatly increased recovery time. Poor when used as a punish
- Cancel-able
- Hit Detection: Low
- Damage: 80
Jumping
j. A - A jumping downwards jab, rarely used
- Cancel-able
- Hit Detection: Mid
- Damage: 45(40)
j. B - A jumping back kick aimed upwards, King's best air-to-air attack
- Hit Detection: Mid
- Damage: 45(40)
j. C - A jumping downwards punch, similar to j.A with more hitstun. Useful as a quick jump-in when not crossing-up the opponent
- Cancel-able
- Hit Detection: Mid
- Damage: 72(70)
j. D - A jumping downwards angled kick, can crossup. King's most common jump-in to start combos. Can NOT be used as an instant overhead (even on Raiden)
- Hit Detection: Mid
- Damage: 70(68)
Blowback Attack
CD - A spin kick to the midsection, generally beats lows. Good as a standing poke
- Whiff/Cancel-able
- Hit Detection: High
- Damage: 75
j. CD - An aerial spinning heel kick that arcs downwards, slow startup. Decent air-to-air if done early. Often misses against grounded/crouching opponents
- Cancel-able
- Hit Detection: High
- Damage: 90(80)
GCCD: Guard Cancel Blowback Attack - A spin kick to the midsection, similar to st.CD. May miss on opponents who hit with high jump-ins
- Hit Detection: High
- Damage: 10
Throw
Hook Buster = (b/f+C/D) - King throws the opponent with her legs. C version throws opponent forward, D version throws opponent behind
- Can be broken
- Hit Detection: Close
- Damage: 100
Command Moves
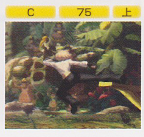
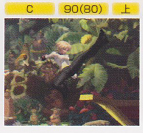
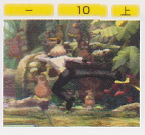
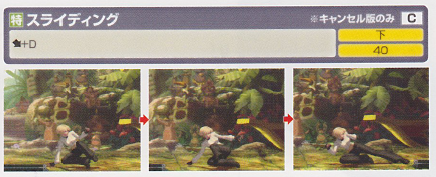
Slide Kick = (df+D)
- King's slide kick moves her forward on the ground for a low hitting kick. If you land close high kick, you can combo into slide kick and initiate a cancel into Trap Shot, Venom Strike or Tornado Kick. However, landing her slide kick by itself will not let you cancel it, so the trick is to empty cancel a s.A/d.A/s.B (any quick cancelable move) then perform the slide so you can cancel out of it.
- Cancel-able
- Hit Detection: Low
- Damage: 40
Special Moves
Trap Shot = (dp+K)
- King will do a backflip kick. If it lands, she will go into a full animation where she kicks the opponent multiple times. If it whiffs, no further animation will occur. Trap Shot can be canceled into a lot of different moves (Venom Strike, Tornado Kick, EX Trap Shot, and Surprise Rose). Unsafe on block, especially if the opponent has you in the corner. Not viable as anti-air unless done as an EX version. EX version has full invincibility against attacks (not projectiles).
(EX) = dp+BD
- Drive/Super Cancel-able
- Hit Detection: High
- Damage: 0+20x3+80/0+20x6+80
Venom Strike = (qcf+K)
- King's projectile. A standard fireball on the ground. She can also perform this move anytime during her jump-arc whether it be neutral, backward, or forward, which is very useful for zoning. EX version version hits twice: goes through standard projectiles, trades with EX projectiles, and loses to DM projectiles.
(EX) = qcf+BD
- Super Cancel-able
- Hit Detection: High
- Damage: 65/75x2
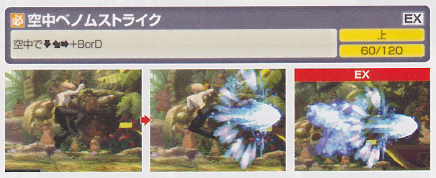
Air Venom Strike = (qcf+K) in air
- When done as an aerial version, A version drops you straight down, B version makes King jump slightly backwards before landing, EX version drops you straight down at a faster rate than A version.
(EX) = qcf+BD in air
- Hit Detection: High
- Damage: 60/120
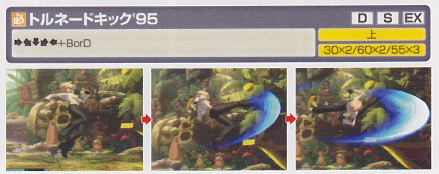
Tornado Kick '95 = (hcb+K)
- King does a whirlwind kick forward. The start up on this move feels pretty slow, so don't throw it out when your opponent is close enough to react. It's called Tornado Kick '95 because her Tornado Kicks in recent games have been much more vertical, and this Tornado Kick resembles the OG horizontal version in KoF 95. Second hit will whiff on crouchers (unsure on Raiden, testing necessary). Unsafe on block, unless blocked from afar (hits with the tip). EX version has invincibility, may be used as an anti-air.
(EX) = hcb+BD
- Drive/Super Cancel-able
- Hit Detection: Close
- Damage: 30x2/60x2/55x3
Desperation Moves
Double Strike = (qcfx2+K)
- King throw's out two very large and fast Venom Stikes. B version projectiles travel slower than D version, same damage.
- Hit Detection: High
- Damage: 105x2
Surprise Rose = (qcfx2+P)
- King does an upwards kick during the first part of the animation, then lands forward for more kicks. The upwards kick in the beginning makes this super viable as an anti air, but it does not have great priority and can get beaten out by certain normals. Depending on whether you press A or C, she will travel shorter or farther respectively with the second part. Max Cancel-able during any of the hits (minus the initial upwards kick).
(EX) = qcfx2+AC
- Max Cancel-able
- Hit Detection: High
- Damage: 10x2+0+12x11+48/10x2+0+(10x3+30)x3+10x3+100
Neomax
Venom Shot = (qcbx2+BD)
- Can be done from the ground or in the air. If done from the ground, King jumps straight up before performing the move. Superflash/timefreeze does not occur until the peak of the jump, and therefore can be interrupted before the move executes. If interrupted in this way, no meter is spent. If Venom Shot is done from the air, startup is 1 frame. Not all hits are guaranteed.
- Hit Detection: High
- Damage: 30x(1~17)
Combos
Common Combo Starters
c.B> c.A> df.D
s.B> df.D
s.D> df.D
No Drive Gauge
NO POWER GAUGE
c.C> df.D> hcb+B> s.C [224]
corner only
c.C> df.D> hcb+B> dp+B/D [250]
1 POWER GAUGE
c.C> df.D> hcb+B> dp+BD [274]
c.C> df.D> qcf+BD> hcb+D [323]
Corner only
c.C> df.D> hcb+B> qcf+A/C [313]
c.C> df.D> qcf+BD> qcf+B> hcb+D [369]
2 POWER GAUGE
c.C> df.D> qcf+BD> qcfx2+B/D [396]
c.C> df.D> qcfx2+AC [415]
Corner only
c.C> df.D> qcf+BD> qcf+B> qcfx2+B/D [438]
c.C> df.D> hcb+D> qcfx2+AC [497]
3 POWER GAUGE
Corner only
c.C> df.D> qcf+BD> qcfx2+AC [514]
c.C> df.D> qcf+BD> qcf+B> hcb+D> qcfx2+AC [610]
Drive Gauge 50%
NO POWER GAUGE
c.C> df.D> dp+B/D> (DC) hcb+B> hcb+D [312]
Corner only
c.C> df.D> hcb+B> dp+B/D> (DC) hcb+B> hcb+D [332]
1 POWER GAUGE
c.C> df.D> hcb+B> dp+BD> (DC) hcb+B> hcb+D [325]
c.C> df.D> hcb+D> (DC) qcf+BD> hcb+D [354]
c.C> df.D> dp+B/D> (DC) hcb+B> qcfx2+B [363]
Corner only
c.C> df.D> hcb+B> dp+B/D> (DC) qcf+BD> qcf+B> qcf+B> 2C [402]
c.C> df.D> hcb+B> dp+B/D> (DC) hcb+B> qcf+B> qcfx2+A/C [410]
c.C> df.D> hcb+D> (DC) qcf+BD> qcf+B> hcb+D [438]
c.C> df.D> qcf+BD> qcf+D> dp+B/D> (DC) hcb+B> qcf+B> 2C [443]
2 POWER GAUGE
c.C> df.D> dp+B/D> (SC) qcfx2+AC [453]
c.C> df.D> hcb+D> (DC) qcf+BD> qcfx2+D [465]
Corner only
c.C> df.D> hcb+B> dp+B/D> (DC) hcb+B> qcfx2+B/D> qcfx2+A/C [483]
c.C> df.D> qcf+BD> qcf+B> dp+B/D> (DC) hcb+B> qcf+B> qcfx2+A/C [519]
c.C> df.D> qcf+BD> qcf+B> hcb+D (1st hit only)> (DC) qcf+BD> qcf+B> hcb+D [522]
c.C> df.D> hcb+B> dp+B/D> (DC) hcb+B> hcb+D> qcfx2+AC [547]
3 POWER GAUGE
Corner only
c.C> df.D> qcf+BD> qcf+B> hcb+D (1st hit only)> (DC) qcf+BD> qcf+B> qcfx2+B/D [579]
c.C> df.D> hcb+B> dp+B/D> (DC) hcb+B> qcfx2+B/D> qcfx2+AC [600]
c.C> df.D> hcb+B> dp+B/D> (DC) qcf+BD> qcf+B> hcb+D> qcfx2+AC [612]
c.C> df.D> qcf+BD> qcf+B> dp+B/D> (DC) hcb+B> hcb+D> qcfx2+AC [653]
c.C> df.D> hcb+D> (DC) qcf+BD> qcf+B> hcb+D> qcfx2+AC [676]
4 POWER GAUGE
Corner only
c.C> df.D> qcf+BD> qcf+B> dp+B/D> (DC) qcf+BD> qcf+B> hcb+D> qcfx2+AC [711]
Drive-gauge 100%
NO POWER GAUGE
Corner only
c.C> df.D> hcb+B> dp+B/D> (DC) hcb+B> dp+B/D> hcb+B> dp+B/D [362]
1 Power Gauge
c.C> df.D> dp+B/D> (DC) dp+BD> (DC) hcb+B> hcb+D [330]
Corner only
c.C> df.D> hcb+B> dp+B/D> (DC) hcb+B> dp+B/D> (DC) hcb+B> qcf+B> qcfx2+A/C [447]
c.C> df.D> qcf+BD> qcf+B> dp+B/D> (DC) hcb+B> dp+B/D> (DC) hcb+B> hcb+D [463]
c.C> df.D> hcb+D> (DC) qcf+BD> dp+B/D> (DC) hcb+B> hcb+D [465]
2 POWER GAUGE
Corner only
c.C> df.D> hcb+D> (DC) qcf+BD> dp+B/D> (DC) hcb+B> qcf+B> qcfx2+A/C [546]
c.C> df.D> hcb+B> dp+B/D> (DC) hcb+B> dp+B/D> (DC) hcb+B> hcb+D> qcfx2+AC [573]
c.C> df.D> hcb+D> (DC) qcf+BD> qcf+B> hcb+D (1st hit only)> (DC) qcf+BD> qcf+B> qcf+D> hcb+D [608]
3 POWER GAUGE
c.C> df.D> qcbx2+BD [432]
Corner only
c.C> df.D> hcb+D> (DC) qcf+BD> qcf+B> hcb+D (1st hit only)> (DC) qcf+BD> qcf+B> qcfx2+B/D [630]
c.C> df.D> qcf+BD> qcf+B> dp+B/D> (DC) hcb+B> dp+B/D> (DC) hcb+B> hcb+D> qcfx2+AC [678]
4 POWER GAUGE
Corner only
c.C> df.D> hcb+D> (DC) qcf+BD> qcf+B> hcb+D(1st hit only)> (DC) qcf+BD> qcf+B> qcf+D> hcb+D> qcfx2+AC [823]
HD Combos
NO POWER GAUGE
corner only
c.C> df.D> HD activation> c.C> df.D> [dp+B/D> (HDC) hcb+B]×4> qcf+B> c.C [486]
1 POWER GAUGE
corner only
c.C> df.D> HD activation> c.C> df.D> hcb+D> (HDC) qcf+BD> [dp+B/D> (HDC) hcb+B]×3> qcf+B> c.C [581]
2 POWER GAUGE
corner only
c.C> df.D> HD activation> c.C> df.D> [dp+B/D> (HDC) hcb+B]×4> hcb+D> qcfx2+AC [698]
3 POWER GAUGE
corner only
c.C> df.D> HD activation> c.C> df.D> hcb+D> (HDC) qcf+BD> [dp+B/D> (HDC) hcb+B]×3> hcb+D> qcfx2+AC [793]
4 POWER GAUGE
corner only
j.C> c.C> df.D> HD activation> c.C> df.D> qcf+BD> qcf+B> hcb+D (1st hit only)> (HDC) qcf+BD> [dp+B/D> (HDC) hcb+B]×3> qcfx2+B/D> qcfx2+AC [853]
c.C> df.D> HD activation> c.C> df.D> hcb+D> (HDC) qcf+BD> [dp+B/D> HDC hcb+B]×3> qcfx2+B> qcfx2+AC [873]
5 POWER GAUGE
corner only
c.C> df.D> HD activation> c.C> df.D> hcb+D> (HDC) qcf+BD> qcf+B> hcb+D (1st hit only)> (HDC) qcf+BD> qcf+B> qcf+D> hcb+D> (HDC) qcf+BD> dp+B/D> (HDC) hcb+B> hcb+D> qcfx2+AC [947]
j.C> c.C> HD activation> (far) s.D> qcf+BD> qcf+B> hcb+D> qcf+BD> [dp+B/D> (HDC) hcb+B] × 3> qcfx2+B> qcfx2+AC [996]
j.C> s.C> HD activation> s.C> hcb+D> qcf+BD> qcf+B> hcb+D> qcf+BD> qcf+B> (dash)> dp+B/D> (HDC) hcb+B> dp+B/D> qcf+B> qcfx2+B> qcfx2+AC [unconfirmed]
Miscellaneous
Character Sprite
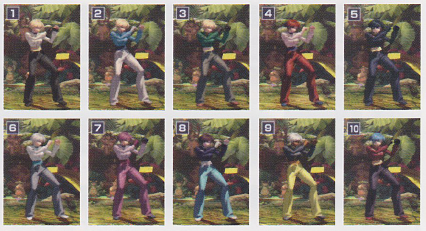
Colors
Other
Taunt
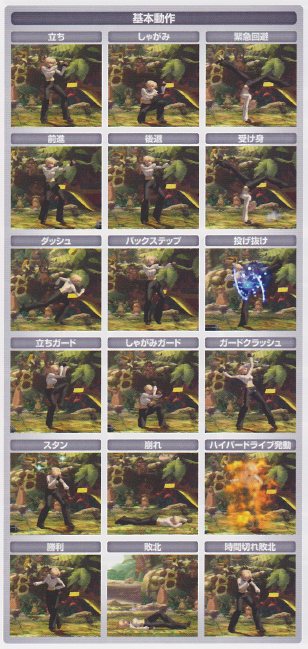
First Row: Standing/Crouching/Evasive Roll
Second Row: Walking (forward/Walking (Backward)/Safe Roll
Third Row: Running/Back Step/Throw Break
Fourth Row: Standing Guard/Crouching Guard/Guard Crush
Fifth Row: Dizzy/Downed/Hyper Drive Activation
Last Row: Win Pose/Knock Out/Time Up Pose


