The King of Fighters XIII/Kyo Kusanagi
Gameplay Overview
Kyo is an extremely versatile character with a very vast range of playing styles. He can zone you with Yamibarai but at the same time he can rush you down to the corner. He can punish jump-ins very well with his Oniyaki and Ama No Murakumo but can also carry his opponent across the screen with moves such as Kai and Oborogurma. His HD combos involve him using most of his moveset to get the most damaging combo out possible whether it's midscreen or in the corner. His play-style tends to be favored by people looking for someone who is flashy but at the same time isn't too difficult to learn.
Gameplay Notes
Pros
- Has a wide range of options with his EX attacks
- Good meter-less combos
- Very damaging HD combos
- Incredible offensive rush down game
- Can juggle/punish very well
Cons
- Zaps meter quickly
- His most damaging combos require him to launch the opponent into the air
Normals
Standing
st. A: Standard punch attack, fast and stops a lot of short-hops too
- Cancellable
- Hit Detection: High
- Damage: 25
st. B: Quick low kick attack (hits low), very quick
- Cancellable
- Hit Detection: Low
- Damage: 30
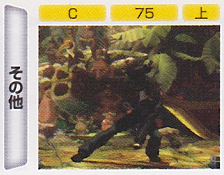
st. C: Strong punch that's aimed slightly upward, good range and an okay AA, has pretty good hitstun so it may end up starting a few combos
- Whiff/Cancellable
- Hit Detection: High
- Damage: 80
st. D: Jumping turn kick, great reach and can be used to avoid some attacks that are aimed low as well, it's a little slow though.
- Hit Detection: High
- Damage: 80
cl. C: Up close strong punch, because of how quick it is it's gonna be your main bnb/combo starter of choice
- Cancellable
- Hit Detection: High
- Damage: 70
Crouching
cr. A: Crouching punch attack, very quick poke, preferred to be chained to his df+D
- Chain/Cancellable
- Hit Detection: High
- Damage: 25
cr. B: A quick crouching kick, a great poke that's good for chaining into combos, excellent range, can be chained
- Chainable
- Hit Detection: Low
- Damage: 30
cr. C: Crouch uppercut attack, good reach, great priority, very fast, good as an AA, cancel-able, this move got it all
- Cancellable
- Hit Detection: High
- Damage: 70
cr. D: Crouch sweep attack, knocks standing opponents down when hit, good reach but it's rather slow
- Whiff/Cancellable
- Hit Detection: Low
- Damage: 80
Jumping
j. A: Jumping elbow attack, it comes out fast but the range is mediocre
- Cancellable
- Hit Detection: Mid
- Damage: 45(40)
j. B: Jumping knee attack, good priority and stays out for a bit, crosses-up
- Hit Detection: Mid
- Damage: 45(40)
j. C: Jumping punch attack, a great jump-in move and does good damage as well, crosses-up
- Hit Detection: Mid
- Damage: 72(70)
j. D: Good priority, useful in air-to-air and should be used earlier than later because of it's range
- Hit Detection: Mid
- Damage: 70(68)
Blowback Attack
CD: Shoulder tackle, very fast
- Whiff/Cancellable
- Hit Detection: High
- Damage: 75
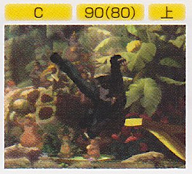
j. CD: Air shoulder tackle, comes out pretty quick, delivers a chunk of hitstun like many other CD attacks
- Cancellable
- Hit Detection: High
- Damage: 90(80)
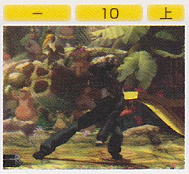
GCCD: Guard Cancel Blowback Attack
- Hit Detection: High
- Damage: 10
Throw
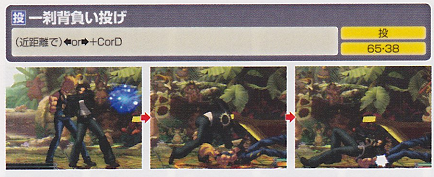
Issetsu Seoi Nage = (b/f + C/D) close - A slam to elbow drop, nothing much else
- Can be broken
- Hit Detection: Close
- Damage: 65+38
Command Moves
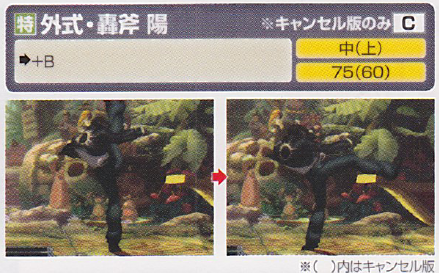
Goufu You = (f+B) - Overhead kick, works well with after moves with a lot of hitstun, overhead on crouching opponents
- Cancellable
- Hit Detection: Mid/High
- Damage: 75(60)
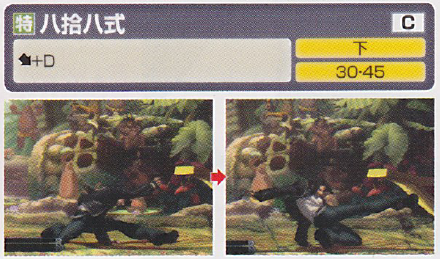
88 Shiki = (df+D) - 2 low sweep kicks, good range, connects after crouch normals and his st. C fairly well
- Free cancellable on first hit
- Hit Detection: Low
- Damage: 30+45
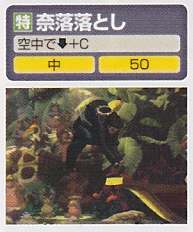
Naraku Otoshi = (db/d/df+C in air) - Two-handed downward haymaker attack, when successfully used air-to-air it slams the opponent to the ground, has a lot of hitstun so it can be used to jump-in and start a combo, when used during a backdash it makes him hop backward further and quicker, can cross up
- Hard Knockdown on air opponents
- Hit Detection: Mid
- Damage: 50
Special Moves
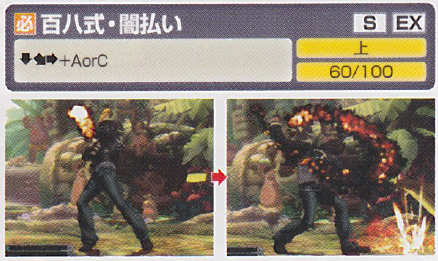
Yamibarai = (qcf+P) - A flame projectile that goes across the ground towards the other side of the screen, weak version slowly goes across the ground, the strong version goes much faster
(EX) = qcf+AC - Comes out very quickly making it very easy to combo into, knocks opponent down
- Super Cancellable on hit, need to be close
- Hit Detection: Low
- Damage: 60/100
Oniyaki = (dp+P) - An uppercut imbued with flames, has a wide hitbox so it punishes a lot of jump-ins (and some pokes) easily, weak version does one hit while the strong version does 3 hits, both versions make him rise into the air in a diagonal fashion, both versions can be drive/super canceled on the first hit
(EX) = dp+AC - Rises into the air vertically instead of diagonally, also has a vacuum effect on hit pulling them into the uppercut, has more invincibility/auto-guard and does 4 hits
- Drive/Super Cancellable
- Hit Detection: High
- Damage: 55+25/80+25x2/70+20x9
Kotokskio = (hcb+K) - Rushing elbow to grab attack, very quick and has lower body invincibility at start-up, works well after most normals and juggle attacks, weak version goes about 75% of the screen and has good recovery, strong version goes full-screen
(EX) = hcb+BD close - Changes the properties to a 1F command grab
- Drive/Super Cancellable on first hit
- Hit Detection: High/Close
- Damage: 30+135/180
Oborogurma = (rdp+K) - Quick jump kick(s), weak version does one hit and juggles the opponent, strong version does three hits slamming the opponent down on the third hit, both versions are unsafe when whiffed, weak version can be drive/super canceled on the first hit while the strong/EX version can be super canceled on the second hit
(EX) = rdp+BD - Mimics the strong version except with more invincibility at start-up, comes out quicker
- Super Cancellable on the first/second hit
- Hit Detection: High
- Damage: 40/40x2+70/60x2+100
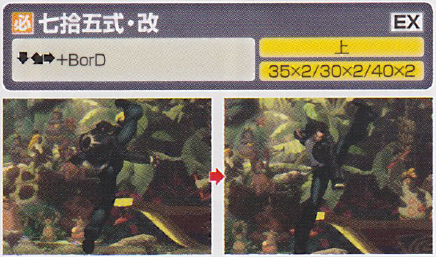
Kai = (qcf+K) - 2 jumping kick attacks, weak version simply knocks the opponent down but it's pretty safe, strong version launches the opponent higher into the air for a possible folow-up, can be super canceled upon second hit
(EX) = qcf+BD - Comes out much quicker making it easier to connect after his df+D
- Super Cancellable
- Hit Detection: High
- Damage: 35x2/30x2/40x2
Desperation Moves
Orochinagi = (qcf hcb+P) - Flaming wave attack, does a nice amount of chip damage, hold to delay, both the ground and EX versions can be max canceled on hit
Air Orochinagi = (qcf hcb+P in air) - Air flaming wave attack, mimics the ground version except done in the air now, pushes Kyo back slightly after activation
(EX) = qcf hcb+AC - 1F invincible start-up, more damage, and does three hits instead of one
- Max Cancellable on ground, on hit
- Hit Detection: High
- Damage: 210/120x3
Neomax
Ama No Murakumo (qcfx2 +AC) - Kyo throws a small flame across the screen and if it hits the opponent fire pillars rise from the ground hitting the opponent ten times, comes out very quickly making it useful to punish everything from fireballs to laggy moves, however if it misses Kyo stands in place for about a second and a half leaving him wide open to be punished.
- Hit Detection: High
- Damage: 45x10
Combos
(HD) - Activate Hyperdrive
(HDC) - Hyperdrive Cance
(DC) - Drive Cancel
(SC) - Super Cancel
(MC) - MAX Cancel
DMG - Damage
No Drive/No Meter
- cr. Bx1~2, st. B, hcb+K
- cr. B, cr. A, df+D (1), hcb+K
- cr. B, st. C, df+D (1), hcb+K
50% Drive/No Meter
- cr. Bx1~2, st. B, dp+C (1), (DC) qcf+D, hcb+D
- cr. Bx1~2, st. B, dp+C (1), (DC) qcf+D, rdp+D
- st. C, dp+C (1), (DC) qcf+D, hcb+D
- st. C, dp+C (1), (DC) qcf+D, rdp+D
- cr. B, cr. A, df+D (1), hcb+K, (DC) qcf+K, hcb+K
- cr. B, cr. A, df+D (1), hcb+K, (DC) qcf+K, rdp+D
100% Drive/No Meter
- cr. Bx2, st. B, dp+C (1), (DC) qcf+D, (dash forward) dp+A, (DC) qcf+D, hcb+K
- cr. Bx2, st. B, dp+C (1), (DC) qcf+D, (dash forward) dp+A, (DC) qcf+D, rdp+D
- st. C, dp+C (1), (DC) qcf+D, (dash forward) dp+A, (DC) qcf+D, hcb+K
- st. C, dp+C (1), (DC) qcf+D, (dash forward) dp+A, (DC) qcf+D, rdp+D
No Drive/1 Meter
- cr. B, cr. A, df+D (1), qcb hcf+P
- st. C, qcf+K, qcb hcf+P
- st. C, qcf+K, rdp+B, rdp+BD
50% Drive/1 Meter
- cr. Bx1~2, st. B, dp+C (1), (DC) qcf+D, qcb hcf+P
- st. C, dp+C (1), (DC) qcf+D, qcb hcf+P
- st. C, qcf+D, rdp+Bx2, (SC in air) qcb hcf+P
- st. C, qcf+D, rdp+D (2), (SC in air) qcb hcf+P
No Drive/2 Meters
- qcf+D, rdp+B, qcb hcf+AC
50% Drive/2 Meters
- cr. Bx1~2, st. B, dp+C (1), qcf+D, rdp+B, qcb hcf+AC
- st. C, dp+C (1), qcf+D, rdp+B, qcb hcf+AC
100%/2 Meters
- corner: qcf+D, rdp+B, (SC) qcb hcf+P, rdp+D (2), (SC in air) qcb hcf+P, hcb+K
No Drive/3 Meters
-corner: qcf+D, qcb hcf+P (in air), qcb hcf+AC
50% Drive/3 Meters
- corner: qcf+D, rdp+B, (SC in air) qcb hcf+P, (rdp+B), qcb hcf+AC
100% Drive/4 Meters
- qcf+D, rdp+B, (SC in air) qcb hcf+P, rdp+D (2), (SC in air) qcb hcf+P, qcb hcf+AC
HD Combos
***All combos below start with either standard HD activation, or combo HD activation***
- st. C, df+D (2), hcb+K, [HDC] dp+C (1), qcf+D, hcb+K, [HDC] rdp+B, dp+A, [HDC] rdp+B, dp+A, [HDC] rdp+B, dp+C, [HDC] rdp+B, dp+A, [HDC] qcf+D
- st. C, df+D (2), hcb+K, [HDC] dp+C (1), [HDC] qcf+D, (hcb+K, [HDC] rdp+B, dp+A, [HDC] qcf+D]xn
- corner: [dp+C (1), rdp+B]xn
- corner: [rdp+B, dp+C (1)]xn
- [rdp+B, dp+A, qcf+D]xn
- st. C, df+D (2), ([HDC] hcb+K, [HDC] dp+C)x4, qcf+D, hcb+K
- st. C, df+D (2), ([HDC] hcb+K, [HDC] dp+C)x4, qcf+D, rdp+D
1 Meter Additions
- qcb hcf+P
- [rdp+B, dp+AC]
- [rdp+B, rdp+BD]
- st. C, dp+C (1), qcf+D, rdp+B, (dp+C (1), [HDC] rdp+B)x3, dp+A, [HDC] rdp+B, (SC in air) qcb hcf+P, rdp+B, rdp+D
2 Meter Additions
- qcb hcf+AC
- st. C, dp+C (1), [HDC] qcf+D, rdp+B, [dp+C (1), (HDC) rdp+B]x2, (SC in air) qcb hcf+P, rdp+B, dp+C (1), (HDC) rdp+B, (SC in air) qcb hcf+P, rdp+B, dp+C
- st. C, dp+C (1), [HDC] qcf+D, rdp+B, dp+C (1), (HDC) rdp+B, (SC in air) qcb hcf+P, rdp+D (2), (SC in air) qcb hcf+P, hcb+K, [HDC] dp+A, [HDC] qcf+D, rdp+B, dp+C
- st. C, dp+C (1), [HDC] qcf+D, rdp+B, dp+C (1), (HDC) rdp+B, (SC in air) qcb hcf+P, rdp+D (2), (SC in air) qcb hcf+P, hcb+K, [HDC] dp+A, [HDC] qcf+D, rdp+B, rdp+D
3 Meter Additions
- qcb hcf+P (in air), qcb hcf+AC
- st. C, dp+C (1), [HDC] qcf+D, rdp+B, [dp+C (1), (HDC) rdp+B]x2, (SC in air) qcb hcf+P, rdp+B, dp+C (1), [HDC] rdp+B, [SC in air] qcb hcf+P, qcb hcf+P
- st. C, dp+C (1), [HDC] qcf+D, rdp+B, dp+C (1), (HDC) rdp+B, (SC in air) qcb hcf+P, rdp+D (2), (SC in air) qcb hcf+P, hcb+K, [HDC] dp+A, [HDC] qcf+D, qcb hcf+P (in air), rdp+B, dp+A
4 Meter Additions
- st. C, df+D (2), [(HDC) hcb+K, (HDC) dp+C (1)]x3, hcb+K, (SC) qcb hcf+P, (MC) qcfx2+AC
- st. C, dp+C (1), [HDC] qcf+D, rdp+B, (dp+C (1), [HDC] rdp+B)x2, (SC in air) qcb hcf+P, rdp+B, dp+C (1), [HDC] rdp+B, (SC in air) qcb hcf+P, qcb hcf+AC
- st. C, dp+C (1), [HDC] qcf+D, rdp+B, dp+C (1), [HDC] rdp+B, (SC in air) qcb hcf+P, rdp+D (2), (SC in air) qcb hcf+P, hcb+K, [HDC] rdp+B, (SC in air) qcb hcf+P, rdp+BD
5 Meter Additions
- st. C, df+D (2), [(HDC) hcb+K, (HDC) dp+C (1)]x3, hcb+K, (SC) qcb hcf+AC, qcfx2+AC
- st. C, dp+C (1), [HDC] qcf+D, rdp+B, dp+C (1), [HDC] rdp+B, (SC in air) qcb hcf+P, rdp+B, dp+C (1), [HDC] rdp+B, (SC in air) qcb hcf+P, rdp+D (2), (SC in air) qcb hcf+P, qcb hcf+AC
- st. C, dp+C (1), [HDC] qcf+D, rdp+B, dp+C (1), [HDC] rdp+B, (SC in air) qcb hcf+P, rdp+D (2), (SC in air) qcb hcf+P, hcb+K, (HDC) dp+A, (HDC) qcf+D, qcb hcf+P (in air), qcb hcf+AC
- st. C, dp+C (1), [HDC] qcf+D, rdp+B, dp+C (1), [HDC] rdp+B, (SC in air) qcb hcf+P, rdp+D (2), (SC in air) qcb hcf+P, hcb+K, (HDC) dp+A, (HDC) qcf+D, qcb hcf+P (in air), qcb hcf+AC
- st. C, dp+C (1), [HDC] qcf+D, rdp+B, dp+C (1), [HDC] rdp+B, (SC in air) qcb hcf+P, rdp+D (2), (SC in air) qcb hcf+P, hcb+K, (MC) qcfx2+AC
Corner
- cr. B, cr. A, df+D (1), qcf+K, rdp+B, dp+C
- st. C, df+D (1), qcf+K, rdp+B, dp+C
- cr. B, cr. A, df+D (1), qcf+K, rdp+B, dp+C (1), (DC) rdp+B, dp+C
- st. C, df+D (1), qcf+K, rdp+B, dp+C (1), (DC) rdp+B, dp+C
- cr. Bx2, st. B, df+D (1), qcf+K, rdp+B, [dp+C (1), (DC) rdp+B]x2, dp+C
- st. C, df+D (1) dp+C (1) qcf+K, rdp+B, [dp+C (1), (DC) rdp+B]x2, dp+C
- cr. B, cr. A, df+D (1), qcf+K, rdp+B, qcb hcf+P
- st. C, df+D (1), qcf+K, rdp+B, qcb hcf+P
- cr. B, cr. A, df+D (1), qcf+D, rdp+B, (SC in air) qcb hcf+P, rdp+B, dp+C
- cr. B, cr. A, df+D (1), qcf+D, rdp+B, (SC in air) qcb hcf+P, rdp+B, hcb+D
- st. C, df+D (1), qcf+D, rdp+B, (SC in air) qcb hcf+P, rdp+B, dp+C
- st. C, df+D (1), qcf+D, rdp+B, (SC in air) qcb hcf+P, rdp+B, hcb+D
- cr. B, cr. A, df+D (1), qcf+D, qcb hcf+P (in air), rdp+B, dp+A, (DC) qcf+D, rdp+B, dp+C
- cr. B, cr. A, df+D (1), qcf+D, qcb hcf+P (in air), rdp+B, dp+A, (DC) qcf+D, rdp+D
- st. C, df+D (1), qcf+D, qcb hcf+P (in air), rdp+B, dp+A, (DC) qcf+D, rdp+B, dp+C
- st. C, df+D (1), qcf+D, qcb hcf+P (in air), rdp+B, dp+A, (DC) qcf+D, rdp+D
- qcf+D, rdp+Bx2, (SC) qcb hcf+P, rdp+B, dp+AC
- qcf+D, rdp+Bx2, (SC) qcb hcf+P, rdp+B, qcb hcf+P
Tips
Miscellaneous
Character Sprite
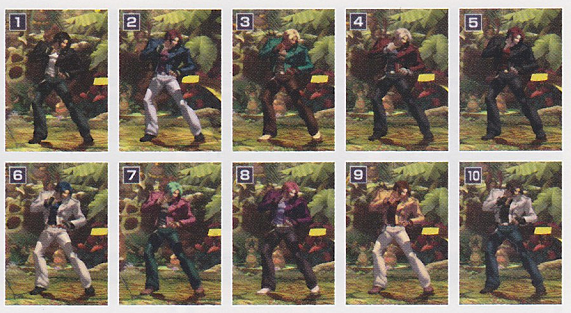
Colors
Other
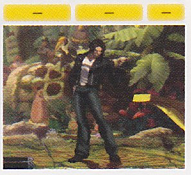
Taunt
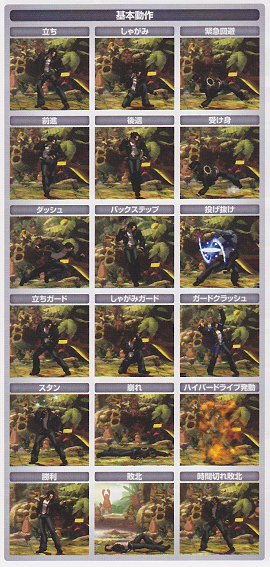
First Row: Standing/Crouching/Evasive Roll
Second Row: Walking (forward/Walking (Backward)/Safe Roll
Third Row: Running/Back Step/Throw Break
Fourth Row: Standing Guard/Crouching Guard/Guard Crush
Fifth Row: Dizzy/Downed/Hyper Drive Activation
Last Row: Win Pose/Knock Out/Time Up Pose
Links & References
Technical Reference


