Difference between revisions of "The King of Fighters XIII/Duo Lon"
(→Far) |
|||
| Line 314: | Line 314: | ||
==Mid range== | ==Mid range== | ||
This is where Duo Lon is most comfortable at. Duo Lon can continue to annoy his opponent with qcb~f+B pokes but now you can add f+A in front of it making a cool 2-hit combo. However, do not get too predictable as the opponent is in range for them to punish Duo Lon with a jump in if the f+A is mistimed. If they jump in on Duo Lon, an early d.C (it does have a slower start up than it looks so be careful) is a good anti air canceled into qcb+A (which is still punishable so keep that in mind) or a qcf+B teleport or dash in d.B. | This is where Duo Lon is most comfortable at. Despite Duo Lon having a good rushdown game, he excels at this distance because of his mix ups and also because his rekkas are punishable. Duo Lon can continue to annoy his opponent with qcb~f+B pokes but now you can add f+A in front of it making a cool 2-hit combo. However, do not get too predictable as the opponent is in range for them to punish Duo Lon with a jump in if the f+A is mistimed. If they jump in on Duo Lon, an early d.C (it does have a slower start up than it looks so be careful) is a good anti air canceled into qcb+A (which is still punishable so keep that in mind) or a qcf+B teleport or dash in d.B. | ||
Although it takes some practice, hop B (press it as early as possible) --> f.B (cancel it as late as possible) stun them long enough for a ground combo. Duo Lon's jump C is a great air-to-air and his jump D is a grat air-ground attack so use them accordingly. If Duo Lon gets them in a block stun with either a air f+B or ground f+A, teleport behind or in front (qcb D or B respectively) to add more mix up pressure. To be continued. | Although it takes some practice, hop B (press it as early as possible) --> f.B (cancel it as late as possible) stun them long enough for a ground combo. Duo Lon's jump C is a great air-to-air and his jump D is a grat air-ground attack so use them accordingly. If Duo Lon gets them in a block stun with either a air f+B or ground f+A, teleport behind or in front (qcb D or B respectively) to add more mix up pressure. To be continued. | ||
Revision as of 21:41, 1 October 2011
Gameplay Overview
Starts at 2m37 (http://www.youtube.com/watch?v=gFX8UBiyo8w#t=2m37)
Gameplay Notes
Duo Lon is one of the more versatile players in the XIII roster. His gameplay revolves around his fast mix up with Rekkas (Suteki Juryu, qcf+P x3) and his teleports. With the introduction of Ex specials in XIII, his (air) f+A and (air) f+B command/special attack become very useful for setting up mixups. He's typically a rush down character but at the same time he can zone his opponent well with his f+A ground and air version. His f+B also prevents opponents from turtling him from a far.
Despite having overall a low damage output and losing his other variation of Rekkas from '03 and XI he's still a very capable silent assasin like his official nickname suggests.
Pros
-Good Mixups in general
-Fast
-Builds meter relatively fast
-Decent keep away game
-Good rush down game
-1-frame Neo Max command throw
-f.A --> f.B link good to keep opponents grounded
-j.B --> air.f+B adds great pressure and is also good for mixups
Cons
-Low damage
-Rekkas not safe on block
-Limited move set makes him somewhat predictable
-Limited HD combos due to limited move set
Normals
Standing
st. A
- Cancellable / Chain-able
- Hit Detection: High
- Damage: 25
st. B
- Cancellable
- Hit Detection: Low
- Damage: 30
st. C
- Cancellable
- Hit Detection: High
- Damage: 70
st. D
- Can't be cancelled
- Hit Detection: High
- Damage: 70
cl. D
- Cancellable
- Hit Detection: High
- Damage: 70
Crouching
cr. A
- Cancellable / Chain-able
- Hit Detection: High
- Damage: 25
cr. B
- Chain-able
- Hit Detection: Low
- Damage: 30
cr. C
- Cancellable
- Hit Detection: High
- Damage: 70
cr. D
- Can't be cancelled
- Hit Detection: Low
- Damage: 80
Jumping
j. A
- Cancellable
- Hit Detection: Mid
- Damage: 45 (40)
j. B
- Cancellable
- Hit Detection: Mid
- Damage: 45 (40)
j. C
- Cancellable
- Hit Detection: Mid
- Damage: 72 (70)
j. D
- Can't be cancelled
- Hit Detection: Mid
- Damage: 70 (68)
Blowback Attack
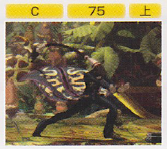
CD
- Cancellable
- Hit Detection: High
- Damage: 75
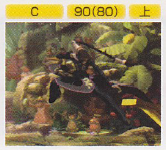
j. CD
- Cancellable
- Hit Detection: High
- Damage: 90 (80)
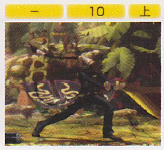
GCCD
- Can't be cancelled
- Hit Detection: High
- Damage: 10
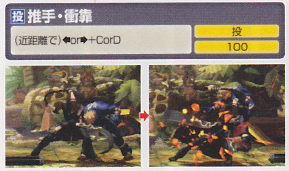
Throw
Suite Shikon = (b/f+C/D)
- Can be broken
- Hit Detection: Throw
- Damage: 100
Special Moves
Genmu Ken = (f+A)
(EX) = f+AC
- Cancellable
- Hit Detection: High
- Damage: 40; EX Damage: 30 x 2
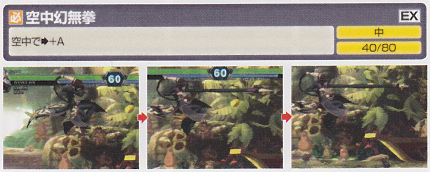
Genmu Ken Air = (f+A) in air
(EX) = f+AC in air
- Hit Detection: Mid
- Damage: 40; EX Damage: 80
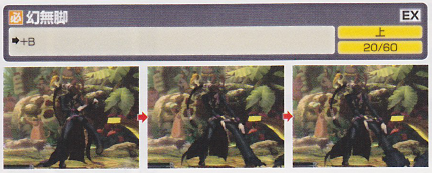
Genmu Kyaku = (f+B)
(EX) = f+BD
- Hit Detection: High
- Damage: 20; EX Damage: 60
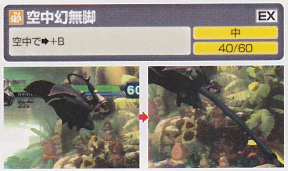
Genmu Kyaku Air = (f+B) in air
(EX) = f+BD in air
- Hit Detection: Mid
- Damage: 40; EX Damage: 60
Hike Kyaku Zen = (qcf+K)
(EX) = qcf+BD
- No Damage
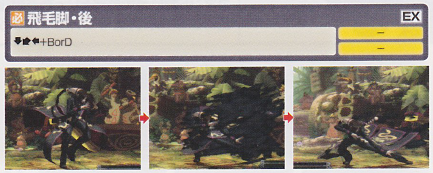
Hike Kyaku Ushiro = (qcb+K)
(EX) = qcb+BD
- No Damage
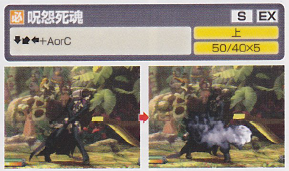
Juon Shikon = (qcb+P)
(EX) = qcb+AC
- Super-Cancellable
- Hit Detection: High
- Damage: 50; EX Damage: 40 x 5
Suteki Juryu = (qcf+P) x3
(EX) = qcf+AC x3
- Drive- / Super-Cancellable
- Hit Detection: High
- Damage: 30, 30, 40; EX Damage: 60, 30, 40
Desperation Moves
Genmu Bakko Shikon = (qcb hcf+P)
(EX) = qcb hcf+AC
- MAX Cancellable
- Hit Detection: High
- Damage: 200; EX Damage: 60 x 3, 140
Neomax
Juon Ko Ha = (hcbx2+AC)
- Hit Detection: Throw (/ High if MAX canceled into)
- Damage: 10 x 40
Combos
No Drive Gauge
No Power Gauge
- [cr.B, cr.A / st.C, f+A], (qcf+P)x3, qcf+K, st.C/D (reset)
1 Power Gauges
- j.CD, f+AC in air
- [cr.B, cr.A / st.C, f+A], qcb hcf+P
2 Power Gauges
- [cr.B, cr.A / st.C, f+A], (qcf+P)x3, qcf+K, qcb hcf+AC
3 Power Gauges
- f+BD, qcb hcf+AC
50% Drive Gauge
1 Power Gauge
- [cr.B, cr.A / st.C, f+A], (qcf+P)x2, (DC) f+AC, (cr.A,) st.C, (qcf+P)x3
- [cr.B, cr.A / st.C, f+A], (qcf+P)x2, (DC) (qcf+AC)x3, qcf+D, s.A
Corner
- [cr.B, cr.A / st.C, f+A], (qcf+P)x3, (DC) qcb+A, qcb hcf+P
2 Power Gauges
- [cr.B, cr.A / st.C, f+A], (qcf+P)x2, (DC) (qcf+AC)x3, qcf+D, qcb hcf+P
3 Power Gauges
- [cr.B, cr.A / st.C, f+A], (qcf+P)x2, (DC) (qcf+AC)x3, qcf+D, qcb hcf+AC
HD Combos
NOTE: All combos listed below start with st/cr.X or anything that properly linksinto the rest of the combo
Legend
① = [(qcf+P)x2, (HDC) f+A]*N
1 Power Gauge
- st.C, f+A, ①, (qcf+P)x2, (DC) qcb+P (HD end), qcb hcf+P
2 Power Gauges
- st.C, f+A, ①, (qcf+P)x3, (DC) qcf+D (HD end), qcb hcf+AC
3 Power Gauges
- st.C, f+A, ①, (qcf+P)x2, (SC) hcbx2+AC
4 Power Gauges
- st.C, f+A, ①, (qcf+P)x2, (SC) qcb hcf+P, (MC) hcbx2+AC
5 Power Gauges
- st.C, f+A, ①, (qcf+P)x2, (SC) qcb hcf+AC, (MC) hcbx2+AC
Strategies
Far
Duo Lon does not have too many tools to play with in this range, but if the opponent is not going to hyper jump in Duo Lon can use his qcb+P projectile as tool to advance in or simply just to see what the opponent does. Although it has incredibly bad start up, once out, the qcb+P (particularly the C version) lingers for quite some time allowing Duo Lon to chase after it allowing for some good pressure strategies. If they jump at Duo Lon, hop f+A will poke out any jumper due to it's range. If they don't do anything, annoy your opponent with qcb K~f+B and poke him/her out. It's a good habit to cancel the f+B off the back teleport just in case the opponent jumps in as well to keep good distance away from them. If they are advancing too much for comfort, jump back air.f+B and air.f+A does wonders.
Mid range
This is where Duo Lon is most comfortable at. Despite Duo Lon having a good rushdown game, he excels at this distance because of his mix ups and also because his rekkas are punishable. Duo Lon can continue to annoy his opponent with qcb~f+B pokes but now you can add f+A in front of it making a cool 2-hit combo. However, do not get too predictable as the opponent is in range for them to punish Duo Lon with a jump in if the f+A is mistimed. If they jump in on Duo Lon, an early d.C (it does have a slower start up than it looks so be careful) is a good anti air canceled into qcb+A (which is still punishable so keep that in mind) or a qcf+B teleport or dash in d.B. Although it takes some practice, hop B (press it as early as possible) --> f.B (cancel it as late as possible) stun them long enough for a ground combo. Duo Lon's jump C is a great air-to-air and his jump D is a grat air-ground attack so use them accordingly. If Duo Lon gets them in a block stun with either a air f+B or ground f+A, teleport behind or in front (qcb D or B respectively) to add more mix up pressure. To be continued.
Miscellaneous
Character Sprite
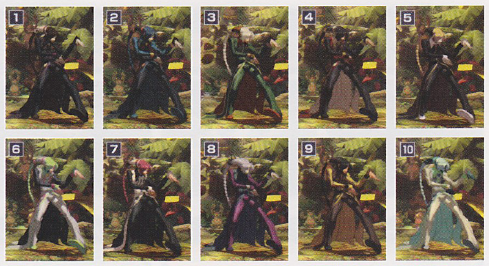
Colors
Other
Taunt
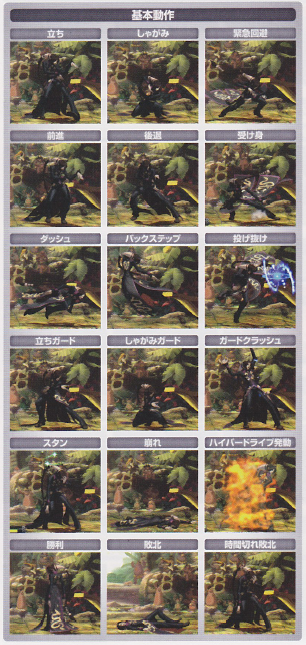
First Row: Standing/Crouching/Evasive Roll
Second Row: Walking (forward/Walking (Backward)/Safe Roll
Third Row: Running/Back Step/Throw Break
Fourth Row: Standing Guard/Crouching Guard/Guard Crush
Fifth Row: Dizzy/Downed/Hyper Drive Activation
Last Row: Win Pose/Knock Out/Time Up Pose
Links & References
Technical Reference
http://www.youtube.com/watch?v=gFX8UBiyo8w&t=2m40s
Discussion Threads
Discuss at Dream Cancel


