Difference between revisions of "The King of Fighters XIII/K'"
| Line 6: | Line 6: | ||
=Gameplay Overview= | =Gameplay Overview= | ||
To put it bluntly, his play-style is very versatile like Kyo Kusanagi except | To put it bluntly, his play-style is very versatile, like Kyo Kusanagi, except much better. He has the combined zoning prowess of both King and Athena, except without the crippling recovery. He has immense juggle potential like Ash in Sans-Cullote mode, except he doesn't have to sacrifice all the meter or be in the corner. He has all the anti-air capabilities of Leona/Ryo and Robert and still follow-up with an attack without drive cancelling. He can rush down like Takuma and Shen but with better pokes. He can attack really fast and link combos together with ease like Yuri and Kim. He can lock the opponent down in the corner like Raiden except without burning all the extra meter. K' is "A Beast of Prey". | ||
==Gameplay Notes== | ==Gameplay Notes== | ||
| Line 40: | Line 40: | ||
[[Image:Far_Normals_9.png]] | [[Image:Far_Normals_9.png]] | ||
'''st. A''' - A simple punch attack, really fast, nice range | '''st. A''' - A simple punch attack, really fast, nice range. Great for stopping jump-ins if timed correctly. Doesn't have much combo use, but could probably get away with using it as a quick fake-out by whiff cancelling it before an opponent runs up. | ||
- Chain/Cancel-able, Far and Close | - Chain/Cancel-able, Far and Close | ||
| Line 53: | Line 53: | ||
'''st. B''' - Low kick, | '''st. B''' - Low kick. Actually, despite looking like a low kick it's actually aimed high. Has good range for a far normal. Decent start-up, possibly good for pokes and other strategies/tactics to annoy the opponent. | ||
- Hit Detection: High | - Hit Detection: High | ||
| Line 62: | Line 62: | ||
'''st. C''' - A right hook aimed at the opponents face | '''st. C''' - A right hook aimed at the opponents face. Decent reach, decent recovery for a far strong normal. It seems rather promising, good for that extra boost as getting them into the corner. | ||
- | - Cancellable | ||
- Hit Detection: High | - Hit Detection: High | ||
| Line 75: | Line 75: | ||
'''st. D''' - A high kick, a really high kick, runs the same properties as his Far C except it goes high meaning it can be used as an anti-air when timed correctly | '''st. D''' - A high kick, a really high kick, runs the same properties as his Far C except it goes high; meaning it can be used as an anti-air when timed correctly. It isn't cancellable (except in HD mode). | ||
- Hit Detection: High | - Hit Detection: High | ||
| Line 88: | Line 88: | ||
[[Image:Close_Normals_9.png]] | [[Image:Close_Normals_9.png]] | ||
'''cl. C''' - A punch aimed at the gut, does two hits, comes out fast, good recovery | '''cl. C''' - A punch aimed at the gut, does two hits, comes out fast, good recovery. Yhe combo starter of choice as it combos into just about everything if not everything. | ||
- | - Cancellable | ||
- Hit Detection: High | - Hit Detection: High | ||
| Line 101: | Line 101: | ||
'''cl. D''' - | '''cl. D''' - Similar to close C, more range, slightly slower, and hits low. | ||
- | - Cancellable | ||
- Hit Detection: Low | - Hit Detection: Low | ||
| Line 117: | Line 117: | ||
[[Image:Crouch_Normals_9.png]] | [[Image:Crouch_Normals_9.png]] | ||
'''cr. A''' - Crouching punch, | '''cr. A''' - Crouching punch, similar to stand A. Useful for chaining together lights into combos. Good range and recovery as expected, hits high. | ||
- Chain/ | - Chain/Cancellable | ||
- Hit Detection: High | - Hit Detection: High | ||
| Line 128: | Line 128: | ||
'''cr. B''' - A (really) low kick | '''cr. B''' - A (really) low kick. This is the combo starter from crouching normals. This move is good, really good. Great range/recovery, good start-up, and amazing combo opportunity. | ||
- Chain/ | - Chain/Cancellable | ||
- Hit Detection: Low | - Hit Detection: Low | ||
| Line 139: | Line 139: | ||
'''cr. C''' - | '''cr. C''' - An uppercut punch, another good combo starter from crouch normals. Comes out a little slow so it requires some timing to use an anti-air. Good combos options when used after a jump-in. | ||
- | - Cancellable | ||
- Hit Detection: High | - Hit Detection: High | ||
| Line 152: | Line 152: | ||
'''cr. D''' - A sweep kick used to trip | '''cr. D''' - A sweep kick used to trip opponents, slow recovery. Whiff cancellable. | ||
- Whiff | - Whiff cancellable | ||
- Hit Detection: Low | - Hit Detection: Low | ||
| Line 162: | Line 162: | ||
- Combos from: Late jump-ins because it's a pretty slow move | - Combos from: Late jump-ins because it's a pretty slow move | ||
- Combos into: Whiff canceling will allow it to be | - Combos into: Whiff canceling will allow it to be comboed into the majority of his EX attacks and anything else that's very fast | ||
| Line 169: | Line 169: | ||
[[Image:Jump_Normals_9.png]] | [[Image:Jump_Normals_9.png]] | ||
'''j. A''' - A jumping light punch | '''j. A''' - A jumping light punch, mediocre range, so it be used as an air-to-air. Can combo into his Air Minutes Spike. | ||
- | - Cancellable | ||
- Hit Detection: Mid | - Hit Detection: Mid | ||
| Line 180: | Line 180: | ||
'''j. B''' - A jumping knee attack | '''j. B''' - A jumping knee attack. Comes out fast, but still the range isn't much better than j.A. | ||
- Hit Detection: Mid | - Hit Detection: Mid | ||
| Line 187: | Line 187: | ||
'''j. C''' - Jumping strong punch | '''j. C''' - Jumping strong punch. Works well with pressure when your opponent is in the corner. It's a meaty jump-in and crosses-up. Also good for short hop blockstrings. | ||
- | - Cancellable | ||
- Hit Detection: Mid | - Hit Detection: Mid | ||
| Line 198: | Line 198: | ||
'''j. D''' - Jumping overhead kick | '''j. D''' - Jumping overhead kick, great range, good recovery/start-up. Perfect for block strings and corner pressure. Huge amount of hit-stun. The hit-box moves in a way that it aims for the opponent's hitbox regardless of where you jump-in. When used as a meaty jump-in against an opponent in the corner, EX Eins Trigger will punish an opponent who Guard Cancel Rolls. | ||
- | - Cancellable | ||
- Hit Detection: Mid | - Hit Detection: Mid | ||
| Line 215: | Line 215: | ||
[[Image:CD_9.png]] | [[Image:CD_9.png]] | ||
'''CD''' - An angry "piss off" kick to the face | '''CD''' - An angry "piss off" kick to the face. Decent speed and range. Use at mid range or whiff cancel. Whiff canceling allows to be comboed into just about anything with a fast start-up. Can be used after Eins Trigger + Second Shell juggle when in the corner. | ||
- Whiff/ | - Whiff/Cancellable | ||
- Hit Detection: High | - Hit Detection: High | ||
| Line 225: | Line 225: | ||
- Combos from: EX/Eins Trigger + Second Shell (corner) | - Combos from: EX/Eins Trigger + Second Shell (corner) | ||
- Combos into: Whiff | - Combos into: Whiff cancellable into EX/Eins Trigger+Second Shoot/Shell/Blackout, EX Minutes Spike+Narrow Spike, EX/Crow Bites+Plus, Blackout, Heat Drive, EX/Chain Drive | ||
[[Image:JCD_9.png]] | [[Image:JCD_9.png]] | ||
'''j. CD''' - K' does a long ranged kick to whatever is below his boot | '''j. CD''' - K' does a long ranged kick to whatever is below his boot. Good priority and range. Cancellable into Air EX/Minutes Spike. When used on counter hit, puts the opponent into a juggled state for a follow-up attack. | ||
- Cancel-able | - Cancel-able | ||
| Line 245: | Line 245: | ||
[[Image:GCCD_9.png]] | [[Image:GCCD_9.png]] | ||
'''GCCD''' - His old pre-KOF 2003 CD attack | '''GCCD''' - His old pre-KOF 2003 CD attack. | ||
- Hit Detection: High | - Hit Detection: High | ||
| Line 255: | Line 255: | ||
[[Image:Spot_Pile.png]] | [[Image:Spot_Pile.png]] | ||
'''Spot Pile = (b/f+C/D)''' - K' grabs his opponent | '''Spot Pile = (b/f+C/D)''' - K' grabs his opponent, bends them over with one hand, then uses his other arm to elbow them to the ground. | ||
- Can be broken | - Can be broken | ||
| Line 267: | Line 267: | ||
[[Image:One_Inch.png]] | [[Image:One_Inch.png]] | ||
'''One Inch Punch = (f+A)''' - K' steps forward then does a thrust punch to the | '''One Inch Punch = (f+A)''' - K' steps forward then does a thrust punch to the opponent's stomach. Decent range. Too slow to be used on its own without a special set-up, like after his EX Eins Trigger + Second Shell juggle. Using it after that can allow you to cancel it into either of his DM's. When used on its own, and near the opponent, this move will auto-guard crush upon hit. If used after a strong normal, it will cause a crumple state. | ||
- | - Cancellable | ||
- Hit Detection: High | - Hit Detection: High | ||
| Line 283: | Line 283: | ||
[[Image:Iron_Trigger.png]] | [[Image:Iron_Trigger.png]] | ||
'''Eins Trigger = (qcf+P)''' - K' moves his right arm in front of him and forms a circular flame | '''Eins Trigger = (qcf+P)''' - K' moves his right arm in front of him and forms a circular flame. Comes out fast, has good recovery, and can be used during blockstrings without the follow-up attack. It can also be used to zone the opponent out when they're trying to jump-in or throwing a projectile. Also good for safely building meter when on the other side of the screen. Weak version comes out faster than the strong version. | ||
(EX) = qcf+AC - Does more hits and more damage, also carries these properties over to the follow-up move whether it's Shoot/Shell/ or blackout | (EX) = qcf+AC - Does more hits and more damage, also carries these properties over to the follow-up move whether it's Shoot/Shell/ or blackout | ||
| Line 298: | Line 298: | ||
[[Image:Seconnd_Shoot.png]] | [[Image:Seconnd_Shoot.png]] | ||
'''∟ Second Shoot = (f+B)''' - After K' forms the flame in his right hand he kicks it toward his opponent | '''∟ Second Shoot = (f+B)''' - After K' forms the flame in his right hand he kicks it toward his opponent. Long range zoning tool of choice. Can be used in block strings, second shell follow-up attacks, building meter, cancelling out other projectiles, or to just keep your opponent out of your face. Does not knock down. | ||
'''EX Second Shoot = (f+B)''' - When used after EX Eins Trigger the properties change slightly | '''EX Second Shoot = (f+B)''' - When used after EX Eins Trigger the properties change slightly. This move does more damage, travels faster, and goes through normal projectiles. Knocks down on hit. | ||
- Hit Detection: High | - Hit Detection: High | ||
| Line 311: | Line 311: | ||
[[Image:Second_Shell.png]] | [[Image:Second_Shell.png]] | ||
'''∟ Second Shell = (f+D)''' - After K' forms the flame in his right hand he kicks high into the air making flames come out at the top of his boot launching the opponent into the air | '''∟ Second Shell = (f+D)''' - After K' forms the flame in his right hand, he kicks high into the air making flames come out at the top of his boot launching the opponent into the air. Anti-air/jump-in zoning tool of choice. It is also the preferred combo start of choice whether using low crouch normals or standing close normals. Causes juggle state. | ||
'''EX Second Shell = (f+D)''' - When used after EX Eins Trigger the properties change just a bit | '''EX Second Shell = (f+D)''' - When used after EX Eins Trigger the properties change just a bit: more damage, more hits, and launches the opponent higher into the air, making it easier to follow-up with an attack. | ||
- Hit Detection: High | - Hit Detection: High | ||
| Line 326: | Line 326: | ||
[[Image:Iron_Trigger,_Blackout.png]] | [[Image:Iron_Trigger,_Blackout.png]] | ||
'''∟ Blackout = (b+K)''' - K' slips into the shadows to quickly and stealthy run up or get behind his opponent | '''∟ Blackout = (b+K)''' - K' slips into the shadows to quickly and stealthy run up or get behind his opponent. Can be used for faking out the opponent, especially when in the corner. Works very well to run up on the opponent, then immediately go for the crouch B because they may not react fast enough | ||
- Combos from: EX/Eins Trigger move starter | - Combos from: EX/Eins Trigger move starter | ||
| Line 333: | Line 333: | ||
[[Image:Blackout.png]] | [[Image:Blackout.png]] | ||
'''Blackout = (qcf+K)''' - K' slips into the shadows to quickly and stealthy run up or get behind his opponent | '''Blackout = (qcf+K)''' - K' slips into the shadows to quickly and stealthy run up or get behind his opponent. Weak version makes K' travel about 1/4 of the screen, while the strong version makes him travel about 90% of the screen. If the opponent is any closer, K' will go past them. Neither version makes K' invincible so he is vulnerable to attacks during this move. Use it to quickly avoid jump-ins. | ||
(EX) = qcf+BD - Faster start-up and recovery, goes about as much distance as the A version | (EX) = qcf+BD - Faster start-up and recovery, goes about as much distance as the A version. K' is also completely invincible while this move is active. Perfect to use to get out of the corner. | ||
- Combos from: Strong Normals, Eins Trigger move starter | - Combos from: Strong Normals, Eins Trigger move starter | ||
| Line 342: | Line 342: | ||
[[Image:Minutes_Spike.png]] | [[Image:Minutes_Spike.png]] | ||
'''Minute Spike = (qcb+K)''' - K' jumps forward to do a flying kick to hit the opponent in the face | '''Minute Spike = (qcb+K)''' - K' jumps forward to do a flying kick to hit the opponent in the face. Extremely good for carrying the opponent to the corner. Use it before Crow Bites but after Eins Trigger + Second Shell. Weak version goes a short distance, while the strong version goes much farther. | ||
(EX) = qcb+BD - Gains "Guard Point" properties | (EX) = qcb+BD - Gains "Guard Point" properties, will auto-guard then bypass any normal that may be used to counter-attack this move at start-up. | ||
- Combos into: Narrow Spike, EX Air Minutes Spike | - Combos into: Narrow Spike, EX Air Minutes Spike | ||
| Line 351: | Line 351: | ||
'''Air Variant (qcb+K)''' in air - K' jumps forward to do a flying kick to hit the opponent in the face | '''Air Variant (qcb+K)''' in air - K' jumps forward to do a flying kick to hit the opponent in the face. Good start-up but mediocre recovery if you whiff it. | ||
(EX) qcb+BD in air - Invincible from start to recovery, and does more damage. | (EX) qcb+BD in air - Invincible from start to recovery, and does more damage. | ||
- Combos from: His jump A/C/D, JCD, and regular Minutes Spike if drive | - Combos from: His jump A/C/D, JCD, and regular Minutes Spike if drive cancelled. | ||
- Drive | - Drive Cancellable | ||
- Hit Detection: High | - Hit Detection: High | ||
| Line 367: | Line 367: | ||
[[Image:Narrow_Spike.png]] | [[Image:Narrow_Spike.png]] | ||
'''∟ Narrow Spike = (qcb+K)''' ground only - After K' jumps forward doing a flying kick he slides on the ground to kick the opponent in the shins | '''∟ Narrow Spike = (qcb+K)''' ground only - After K' jumps forward doing a flying kick, he slides on the ground to kick the opponent in the shins. Comes out pretty fast along with good recovery, making it somewhat safe depending on which version you use and where your opponent is. Strings combos together very well, Drive and Super Cancellable on hit. | ||
(EX) = qcb+BD - Significantly faster recovery | (EX) = qcb+BD - Significantly faster recovery. | ||
- Drive/Super | - Drive/Super Cancellable | ||
- Hit Detection: Low | - Hit Detection: Low | ||
| Line 379: | Line 379: | ||
- Combos from: EX/Miuntes Spike | - Combos from: EX/Miuntes Spike | ||
- Combos into: EX/Crow Bites when in the corner, when drive | - Combos into: EX/Crow Bites when in the corner, when drive cancelled EX/Minutes Spike, can also be Super Canceled into his Heat Drive and EX/Chain Drive. | ||
[[Image:Crow_Bites.png]] | [[Image:Crow_Bites.png]] | ||
'''Crow Bites = (dp+P)''' - K' does a rising uppercut with flames coming out at the end of his glove launching the opponent into the air | '''Crow Bites = (dp+P)''' - K' does a rising uppercut with flames coming out at the end of his glove, launching the opponent into the air. Weak version does 1 hit and comes out fast, strong version does 3 hits and has a much slower start-up. Drive and super cancellable on the first hit. | ||
(EX) = dp+AC - Complete invincibility through out the whole move, more damage, does 11 hits, mimics his Heavens Drive DM from KOF XI. | (EX) = dp+AC - Complete invincibility through out the whole move, more damage, does 11 hits, mimics his Heavens Drive DM from KOF XI. | ||
- Drive/Super | - Drive/Super Cancellable | ||
- Hit Detection: High | - Hit Detection: High | ||
| Line 401: | Line 401: | ||
[[Image:Crow_Bites_Plus.png]] | [[Image:Crow_Bites_Plus.png]] | ||
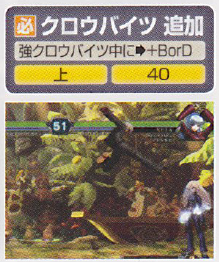
'''∟ Crow Bites Plus = (f+K)''' (C version only) - After K' launches the opponent into the air from Crow Bites, Plus will add an extra hit to knock the opponent down | '''∟ Crow Bites Plus = (f+K)''' (C version only) - After K' launches the opponent into the air from Crow Bites, Plus will add an extra hit to knock the opponent down. This move activates automatically during EX Crow Bites. | ||
- Hit Detection: High | - Hit Detection: High | ||
| Line 413: | Line 413: | ||
[[Image:Heat_Drive.png]] | [[Image:Heat_Drive.png]] | ||
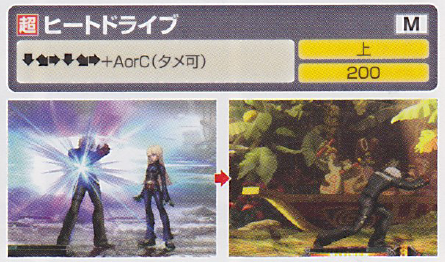
'''Heat Drive = (qcfx2+P)''' hold to delay - K' holds up his right hand and forms a flame, then | '''Heat Drive = (qcfx2+P)''' hold to delay - K' holds up his right hand and forms a flame, then quickly dashes past opponent launching them high up into the air. Very fast from start to finish. The dash makes K' go through projectiles. Switches sides with opponent after the initial hit. Can also be MAX canceled into Hyper Chain Drive after you hit the opponent but you must be in HD mode. Holding down whatever punch button you used to activate the move will delay it for a brief period, the holding time is about 3 seconds. | ||
- Max Cancel-able | - Max Cancel-able | ||
| Line 428: | Line 428: | ||
[[Image:Chain_Drive.png]] | [[Image:Chain_Drive.png]] | ||
'''Chain Drive = (qcf hcb+P)''' - K' tosses his a flame imbued sunglasses toward his opponent and if it hits | '''Chain Drive = (qcf hcb+P)''' - K' tosses his a flame imbued sunglasses toward his opponent and, if it hits, he quickly dashes forward elbowing them in the gut. Time stops for a brief moment while K' takes his time to put his shades back on then proceeds to do a long combo consisting of multiple hits before he knocks them to the ground with a One Inch attack. No real difference between the weak/strong versions. MAX cancel-able on the 12th hit when in HD mode. The unique thing about the start-up is when K' throws the flamed sunglasses it can go through projectiles because it has a guard shield of two hits. If the opponent throws out a projectile this move will punish it. This move can also be used as a pseudo anti-air. | ||
(EX) = qcf hcb+AC - Does more hits (23), ends the combo with a Heat Drive | (EX) = qcf hcb+AC - Does more hits (23), ends the combo with a Heat Drive. Completely invincible and faster start-up. | ||
- Max Cancel-able | - Max Cancel-able | ||
| Line 445: | Line 445: | ||
[[Image:Hyper_Chain_Drive.png]] | [[Image:Hyper_Chain_Drive.png]] | ||
'''Hyper Chain Drive = (hcbx2+AC)''' - K' punches the ground to make a volcano of flames rise from below him | '''Hyper Chain Drive = (hcbx2+AC)''' - K' punches the ground to make a volcano of flames rise from below him. Fast start-up, very good vertical range, meaning it can stuff just about any anti-air or jump-in the opponent may try to throw out. Combos from either of his DM's. Works really well in the corner. When used to KO the opponent K' emerges from the flames holding his gloved hand that is now cracked and almost falling off. | ||
- Hit Detection: High | - Hit Detection: High | ||
| Line 578: | Line 578: | ||
==Far Range== | ==Far Range== | ||
*K' can play it safe from this range | *K' can play it safe from this range. He can easily anticipate and zone out projectiles that are thrown his way with EX/Eins + Shoot. However, therein lies the problem. From this range K' can only really zone. K' can build meter but only if the Eins + Shell hits the opponent (guard or not) otherwise it won't work. The range issue can be remedied by using moves like Eins + Blackout to quickly dash across the screen and into the opponent's face, then follow up with a crouch B combo starter. If there is have meter to burn, K' can also get by by using EX Minutes + Narrow Spike since it goes a good distance and it's much more safe on block than the weak/strong versions. EX attacks aren't of much use from this distance so stick to zoning/building meter. Drive/super canceling is out of the question. | ||
==Mid Range== | ==Mid Range== | ||
*K' isn't as proficient with special moves here because a whiffed Eins Trigger + Shell is likely to get | *K' isn't as proficient with special moves here because a whiffed Eins Trigger + Shell is likely to get punished. K' can still get away with playing it safe though. Using moves such as Eins + Weak Blackout can help out from time to time when trying to get behind the opponent. As for offensive options, s.A as an anti-air poke, j.B/C/D for jump-in purposes, j.CD for that extra push, and crouch B will be his main combo starter. As mentioned before, whiffing Eins + Shell will get punished but is still usable. Timing is required, never just thrown randomly. Minutes + Weak Narrow Spike can also be used efficiently within this range. Crow Bites can work too, but be wary of punishes. This is also where K's DMs come into play. Chain Drive works after Eins + Shell, but the main DM of choice is Heat Drive because it plows right through the opponent after a juggle attack. EX attacks are of more use here but not of high priority. Super/drive cancelling options will come up from time to time. | ||
==Close Range== | ==Close Range== | ||
*This is where the fun starts | *This is where the fun starts. K' can pretty much go all out and run right through his opponents defenses. His combo starters run from his s.A to his CD attack. Crouch B is great for starting BnBs from low attacks, while his stand C can go into his command normal and so on. Weak Eins Trigger is extremely good for building meter up close because it comes out really fast and goes away fast, making it a safe and pretty spam-worthy move. Eins + Shell juggles the opponent and sets them up for a variety of follow-up attacks. Crow Bites + Plus/Minutes + Narrow Spike/Heat Drive/Chain or EX Chain Drive enders. Drive/super cancelling have a myriad of uses here. Minutes + Narrow drive cancel loop works very well. Super canceling his Crow Bites to either DM is also good. Minutes combos into Air Minutes too here. NeoMax Hyper Chain Drive can be used as anti-air, but only if you feel like burning the meter to finish them off. | ||
===Cornered Opponent=== | ===Cornered Opponent=== | ||
* K' can literally toy with opponent here | * K' can literally toy with opponent here. Everything from Eins Trigger to his j.CD works here. Cr.B is great, his j.D can be used in heavy blockstrings, and if they ever attempt to GC roll away out of the corner just run up and throw them. NeoMax can be comboed into as long as you use it after a juggle attack. Eins + Shell knocks the opponent into the air giving you a lot of options to continue with, namely his One Inch command normal. That can then combo into his Heat Drive and his EX/Chain Drive DM's. | ||
===Cornered=== | ===Cornered=== | ||
*The main objective here is to get out of the corner, Blackout to EX Blackout are really good here | *The main objective here is to get out of the corner, Blackout to EX Blackout are really good here. Just do whatever it take to get K' out of there. | ||
Revision as of 06:36, 20 July 2011
Gameplay Overview
To put it bluntly, his play-style is very versatile, like Kyo Kusanagi, except much better. He has the combined zoning prowess of both King and Athena, except without the crippling recovery. He has immense juggle potential like Ash in Sans-Cullote mode, except he doesn't have to sacrifice all the meter or be in the corner. He has all the anti-air capabilities of Leona/Ryo and Robert and still follow-up with an attack without drive cancelling. He can rush down like Takuma and Shen but with better pokes. He can attack really fast and link combos together with ease like Yuri and Kim. He can lock the opponent down in the corner like Raiden except without burning all the extra meter. K' is "A Beast of Prey".
Gameplay Notes
Pros
- Great priority
- Strong Offensive game
- Superb pokes
- Great for any team position, battery/middleman/anchor
- Can zone really well
- Powerful BnB's
- Good juggle potential
- He can quickly carry the opponent to the corner
- Very good corner game, stronger combos and block-strings
Cons
- Nothing to really note here
Normals
Standing
st. A - A simple punch attack, really fast, nice range. Great for stopping jump-ins if timed correctly. Doesn't have much combo use, but could probably get away with using it as a quick fake-out by whiff cancelling it before an opponent runs up.
- Chain/Cancel-able, Far and Close
- Hit Detection: High
- Damage: 25
- Combos from: Crouch light normals, and anything else that can chain into light normals
- Combos into: EX/Eins Trigger+Second Shoot/Shell, EX Minutes Spike
st. B - Low kick. Actually, despite looking like a low kick it's actually aimed high. Has good range for a far normal. Decent start-up, possibly good for pokes and other strategies/tactics to annoy the opponent.
- Hit Detection: High
- Damage: 30
- Combos from: Crouch light normals, and anything else that can chain into light normals.
st. C - A right hook aimed at the opponents face. Decent reach, decent recovery for a far strong normal. It seems rather promising, good for that extra boost as getting them into the corner.
- Cancellable
- Hit Detection: High
- Damage: 80
- Combos into: EX/Eins Trigger+Second Shoot/Shell, EX Minutes Spike+Narrow Spike, EX Crow Bites+Plus, Heat Drive, EX/Chain Drive
- Combos from: Jump-ins that yield copious amounts of hit-stun.
st. D - A high kick, a really high kick, runs the same properties as his Far C except it goes high; meaning it can be used as an anti-air when timed correctly. It isn't cancellable (except in HD mode).
- Hit Detection: High
- Damage: 80
- Combos into: EX/Eins Trigger+Second Shoot/Shell, EX Minutes Spike+Narrow Spike, EX Crow Bites, in HD mode
- Combos from: Jump-ins + Hit-stun
cl. C - A punch aimed at the gut, does two hits, comes out fast, good recovery. Yhe combo starter of choice as it combos into just about everything if not everything.
- Cancellable
- Hit Detection: High
- Damage: 40+30
- Combos into: EX/Eins Trigger+Second Shoot/Shell/Blackout, EX Minutes Spike+Narrow Spike, EX/Crow Bites+Plus, Blackout, Heat Drive, EX/Chain Drive
- Combos from: Jump-ins + Hit-stun
cl. D - Similar to close C, more range, slightly slower, and hits low.
- Cancellable
- Hit Detection: Low
- Damage: 70
- Combos from: Jump-ins with hit-stun
- Combos into: EX/Eins Trigger+Second Shoot/Shell/Blackout, EX Minutes Spike+Narrow Spike, EX/Crow Bites+Plus, Blackout, Heat Drive, EX/Chain Drive
Crouching
cr. A - Crouching punch, similar to stand A. Useful for chaining together lights into combos. Good range and recovery as expected, hits high.
- Chain/Cancellable
- Hit Detection: High
- Damage: 25
- Combos into: Other crouching/standing normals that lead to EX/Eins Trigger+Second Shoot/Shell/Blackout, EX Minutes Spike+Narrow Spike, EX/Crow Bites+Plus, Blackout
cr. B - A (really) low kick. This is the combo starter from crouching normals. This move is good, really good. Great range/recovery, good start-up, and amazing combo opportunity.
- Chain/Cancellable
- Hit Detection: Low
- Damage: 30
- Combos into: Other crouching/standing normals that lead to EX/Eins Trigger+Second Shoot/Shell/Blackout, EX Minutes Spike+Narrow Spike, EX/Crow Bites+Plus, Blackout
cr. C - An uppercut punch, another good combo starter from crouch normals. Comes out a little slow so it requires some timing to use an anti-air. Good combos options when used after a jump-in.
- Cancellable
- Hit Detection: High
- Damage: 70
- Combos from: Jump-ins with hit-stun
- Combos into: Other crouching/standing normals that lead to EX/Eins Trigger+Second Shoot/Shell/Blackout, EX Minutes Spike+Narrow Spike, EX/Crow Bites+Plus, Blackout
cr. D - A sweep kick used to trip opponents, slow recovery. Whiff cancellable.
- Whiff cancellable
- Hit Detection: Low
- Damage: 80
- Combos from: Late jump-ins because it's a pretty slow move
- Combos into: Whiff canceling will allow it to be comboed into the majority of his EX attacks and anything else that's very fast
Jumping
j. A - A jumping light punch, mediocre range, so it be used as an air-to-air. Can combo into his Air Minutes Spike.
- Cancellable
- Hit Detection: Mid
- Damage: 45(40)
- Combos into: EX/Minutes Spike (Air Variant)
j. B - A jumping knee attack. Comes out fast, but still the range isn't much better than j.A.
- Hit Detection: Mid
- Damage: 45(40)
j. C - Jumping strong punch. Works well with pressure when your opponent is in the corner. It's a meaty jump-in and crosses-up. Also good for short hop blockstrings.
- Cancellable
- Hit Detection: Mid
- Damage: 72(70)
- Combos into: EX/Minutes Spike (Air Variant), stand normals that lead to EX/Eins Trigger+Second Shoot/Shell/Blackout, EX Minutes Spike+Narrow Spike, EX/Crow Bites+Plus, Blackout
j. D - Jumping overhead kick, great range, good recovery/start-up. Perfect for block strings and corner pressure. Huge amount of hit-stun. The hit-box moves in a way that it aims for the opponent's hitbox regardless of where you jump-in. When used as a meaty jump-in against an opponent in the corner, EX Eins Trigger will punish an opponent who Guard Cancel Rolls.
- Cancellable
- Hit Detection: Mid
- Damage: 70(68)
- Combos from: It's about fast enough to combo into itself, at least on block
- Combos into: EX/Minutes Spike (Air Variant), stand normals that lead to EX/Eins Trigger+Second Shoot/Shell/Blackout, EX Minutes Spike+Narrow Spike, EX/Crow Bites+Plus, Blackout
Blowback Attack
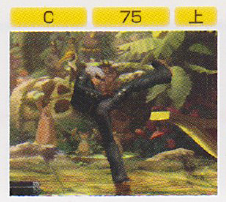
CD - An angry "piss off" kick to the face. Decent speed and range. Use at mid range or whiff cancel. Whiff canceling allows to be comboed into just about anything with a fast start-up. Can be used after Eins Trigger + Second Shell juggle when in the corner.
- Whiff/Cancellable
- Hit Detection: High
- Damage: 75
- Combos from: EX/Eins Trigger + Second Shell (corner)
- Combos into: Whiff cancellable into EX/Eins Trigger+Second Shoot/Shell/Blackout, EX Minutes Spike+Narrow Spike, EX/Crow Bites+Plus, Blackout, Heat Drive, EX/Chain Drive
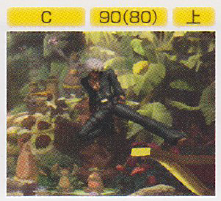
j. CD - K' does a long ranged kick to whatever is below his boot. Good priority and range. Cancellable into Air EX/Minutes Spike. When used on counter hit, puts the opponent into a juggled state for a follow-up attack.
- Cancel-able
- Hit Detection: High
- Damage: 90(80)
- Combos from: It's about fast enough to combo into itself, at least on block, just like his jump D
- Combos into: EX/Minutes Spike (Air Variant), EX/Eins Trigger+Second Shoot/Shell/Blackout, EX Minutes Spike+Narrow Spike, EX/Crow Bites+Plus, Blackout, and stand normals resets after JCD counter hits.
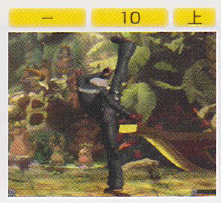
GCCD - His old pre-KOF 2003 CD attack.
- Hit Detection: High
- Damage: 10
Throw
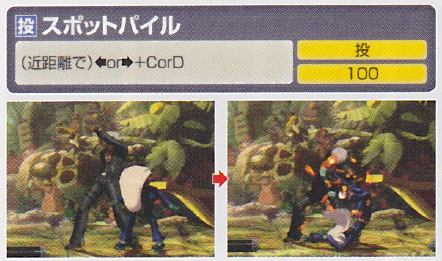
Spot Pile = (b/f+C/D) - K' grabs his opponent, bends them over with one hand, then uses his other arm to elbow them to the ground.
- Can be broken
- Hit Detection: Close
- Damage: 100
Command Moves
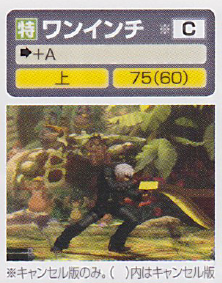
One Inch Punch = (f+A) - K' steps forward then does a thrust punch to the opponent's stomach. Decent range. Too slow to be used on its own without a special set-up, like after his EX Eins Trigger + Second Shell juggle. Using it after that can allow you to cancel it into either of his DM's. When used on its own, and near the opponent, this move will auto-guard crush upon hit. If used after a strong normal, it will cause a crumple state.
- Cancellable
- Hit Detection: High
- Damage: 75(60)
- Combos from: Strong normals, EX/Eins Trigger + Second Shell juggle
- Combos into: EX/Eins Trigger+Second Shoot/Shell/Blackout, EX/Minutes Spike+Narrow Spike, EX/Crow Bites+Plus, Blackout, and stand normals resets after JCD counter hits, Heat Drive, EX/Chain Drive.
Special Moves
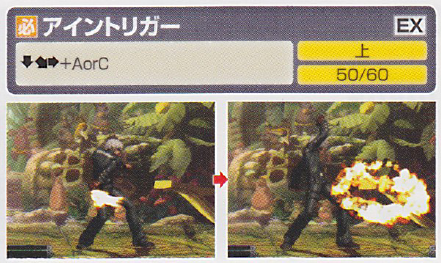
Eins Trigger = (qcf+P) - K' moves his right arm in front of him and forms a circular flame. Comes out fast, has good recovery, and can be used during blockstrings without the follow-up attack. It can also be used to zone the opponent out when they're trying to jump-in or throwing a projectile. Also good for safely building meter when on the other side of the screen. Weak version comes out faster than the strong version.
(EX) = qcf+AC - Does more hits and more damage, also carries these properties over to the follow-up move whether it's Shoot/Shell/ or blackout
- Hit Detection: High
- Damage: 50/60
- Combos from: Strong Normals
- Combos into: Second Shoot/Shell/Blackout move ender
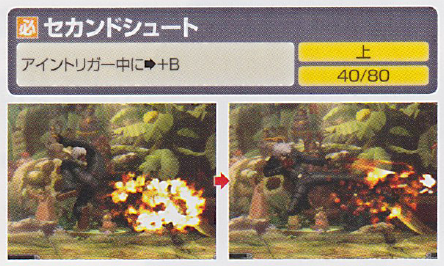
∟ Second Shoot = (f+B) - After K' forms the flame in his right hand he kicks it toward his opponent. Long range zoning tool of choice. Can be used in block strings, second shell follow-up attacks, building meter, cancelling out other projectiles, or to just keep your opponent out of your face. Does not knock down.
EX Second Shoot = (f+B) - When used after EX Eins Trigger the properties change slightly. This move does more damage, travels faster, and goes through normal projectiles. Knocks down on hit.
- Hit Detection: High
- Damage: 40/80
- Combos from: EX/Eins Trigger move starter
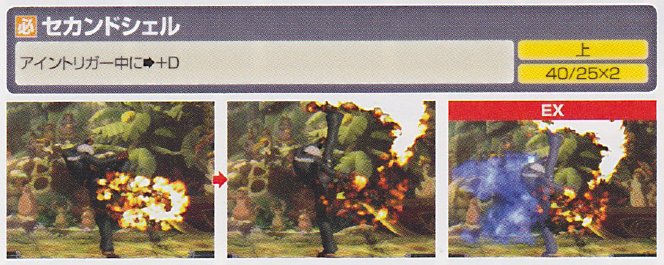
∟ Second Shell = (f+D) - After K' forms the flame in his right hand, he kicks high into the air making flames come out at the top of his boot launching the opponent into the air. Anti-air/jump-in zoning tool of choice. It is also the preferred combo start of choice whether using low crouch normals or standing close normals. Causes juggle state.
EX Second Shell = (f+D) - When used after EX Eins Trigger the properties change just a bit: more damage, more hits, and launches the opponent higher into the air, making it easier to follow-up with an attack.
- Hit Detection: High
- Damage: 40/25x2
- Combos from: EX/Eins Trigger move starter
- Combos into: Minutes Spike + Narrow Spike, Crow Bites, hyper hop CD, f+A in corner
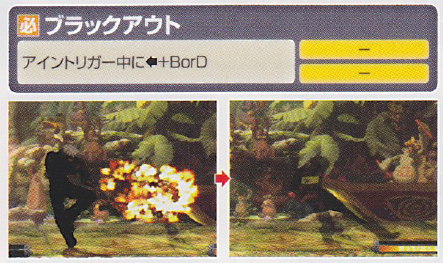
∟ Blackout = (b+K) - K' slips into the shadows to quickly and stealthy run up or get behind his opponent. Can be used for faking out the opponent, especially when in the corner. Works very well to run up on the opponent, then immediately go for the crouch B because they may not react fast enough
- Combos from: EX/Eins Trigger move starter
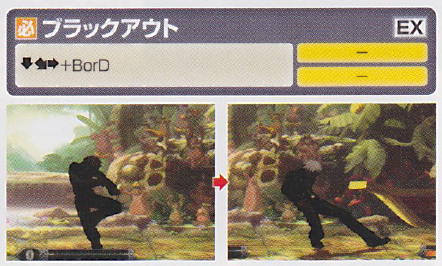
Blackout = (qcf+K) - K' slips into the shadows to quickly and stealthy run up or get behind his opponent. Weak version makes K' travel about 1/4 of the screen, while the strong version makes him travel about 90% of the screen. If the opponent is any closer, K' will go past them. Neither version makes K' invincible so he is vulnerable to attacks during this move. Use it to quickly avoid jump-ins.
(EX) = qcf+BD - Faster start-up and recovery, goes about as much distance as the A version. K' is also completely invincible while this move is active. Perfect to use to get out of the corner.
- Combos from: Strong Normals, Eins Trigger move starter
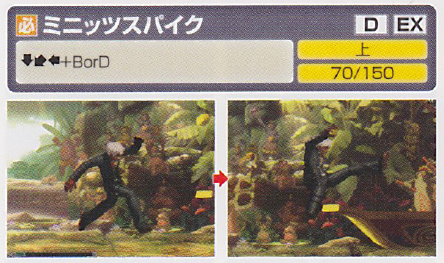
Minute Spike = (qcb+K) - K' jumps forward to do a flying kick to hit the opponent in the face. Extremely good for carrying the opponent to the corner. Use it before Crow Bites but after Eins Trigger + Second Shell. Weak version goes a short distance, while the strong version goes much farther.
(EX) = qcb+BD - Gains "Guard Point" properties, will auto-guard then bypass any normal that may be used to counter-attack this move at start-up.
- Combos into: Narrow Spike, EX Air Minutes Spike
- Combos from: Eins Trigger + Second Shell
Air Variant (qcb+K) in air - K' jumps forward to do a flying kick to hit the opponent in the face. Good start-up but mediocre recovery if you whiff it.
(EX) qcb+BD in air - Invincible from start to recovery, and does more damage.
- Combos from: His jump A/C/D, JCD, and regular Minutes Spike if drive cancelled.
- Drive Cancellable
- Hit Detection: High
- Damage: 70/150
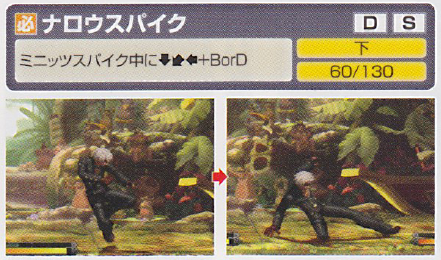
∟ Narrow Spike = (qcb+K) ground only - After K' jumps forward doing a flying kick, he slides on the ground to kick the opponent in the shins. Comes out pretty fast along with good recovery, making it somewhat safe depending on which version you use and where your opponent is. Strings combos together very well, Drive and Super Cancellable on hit.
(EX) = qcb+BD - Significantly faster recovery.
- Drive/Super Cancellable
- Hit Detection: Low
- Damage: 60/130
- Combos from: EX/Miuntes Spike
- Combos into: EX/Crow Bites when in the corner, when drive cancelled EX/Minutes Spike, can also be Super Canceled into his Heat Drive and EX/Chain Drive.
Crow Bites = (dp+P) - K' does a rising uppercut with flames coming out at the end of his glove, launching the opponent into the air. Weak version does 1 hit and comes out fast, strong version does 3 hits and has a much slower start-up. Drive and super cancellable on the first hit.
(EX) = dp+AC - Complete invincibility through out the whole move, more damage, does 11 hits, mimics his Heavens Drive DM from KOF XI.
- Drive/Super Cancellable
- Hit Detection: High
- Damage: 60+40/50+40+30/20x8+40x2+80
- Combos from: EX Eins Trigger + Second Shell
- Combos into: Crow Bites Plus, when drive canceled it combos into Eins Trigger, Minutes Spike + Narrow Spike, Heat Drive, EX/Chain Drive.
∟ Crow Bites Plus = (f+K) (C version only) - After K' launches the opponent into the air from Crow Bites, Plus will add an extra hit to knock the opponent down. This move activates automatically during EX Crow Bites.
- Hit Detection: High
- Damage: 40
- Combos from: EX/Strong Crow Bites
Desperation Moves
Heat Drive = (qcfx2+P) hold to delay - K' holds up his right hand and forms a flame, then quickly dashes past opponent launching them high up into the air. Very fast from start to finish. The dash makes K' go through projectiles. Switches sides with opponent after the initial hit. Can also be MAX canceled into Hyper Chain Drive after you hit the opponent but you must be in HD mode. Holding down whatever punch button you used to activate the move will delay it for a brief period, the holding time is about 3 seconds.
- Max Cancel-able
- Hit Detection: High
- Damage: 200
- Combos from: Strong normals, EX/Eins Trigger + Second Shell + One Inch corner juggle, Super Cancel-able from EX/Narrow Spike
- Combos into: Neomax Hyper Chain Drive
Chain Drive = (qcf hcb+P) - K' tosses his a flame imbued sunglasses toward his opponent and, if it hits, he quickly dashes forward elbowing them in the gut. Time stops for a brief moment while K' takes his time to put his shades back on then proceeds to do a long combo consisting of multiple hits before he knocks them to the ground with a One Inch attack. No real difference between the weak/strong versions. MAX cancel-able on the 12th hit when in HD mode. The unique thing about the start-up is when K' throws the flamed sunglasses it can go through projectiles because it has a guard shield of two hits. If the opponent throws out a projectile this move will punish it. This move can also be used as a pseudo anti-air.
(EX) = qcf hcb+AC - Does more hits (23), ends the combo with a Heat Drive. Completely invincible and faster start-up.
- Max Cancel-able
- Hit Detection: High
- Damage: 25+0+10x3+15x6+70/25+0+10x3+12x6+10x3+12x7+40+80
- Combos from: crouch/stand Strong normals, EX/Eins Trigger + Second Shell + One Inch corner juggle, can be super canceled from Crow Bites, EX/Minutes Spike + Narrow Spike
- Combos into: Neomax Hyper Chain Drive
Neomax
Hyper Chain Drive = (hcbx2+AC) - K' punches the ground to make a volcano of flames rise from below him. Fast start-up, very good vertical range, meaning it can stuff just about any anti-air or jump-in the opponent may try to throw out. Combos from either of his DM's. Works really well in the corner. When used to KO the opponent K' emerges from the flames holding his gloved hand that is now cracked and almost falling off.
- Hit Detection: High
- Damage: 20x3+(20+0)x21
- Combos from: Heat Drive, EX/Chain Drive
Combos
"What I'm good at."
No Drive/No Meter
- j.D -> d.B -> d.B -> qcf+P -> f+B
- j.D -> d.B -> qcf+A -> f+D -> qcb+D -> qcb+D (miss) -> dp+C
- j.D -> s.C -> qcf+A -> f+D -> qcb+D -> qcb+D (miss) -> dp+C
- j.D -> s.C -> f+A -> qcf+A -> f+D -> qcb+D -> qcb+D (miss) -> dp+C
- j.D -> s.C -> f+A -> qcb+D(miss) -> qcb+D+D -> dp+A
50% Drive/No Meter
- j.D -> d.B -> qcf+A -> f+D -> qcb+D -> qcb+D (miss) -> dp+A(2hit) -> qcf+B -> dp+C
- (corner)j.D -> d.B -> d.b -> qcf+A -> f+D -> qcb+D -> qcb+D (miss) -> dp+A(1hit) -> qcb+D -> qcb+D (miss) -> dp+C
100% Drive/No Meter
- j.D -> d.B -> qcf+A -> f+D -> qcb+D -> qcb+D (miss) -> dp+A(2hit) -> qcf+B -> dp+A(2hit) -> qcf+B -> dp+C
- (corner)j.D -> d.B -> d.b -> qcf+A -> f+D -> qcb+D -> qcb+D (miss) -> dp+A(1hit) -> qcb+D -> qcb+D (miss) -> dp+A(1hit) -> qcb+D -> qcb+D (miss) -> dp+C
No Drive/1 Meter
- j.D -> d.B -> qcf+A -> f+D -> qcfx2+P
- j.D -> d.B -> qcf+A -> f+D -> qcb+BD -> qcb+K (miss) -> dp+C
- j.D -> d.B -> qcf+A -> f+D -> qcb+D -> qcb+K (miss) -> dp+AC
- (corner) j.D -> d.B -> d.B -> qcf+A -> f+D -> qcb+BD -> qcb+K (miss) -> dp+C
- (corner) j.D -> d.B -> d.B -> qcf+A -> f+D -> j.CD -> qcb+BD -> dp+A
50% Drive/1 Meter
- j.D -> d.B -> qcf+A -> f+D -> qcb+D -> qcb+K (miss) -> dp+A (1hit) -> SC qcfx2+P
- j.D -> d.B -> qcf+A -> f+D -> qcb+BD -> qcb+K (miss) -> dp+A (2hit) -> DC qcf+B -> dp+C
- j.D -> d.B -> qcf+A -> f+D -> qcb+D -> qcb+K (miss) -> dp+A (1hit) -> DC qcb+BD -> qcb+K (miss) -> dp+C
- j.D -> d.B -> qcf+A -> f+D -> qcb+D -> qcb+K (miss) -> dp+A (2hit) -> DC qcf+B -> dp+AC
- (corner) j.D -> d.B -> d.B -> qcf+A -> f+D -> qcb+D -> qcb+K (miss) -> DC dp+C (1hit) -> qcf,hcb+P
- (corner) j.D -> d.B -> d.B -> qcf+A -> f+D -> qcb+BD -> qcb+K (miss) -> dp+C
- (corner) j.D -> d.B -> d.B -> qcf+A -> f+D -> j.CD -> qcb+BD -> dp+A (1hit) -> DC qcb+D -> qcb+K (miss) -> dp+C
No Drive/2 Meters
- j.D -> d.B -> qcf+A -> f+D -> qcb+BD -> qcb+K (miss) -> dp+C
- j.D -> d.B -> qcf+A -> f+D -> j.CD -> qcb+BD -> qcb+K (miss) -> dp+AC
- (corner) j.D -> d.B -> d.B -> qcf+A -> f+D -> qcf,hcb+AC
- (corner) j.D -> d.B -> d.B -> qcf+A -> f+D -> j.CD -> qcb+BD -> dp+AC
50% Drive/2 Meters
- j.D -> d.B -> qcf+A -> f+D -> qcb+BD -> dp+A (1hit) -> DC qcb+BD -> qcb+K (miss) -> dp+C
- (corner) j.D -> d.B -> d.B -> qcf+A -> f+D -> j.CD -> qcb+BD -> dp+A (1hit) -> DC qcb+BD -> qcb+K (miss) -> dp+C
100% Drive/2 Meters
- j.D -> d.B -> qcf+A -> f+D -> qcb+BD -> qcb+K (miss) -> [dp+A (1hit) -> DC qcf+BD -> qcb+K (miss)]x2 -> dp+AC
- (corner) j.D -> d.B -> qcf+A -> f+D -> qcb+BD -> qcb+K (miss) -> dp+A (1hit) -> DC qcf+D -> qcb+K (miss) -> dp+C (1hit) -> DC qcf,hcb+AC
50% Drive/3 Meters
- j.D -> d.B -> qcf+A -> f+D -> qcb+BD -> dp+A (1hit) -> DC qcb+BD -> qcb+K (miss) -> dp+AC
- (corner) j.D -> d.B -> d.B -> qcf+A -> f+D -> j.CD -> qcb+BD -> dp+A (1hit) -> qcf,hcb+AC
100% Drive/3 Meters
- j.D -> d.B -> qcf+A -> f+D -> qcb+D -> qcb+K (miss) -> hcbx2+AC
100% Drive/4 Meters
- j.D -> d.B -> qcf+A -> f+D -> qcb+BD -> qcb+K (miss) -> [dp+A (2hit) -> DC qcf+B]x2 -> hcbx2+AC
- (corner) j.D -> d.B -> qcf+A -> f+D -> qcb+BD -> qcb+K (miss) -> dp+A (1hit) -> DC qcf+D -> qcb+K (miss) -> dp+C (1hit) -> DC qcf,hcb+AC
HD Combos
- j.D -> s.C -> BC -> s.C -> qcf+A -> f+D -> qcb+D -> [dp+A (2hit) -> HDC qcb+B]x4 -> dp+C -> qcf,hcb+AC
- (corner) j.D -> s.C -> BC -> s.C -> qcf+A -> f+D -> qcb+D -> [dp+A (1hit) -> HDC qcb+D -> qcb+K (miss)]x4 -> dp+C -> qcf,hcb+AC
- (corner) j.D -> s.C -> qcf+A -> f+D -> j.BCD -> qcb+BD -> [dp+A (1hit) -> HDC qcb+D -> qcb+K (miss)]x4 -> dp+C -> qcf,hcb+P
- (corner) j.D -> s.C -> qcf+A -> f+D -> f+A -> BC -> f+A -> qcb+BD -> [dp+A (1hit) -> HDC qcb+D -> qcb+K (miss)]x4 -> dp+C -> qcf,hcb+P
Strategies
"Learn'em, kid."
Far Range
- K' can play it safe from this range. He can easily anticipate and zone out projectiles that are thrown his way with EX/Eins + Shoot. However, therein lies the problem. From this range K' can only really zone. K' can build meter but only if the Eins + Shell hits the opponent (guard or not) otherwise it won't work. The range issue can be remedied by using moves like Eins + Blackout to quickly dash across the screen and into the opponent's face, then follow up with a crouch B combo starter. If there is have meter to burn, K' can also get by by using EX Minutes + Narrow Spike since it goes a good distance and it's much more safe on block than the weak/strong versions. EX attacks aren't of much use from this distance so stick to zoning/building meter. Drive/super canceling is out of the question.
Mid Range
- K' isn't as proficient with special moves here because a whiffed Eins Trigger + Shell is likely to get punished. K' can still get away with playing it safe though. Using moves such as Eins + Weak Blackout can help out from time to time when trying to get behind the opponent. As for offensive options, s.A as an anti-air poke, j.B/C/D for jump-in purposes, j.CD for that extra push, and crouch B will be his main combo starter. As mentioned before, whiffing Eins + Shell will get punished but is still usable. Timing is required, never just thrown randomly. Minutes + Weak Narrow Spike can also be used efficiently within this range. Crow Bites can work too, but be wary of punishes. This is also where K's DMs come into play. Chain Drive works after Eins + Shell, but the main DM of choice is Heat Drive because it plows right through the opponent after a juggle attack. EX attacks are of more use here but not of high priority. Super/drive cancelling options will come up from time to time.
Close Range
- This is where the fun starts. K' can pretty much go all out and run right through his opponents defenses. His combo starters run from his s.A to his CD attack. Crouch B is great for starting BnBs from low attacks, while his stand C can go into his command normal and so on. Weak Eins Trigger is extremely good for building meter up close because it comes out really fast and goes away fast, making it a safe and pretty spam-worthy move. Eins + Shell juggles the opponent and sets them up for a variety of follow-up attacks. Crow Bites + Plus/Minutes + Narrow Spike/Heat Drive/Chain or EX Chain Drive enders. Drive/super cancelling have a myriad of uses here. Minutes + Narrow drive cancel loop works very well. Super canceling his Crow Bites to either DM is also good. Minutes combos into Air Minutes too here. NeoMax Hyper Chain Drive can be used as anti-air, but only if you feel like burning the meter to finish them off.
Cornered Opponent
- K' can literally toy with opponent here. Everything from Eins Trigger to his j.CD works here. Cr.B is great, his j.D can be used in heavy blockstrings, and if they ever attempt to GC roll away out of the corner just run up and throw them. NeoMax can be comboed into as long as you use it after a juggle attack. Eins + Shell knocks the opponent into the air giving you a lot of options to continue with, namely his One Inch command normal. That can then combo into his Heat Drive and his EX/Chain Drive DM's.
Cornered
- The main objective here is to get out of the corner, Blackout to EX Blackout are really good here. Just do whatever it take to get K' out of there.
Miscellaneous
Character Sprite
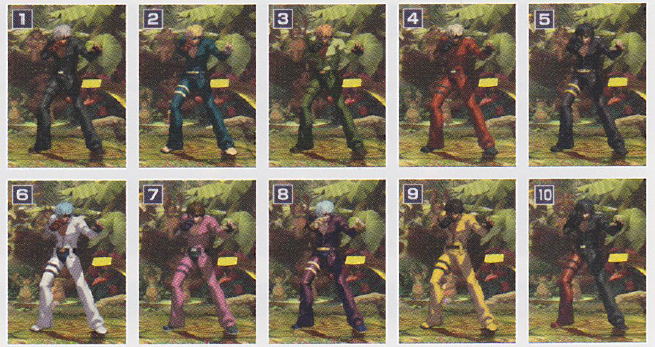
Colors
Alternate Colors
Other
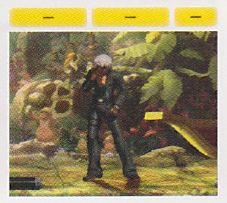
Taunt
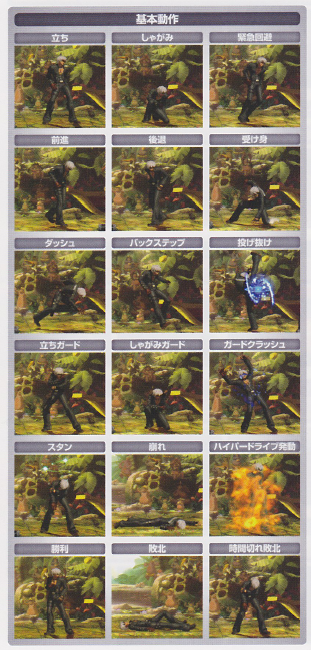
First Row: Standing/Crouching/Evasive Roll
Second Row: Walking (forward/Walking (Backward)/Safe Roll
Third Row: Running/Back Step/Throw Break
Fourth Row: Standing Guard/Crouching Guard/Guard Crush
Fifth Row: Dizzy/Downed/Hyper Drive Activation
Last Row: Win Pose/Knock Out/Time Up Pose
Links & References
Technical Reference
http://www.youtube.com/watch?v=86jHgHypau0
Discussion Threads
Discuss at Dream Cancel


