Difference between revisions of "The King of Fighters XIII/Raiden"
| Line 456: | Line 456: | ||
Discuss at [http://dreamcancel.com/forum/index.php?topic=26.0 Dream Cancel] | Discuss at [http://dreamcancel.com/forum/index.php?topic=26.0 Dream Cancel] | ||
{{Navbox XIII}} | |||
[[Category:The King of Fighters XIII]] | [[Category:The King of Fighters XIII]] | ||
Revision as of 02:57, 28 April 2011
Gameplay Overview
Gameplay Notes
Who is Raiden you say? well he's a top tier character, he can do virtually everything your favorite character can do but better, he's that guy that compliments your team and pulls you a win despite it having two bottom tier characters on the frontline, he's that powerhouse that runs through a whole team of mid-high tiers without breaking a sweat, he's that character that annoys your opponents to no end as soon as the announcer says "GO!", I'll skip all the move descriptions and put it plain & simple, if you're looking for a character that can win and look good doing it then look no further.
Pros
- Insane priority
- Good defensive game
- Great pokes
- Great for any team position, battery/middleman/anchor
- Can zone well
- Extremely powerful combos that require very little drive/meter
- Good juggle potential
- He can quickly carry the opponent to the corner
Cons
- To get the most out of him he requires patience and timing, after you get that down you're good to go.
- May have trouble against very offensive rushdown characters.
Normals
Standing
st. A - A simple slap move, comes out very fast, good priority, great recovery, and it has suprisingly GOOD range as well, this will be the normal you use the most because it has so many uses, preferably used as an anti-air to set-up reset combos for his 3/4 dropkicks, chains into other lights so feel free to do so whenever the oppurtunity comes up, same rules apply to both the close and far version.
- Chain/Cancellable, far and close
- Hit Detection: High
- Damage: 30
- Combos into: When used as an anti-air it can set-up Level 3/4 Super Dropkick reset combos.
- Combos from: Crouch light normals, also Level 3/4 Super Dropkick, as soon as they begin to recover from the first dropkick use this normal again to reset their body and set them up to get hit by the other dropkick.
st. B - A kick aimed at the gut area, comes out a bit slower than his stand A and it isn't chain-able in any shape or form making it a less useful normal compared to the rest of his arsenal, however can possibly be used as a good poke if timed correctly, not sure about the priority as of yet but you'll find some use for it in some way, the close and far versions are the same so the same rules apply.
- Hit Detection: High
- Damage: 35
- Combos from: Since it isn't cancel-able is has to be chained into from other light normals.
- Combos into: EX Super Raiden Drop
st. C - Strong punch aimed at the mid-section, comes out at a good speed making it a good poke when timed well, sadly it's only a poke because it isn't cancellable, level 3 or 4 dropkick can be used after this move, more so in the corner to keep the pressure on your opponent.
- Hit Detection: High
- Damage: 80
- Combos into: Level 3/4 Super Dropkick when timed correctly
st. D - A regular high kick, comes out fast and has great range, doesn't have much use in combos but most people end up using it in block strings.
- Hit Detection: High
- Damage: 70
cl. C - Headbutt attack, short range, comes out at a fast speed, cancel-able on the first hit so it makes up for it's mediocre range to a degree, combos into just about anything with a fast start-up.
- Cancellable
- Hit Detection: High
- Damage: 40+45
- Combos into: Weak/EX Poison mist, EX/Head Crusher, Level 3/4 Super Dropkick, Crazy Train DM, EX/Super Raiden Drop DM
cl. D - High kick, does two hits, good range, but it isn't cancel-able and the recovery is mediocre so you probably won't be using it much compared to the rest of his normals.
- Hit Detection: High
- Damage: 45+50
Crouching
cr. A - Crouching slap, take his stand A into consideration then use it while crouching, while it doesn't have the luxury of being an anti-air it can be used to chain together lights into devastating combos, good range and recovery.
- Chain/Cancellable
- Hit Detection: High
- Damage: 30
- Combos from: Other light normals, standing or crouching
- Combos into: Other lights normals, mostly standing one's
cr. B - Crouching low kick, fast start-up, great range, combos into other lights easily, this normal will help you start at a lot of combos when you're up close, use it well.
- Chainable
- Hit Detection: Low
- Damage: 35
- Combos from: Other light normals stand or crouching
- Combos into: Other light normals, EX Super Raiden Drop
cr. C - Punch aimed at the gut, good range, okay recovery, can be canceled but you'll probably whiff the canceled move unless it's something with a lot of range and fast start-up.
- Cancellable
- Hit Detection: High
- Damage: 70
- Combos into: level 3/4 Super Dropkicks, EX tackle, Weak/EX Poison Mist, Crazy Train DM, EX Super Raiden Drop
cr. D - Low kick, trips the opponent when it makes contact with the opponent, whiff cancel-able before it hits, doesn't have much combo use unless you stick to whiff canceling it, hits low therefore it much be blocked whilst crouching.
- Whiff/Cancellable
- Hit Detection: Low
- Damage: 80
- Combos into: When whiff canceled it can combo into most of his EX attacks and anything else with a fast start-up.
Jumping
j. A - Jumping slap, take his stand A into consideration then use it while he's jumping, a good air-to-air move I suppose, doesn't do much else besides that.
- Hit Detection: Mid
- Damage: 45(40)
- Combos into: level 3/4 Super Dropkick rest combos.
j. B - Jumping light kick, comes out fast, doesn't have enough priority to combo into much of anything, just a good poke to use from time to time.
- Hit Detection: Mid
- Damage: 45(40)
- Combos into: Mostly crouch normals
j. C - Jumping double handed slap, good priority, okay range, nice air-to-air use, comes out at a good speed, not the prefered jump-in attack but still good none the less.
- Hit Detection: Mid
- Damage: 72
j. D - Raiden does a bellyflop!, the prefered jump-in of choice because it does a lot of stun, good priority and range because of Raiden's big hitbox, I believe it crosses up as well as long as you aimed for the opponents head on the way down.
- Hit Detection: Mid
- Damage: 70(68)
- Combos into: Stand/Crouch light/strong normals of your choice
Blowback Attack
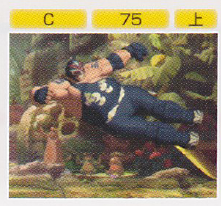
CD - Raiden does a short range dropkick, comes out at an okay speed but yeah the range is a little short at least compared to the rest of his moves, use at mid range or stick to whiff canceling it to throw your opponent off their game.
- Whiff/Cancellable
- Hit Detection: High
- Damage: 75
- Combos into: whiff cancel it into level 3/4 Super Dropkick, the opponent won't see it coming.
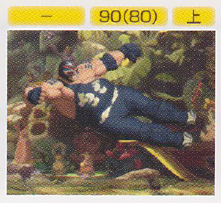
j. CD - The exact same rules apply from his stand CD except you can't whiff cancel it, if you want to use it use it as an air-to-air move.
- Hit Detection: High
- Damage: 90(80)
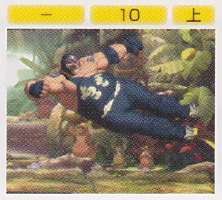
GCCD - The best, most useful Guard Cancel blowback in the whole game, not only can this move be used as a get off me (just like every other character in the game this move costs one meter), it can be used to set-up level 3/4 Super Dropkicks combos, first the GCCD puts the opponent in a juggled state, then add the fact that the level 3/4 (mostly level 4) dropkick comes out at such immense speed that it can hit your opponent before they even touch the ground to recover, at the cost of one meter it's completely worth it.
- Hit Detection: High
- Damage: 10
- Combos into: level 3/4 Super Dropkick
Throws
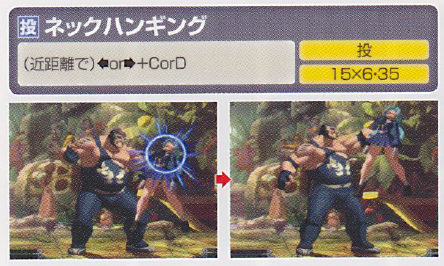
Neck Hanging = (b/f+C/D) - Raiden lifts the opponent into the air and chokes them for about a second and a half, it does a little bit more damage than most neutral throws in game.
- Can be broken
- Hit Detection: Close
- Damage: 15x6+35
Command Moves
Filler Picture
Raiden doesn't need any command moves, he's not incompetent like the rest of the cast.
Special Attacks
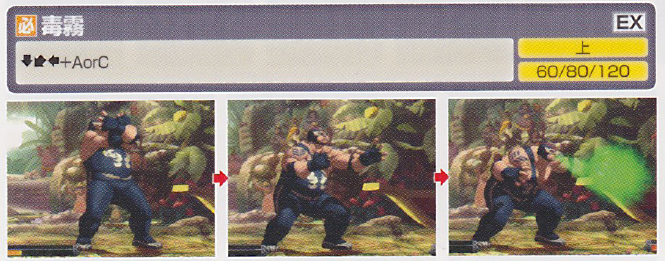
Poison Mist = (qcb+P) - Raiden quickly breaths in, then spits out a green gaseous cloud hitting the opponent in the face, the weak version does not knock down, it also comes out and goes away fairly at a rather fast speed, and they recover pretty quickly so keep your guard when the move is done, combos from strong normals but best used after EX tackle in the corner, the strong version has a slightly slower start-up but it of course stays out longer and knocks the opponent down on contact, if you do use it from a strong normal you may land a counter hit because your opponent might try to retaliate and hit you thinking you'll recover at a slower speed, all in all this verison of the move will end up being your zoning tool of choice, preferably used to keep the opponent at bay when you're charging dropkicks to mow them over with later on, doesn't combo from much of anything but yeah zoning tool.
(EX) = qcb+AC - The green cloud stays out a bit long, faster start-up, does two hits instead of one, upon the second hit it makes the opponent slowly fall to the ground leaving them open to get hit again, the follow-up attack needs to be something fast so it's suggested that you use a crouch normal or something with a very fast start-up otherwise the move you use will whiff.
- Hit Detection: High
- Damage: 60/80/120
- Combos from: the weak version combos from Strong normals and the EX tackle in corner, same thing with the EX poison mist.
- Combos into: the EX poison mist can be use to combo into anything with a fast start-up, e.g. EX tackle, EX Super Raiden Drop DM
Raiden Bomb = (dp+P) close in air - Raiden jumps into the air and if the opponent is in the air as well (along with being in the same trajectory as him) he perform a jumping Super Power Bomb slamming them onto the ground, it's an anti-air grab but it also can be combo'd into if they're in a juggled state, both the weak/strong version have a normal start-up speed and they both do the same amount of damage, if you use this move while your opponent is going for a jump-in it will trade but neither you or the opponent will take damage so it doesn't really matter, however this was changed in the version 1.1 arcade update, Raiden will now take damage when this move trades with the opponents jump attack.
(EX) = dp+AC - Very fasy start-up and he is also completely invincible during the whole move, combos into EX tackle in the corner, this move will more than likely eat away the rest of your opponents health after you've got done doing your dropkick reset + EX tackle corner combos to them.
- Hit Detection: Close/High
- Damage: 15+120/70+120
- Combos from: if drive cancelled weak/strong tackle works, EX tackle in coner.
Head Crusher = (hcf+K) close - Raiden grabs his opponent, turns around, then does what looks like a Crucifix Falling Powerbomb, command grab properties, combos from the strong normals, I would advise you not to use this move alone outside of combos as it has a whiff animation and while it doesn't last too long it still lasts long enough for you not to use it as thus, both version work the same way so don't worry about pressing the wrong button.
(EX) = hcf+BD - Faster start-up, more damage, and has more grab range than the normal version giving it more combo related opportunities.
- Hit Detection: Close
- Damage: 150/200
- Combos from: the weak/strong version combos from strong (and possibly lights if you have fast fingers) normals since it's a normal command grab, however the EX version can combo from lights easily because of the extended range and shorter start-up period.
Giant Bomb = (db~f+P) - Raiden crouches like a quarterback then yells "Ready!? GO!!!" as he proceeds to do a shoulder tackle knocking the opponent onto the ground, the charge time is about half a second, the weak version make him hit the opponent with his left shoulder, has a pretty short start-up period and makes Raiden travel halfway across the screen, it's also quite safe, the strong version make him tackle with his right shoulder, has a slightly longer start-up animation but it makes him travel farther across the screen, this move does pretty good chip damage on block, it's less safe, it must also be noted that the strong verison has a good chunk of auto-guard at start-up making it somewhat safe and all the more convenient if you use it along with his feint, the weak version combos from strong normals but you'll have to think up your own set-ups for the strong version, drive/super cancel-able as soon as it makes contact with the opponent.
(EX) = db~f+AC - Significantly faster start-up, the auto-guard is removed, makes him travel a little bit farther compared to the weak and strong versions, does two hits instead of one, on the second hit it launches the opponent into the air whether they were in a juggled state or not, as soon they're hit they're in a juggled state which means you can continue with whatever you want as soon as you recover, this move can and will be the move you use to quickly carry your opponent to the corner, in the corner this move godly, combo's into weak Poison Mist twice, Raiden Bomb/EX, Super Dropkick if you wait until they're body falls to the mid part of the stage, and his neomax "Raiden Bomber" if you time it correctly, and if you use the EX tackle again it will launch the opponent back into the air to get hit from whatever you want yet again, never underestimate this move as it may help you turn the tables on your opponent when the match isn't in your favor, drive/super cancel-able on the second hit.
- Drive/Super Cancellable
- Hit Detection: High
- Damage: 70/100/70+100
- Combos into: the weak/strong versions drive cancel into Raiden Bomb, The EX version combos into just about anything that doesn't require you to grab the opponent while they're standing still, the weak/strong version require more timing because of their start-up so you might want to stick to drive/super canceling them.
- Combos from: weak/strong versions combo from moves with a lot of hit-stun, the EX versions combos from about anything that juggles the opponent, yes that includes itself.
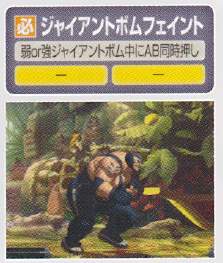
Giant Bomb Feint = (db~f+P, AB) - Raiden crouches like a quarterback then yells "Ready!?" but if you press AB afterward it makes him stop and then go back to his neutral fighting stance, very useful for faking people out, but this move will probably get most of it's use when you accidentally put in the input for strong tackle instead of weak which is okay because this move may save your butt.
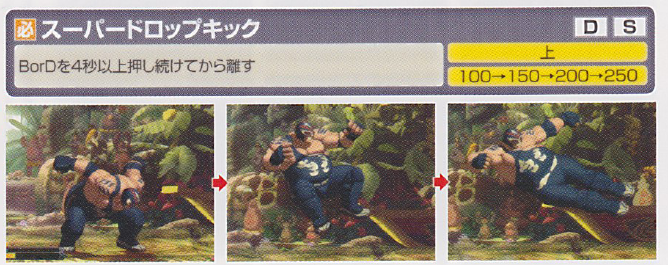
Super Dropkick = [B]/[D] - Raiden does a dropkick, now don't let the simple description fool you as this move got it's work cut out for ya, to put it in more meaningful terms this move can make or break any match, whether you're winning or losing this move can seal the deal, but that depends on which version of the move you're going to use, how many dropkick kicks your charging at the same time (1 or 2), and how long you charged the move thus far, now mix this into the equation as well, when you are charging dropkicks you lose the use that button for X amount time you hold the button to charge them, this literally forces you/Raiden to switch-up play styles for that said time, when you charge the B Super Dropkick you temporarily lose the use of st./cr./j.B, Evasive rolls/Safe Rolls/GCAB and the ability to activate Hyperdive (BC) mode which is a real hinderance for the time being especially when going for the level 4 dropkick, however when you charge the D Super Dropkick the handicap isn't as bad as you only lose the ability to st./cr./j.D and CD's, and if the Raiden player choose to do so he can sacrifice his D Dropkick charge for a GCCD and still connect his B Dropkick afterward but requires some strict timing, as metioned before this move forces you to switch-up play styles depedning on how many kicks you want to charge, now let's say you wanted to charge both dropkicks? you may want to switch to a play style that keeps the opponent away for some time to make the process less of a hassle, sticking to pokes like st.A, jumping around a lot also seems to throw them off, going for neutral throws from time to time, and if they want to throw projectiles try using strong poison bomb to quickly zone it out, anything they can be used to pass time in the most efficient or ridiculous way possible comes into play here, in the next part I'll explain what the differences are between the dropkick levels.
Level 1 = [B]/[D] + 4 seconds - The charge time is 4 seconds, this level of the move comes out at a slow almost turtle-like speed, koncks the opponent down, point blank this level of the move has little to no use what so ever and it also has pathetic recovery along with loads of frame disadvantage on block, doesn't really have any combo chances, in short try your best not to use it.
- Damage: 100
Level 2 = [B]/[D] + 8 seconds - The charge time is 8 seconds, knocks the opponent down on contact, this level of the move is tad bit more safe as it has less frame disadvantage on block, it still doesn't really have any combo opportunities so I'd suggest you wait the extra for 4 seconds to take it to the next level.
- Damage: 150
Level 3 = [B]/[D] + 12 seconds - The charge time is 12 seconds, this level of the move is pretty fast and has some invincibility within some of the start-up frames, does a good amount of guard crush damage, when it hits the opponent they are put into a juggled state which means they can get yet hit again, this move has it's uses but only use it if you think it'll finish the opponent off for good, otherwise I would suggest you to wait yet another 4 seocnds and go for the level 4.
- Damage: 200
Level 4 = [B]/[D] + 16 seconds - The charge time is 16 seconds, this level of the move hits like a truck because it's very fast (around 4 frame start-up), very safe, when it hits it takes away 1/4 of the opponents meter, on block it takes away around 70% of the opponents guard crush, and he's completely invincible through out the entire move, puts the opponent into a juggled state as soon as they get hit, combos from just about any that doesn't knock the opponent directly onto the ground, the B version can be combo'd into from his GCCD, using it coupled with his st.A and EX tackle guarantees 85-95% reset combos that will carry them all the way to the corner and finish them off, this level of the move is possibly Raiden's second most dangerous in his already deadly arsenal (the 1st being his EX tackle).
- Damage: 250
- All versions are Drive/Super Cancellable on hit
- Hit Detection: High
- Damage: Refer above, varies depending on level
- Combos into: Another level 3/4 super dropkick, EX tackle, st./cr.A, weak/EX poison mist, EX Raiden Bomb, neomax Raiden Bomber.
- Combos from: B version can combo into his GCCD, st./cr.A, anti-airs, etc.
Desperation Moves
Super Raiden Drop = (hcfx2+P) close - Raiden grabs the opponent, does a wrestling pose signifying that he's about to do finishing move, turns around then rolls on the ground carrying the opponent with him, jumps high up into the air, then does a Kinniku Buster slamming the opponent onto the ground, because of the short whiff animation the recovery isn't too bad, combos from strong normals up close.
(EX) = hcbx2+AC - More damage, extended grab range making it easier to combo into.
- Hit Detection: Close
- Damage: 240/360
- Combos form: strong normals, the EX version can be combo'd from chained light normals because of it's extended range along with EX poison mist.
Crazy Train = (qcfx2+P) - Raiden hits the opponent in the stomach 4 times then does a haymaker knocking them onto the ground, the start-up speed is tolerable but it should never be thrown out randomly, if you want to use it combo into simple as that, max cancel-able on the 4th hit when in HD mode.
- Max Cancellable
- Hit Detection: High
- Damage: 40x4+60
- Combos from: strong normals
- Combos into: His neomax Raiden Bomber.
Neomax
Raiden Bomber = (qcfx2+BD) - Raiden does a wrestling pose, causing a rainbow of electric to glow on his forearm, then he lariats his opponent with such force that it makes them spin around in the air 4 times before they hit the ground, good start-up and recovery, comboing into it takes a bit of getting used as most of the time the opponent will be airborne at the time, works well after EX tackle and his dropkick in the corner.
- Hit Detection: High
- Damage: 480
- Combos from: level 3/4 super dropkick, EX tackle, Crazy Train DM
Combos
- cr.B x1~2, st.A, hcf+K
- cr.Bx1~2, st.A, hcbx2+AC
- j.D, cr.C, qcb+AC, db~f+A, (DC) dp+P
- (Corner) j.CD, lvl 3/4 dropkick, db~f+AC, (DC) qcb+C, db~f+AC, db~f+A, dp+P
- j.CD, LVL. 3/4 drop kick, db~f+AC, db~f+C, dp+P
- LVL. 4 drop kick, st.A, LVL. 4 drop kick, db~f+AC, qcb+C, (DC) db~f+AC, qcb+Ax2, dp+P
HD Combos
- st.D (2), (BC) cr.C, (db~f+AC, [HDC] qcb+C, db~f+A, [HDC] qcb+C)x2, db~f+AC, [HDC] qcb+C, db~f+A, dp+P ~ 788 damage, 3 stocks
- cr.C, (BC) cr.C, db~f+AC, [HDC] qcb+C, db~f+A, [HDC] qcb+C, cr.C, LVL. 4 Drop Kick, db~f+AC, [HDC] qcb+C, db~f+A, dp+P ~ 1029 damage, 2 stocks
Strategies
Far Range
Mid Range
Close Range
Cornered Opponent
Cornered
Tips
Miscellaneous
Character Sprite
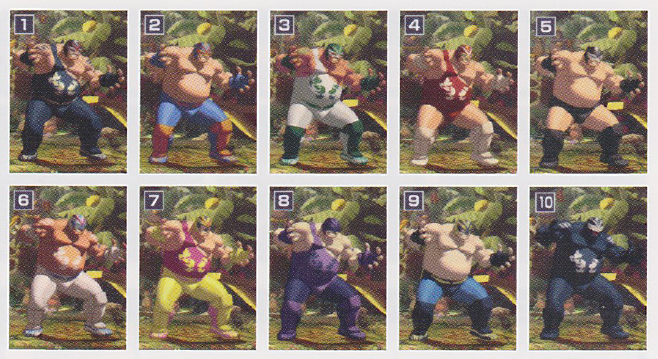
Colors
Big Bear
Other
Taunt
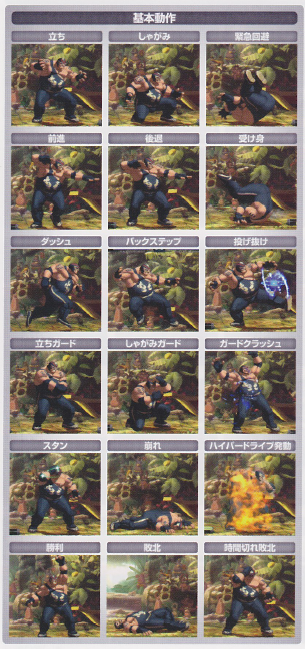
First Row: Standing/Crouching/Evasive Roll
Second Row: Walking (forward/Walking (Backward)/Safe Roll
Third Row: Running/Back Step/Throw Break
Fourth Row: Standing Guard/Crouching Guard/Guard Crush
Fifth Row: Dizzy/Downed/Hyper Drive Activation
Last Row: Win Pose/Knock Out/Time Up Pose
Links & References
Technical Reference
http://www.youtube.com/watch?v=5bUwnGP_HGQ#t=4m26s
Discussion Threads
Discuss at Dream Cancel


