Difference between revisions of "XV Broken/Robert Garcia"
Jump to navigation
Jump to search
m (Some spelling fixes.) |
|||
| Line 4: | Line 4: | ||
==Gameplay Summary== | ==Gameplay Summary== | ||
{{StrengthsAndWeaknesses | {{StrengthsAndWeaknesses | ||
| intro = Robert has flip-flopped between being a motion input or charge character throughout the series, but in KOF XV Robert is a motion input "shoto" character, almost unchanged from KOF XIV. Playing Robert boils down to zoning the opponent with his Ryu-Geki Ken fireballs, knocking them out of the sky with his Ryuuga DP, and otherwise keeping them at bay with good neutral buttons like st.B and CD. Robert also has great meter burn options, with ample opportunity to combo into supers from Ryuuga. With easy combos and a straightforward game plan, Robert is a great choice for people looking for a traditional shoto character. He works well in any position, but is most popular at point, where his fireball game can shine. | | intro = Robert has flip-flopped between being a motion input or charge character throughout the series, but in KOF XV Robert is a motion input "shoto" character, almost unchanged from KOF XIV. Playing Robert boils down to zoning the opponent with his Ryu-Geki Ken fireballs, knocking them out of the sky with his Ryuuga DP, and otherwise keeping them at bay with good neutral buttons like st.B and st.CD. Robert also has great meter burn options, with ample opportunity to combo into supers from Ryuuga. With easy combos and a straightforward game plan, Robert is a great choice for people looking for a traditional shoto character. He works well in any position, but is most popular at point, where his fireball game can shine. | ||
| pros= | | pros= | ||
* '''Jack-Of-All-Trades''': With a solid fireball game and mix-up options, Robert can succeed well in any role. He's probably the most standard shoto in the game, but also comes with all the standard shoto benefits. | * '''Jack-Of-All-Trades''': With a solid fireball game and mix-up options, Robert can succeed well in any role. He's probably the most standard shoto in the game, but also comes with all the standard shoto benefits. | ||
* '''Long Legs''': Robert's kick normals take great advantage of his legs and thus have great range and solid safety. 6B stands out as a nasty callout tool and midrange poke that moves him forward, while his 2B can be cancelled into 214BD for good damage and corner carry midscreen. | * '''Long Legs''': Robert's kick normals take great advantage of his legs and thus have great range and solid safety. 6B stands out as a nasty callout tool and midrange poke that moves him forward, while his 2B can be cancelled into 214BD for good damage and corner carry midscreen. | ||
* '''Blowbacks''': Robert has a great grounded blowback which can | * '''Blowbacks''': Robert has a great grounded blowback which can easily convert into respectable damage from anywhere with his EX specials and supers. He also has an exceptional j.CD, with a big hitbox and a retracted hurtbox. This allows him to trade hits in the air quite well. | ||
* '''Good Pressure''': Robert's corner game is solid overall. He has good normals for keeping up the attack and his fireballs can help cover his | * '''Good Pressure''': Robert's corner game is solid overall. He has good normals for keeping up the attack and his fireballs can help cover his block strings. Robert even has a command grab for opening up opponents who have been blocking for too long. | ||
* '''Easy''': Robert has no bad tools, which means his entire kit is very accessible. He has versatile and easy combo options and can spend 0.5 bars to extend combos very easily. | * '''Easy''': Robert has no bad tools, which means his entire kit is very accessible. He has versatile and easy combo options and can spend 0.5 bars to extend combos very easily. | ||
| cons= | | cons= | ||
* '''Slow Fireballs''': Robert's fireballs are a tad slower than usual, meaning it can be hard for him to punish | * '''Slow Fireballs''': Robert's fireballs are a tad slower than usual, meaning it can be hard for him to punish jump-ins during a fireball war. | ||
}} | }} | ||
| Line 113: | Line 113: | ||
|description=* Chains from other light normals. | |description=* Chains from other light normals. | ||
A quick mid kick. Excellent poke. Pester your opponent with this. The range makes for a consistent | A quick mid kick. Excellent poke. Pester your opponent with this. The range makes for a consistent block string ender, and Robert is not that negative after it. | ||
}} | }} | ||
| Line 123: | Line 123: | ||
|description=* Whiffs on crouchers. | |description=* Whiffs on crouchers. | ||
A high punch. More | A high punch. More committal anti-hop. Can't be cancelled and can be crouched under so overall the risk is high for not that much reward. | ||
}} | }} | ||
===far D=== | ===far D=== | ||
| Line 132: | Line 132: | ||
|description=* Whiffs on crouchers at max range. | |description=* Whiffs on crouchers at max range. | ||
A high roundhouse. The hitbox is huge, making this a good | A high roundhouse. The hitbox is huge, making this a good preemptive anti-air. | ||
}} | }} | ||
| Line 144: | Line 144: | ||
* Can be used for a throw bait. | * Can be used for a throw bait. | ||
A high elbow. 1f faster than cl.B, but cl.B is overall better for defense. | A high elbow. 1f faster than cl.B, but cl.B is overall better for defense. Okay in pressure due to the plus frames. This also adjusts Robert's collision box, which would push him out of throw range when done on an opponent's wake up. | ||
}} | }} | ||
| Line 169: | Line 169: | ||
|moveId=robert_cld | |moveId=robert_cld | ||
|description= | |description= | ||
A | A 2-hit axe kick. Your go-to confirming heavy. Tech throws with this button in case they jump, as it covers a good area above Robert's head. One thing to note is that the two hits cause significant pushback on hit, which causes some 6A combos to whiff midscreen. You'll want to open with a C normal instead, or cancel only the first hit of cl.D. | ||
}} | }} | ||
| Line 181: | Line 181: | ||
* Chains into and from other light normals. | * Chains into and from other light normals. | ||
A low punch. You can use this in | A low punch. You can use this in block strings for plus frames, but the range is not that great, so you're limited in how many light normals you can chain. | ||
}} | }} | ||
===crouch B=== | ===crouch B=== | ||
| Line 199: | Line 199: | ||
|description= | |description= | ||
A crouching uppercut. Good anti air and has the | A crouching uppercut. Good anti-air and has the farthest range between cl.D and cl.C. You can use this for more consistent heavy confirms from jump ins. | ||
}} | }} | ||
===crouch D=== | ===crouch D=== | ||
| Line 208: | Line 208: | ||
|description=* Whiff cancelable. | |description=* Whiff cancelable. | ||
A low sweep. Good range and cancellable even on whiff for safety. Has a low profile, letting Robert go under shallow jump ins and projectiles. | A low sweep. Good range and cancellable even on whiff for safety. Has a low profile, letting Robert go under shallow jump-ins and projectiles. | ||
}} | }} | ||
| Line 301: | Line 301: | ||
|description= | |description= | ||
Robert chucks his | Robert chucks his opponent over his shoulder. Similar story to his forward throw in terms of oki and screen position. If Robert is cornered when he uses this, he is left right next to his opponent. | ||
}} | }} | ||
| Line 312: | Line 312: | ||
|description= | |description= | ||
* Values in [] indicate when the move is cancelled into. | * Values in [] indicate when the move is cancelled into. | ||
* Heavy confirm normal | * Heavy confirm normal. | ||
* Causes a juggle | * Causes a juggle. | ||
* Can be cancelled in chains or by itself | * Can be cancelled in chains or by itself. | ||
An advancing backwards kick. Makes heavy confirms easy as Robert, and also | An advancing backwards kick. Makes heavy confirms easy as Robert, and also has juggle points that allow him easy and damaging combo extensions. The move is very large, so it can be used to tag opponents in neutral while being safe on block. It's not the best on whiff however so be careful if using it like this. | ||
}} | }} | ||
| Line 325: | Line 325: | ||
|input=6A | |input=6A | ||
|description=* Values in [] indicate when the move is cancelled into. | |description=* Values in [] indicate when the move is cancelled into. | ||
* Overhead | * Overhead. | ||
* Cancel version loses overhead properties, but becomes special cancelable. | * Cancel version loses overhead properties, but becomes special cancelable. | ||
* Can jump over low attacks and ground projectiles. | * Can jump over low attacks and ground projectiles. | ||
| Line 343: | Line 343: | ||
* A and EX version recovers in 32f. | * A and EX version recovers in 32f. | ||
* C version recovers in 37f. | * C version recovers in 37f. | ||
* Strength determines projectile speed | * Strength determines projectile speed. | ||
* EX version will beat normal projectiles. | * EX version will beat normal projectiles. | ||
Classic fireball. Robert's is a high fireball so it's more difficult to hop over but prone to low profiling. This is the bread-and-butter of Robert's | Classic fireball. Robert's is a high fireball so it's more difficult to hop over but prone to low profiling. This is the bread-and-butter of Robert's game plan. Use the '''A''' fireball to control space and force an approach. Use the '''C''' fireball to interrupt spacing attempts and disrupt their timing. The '''EX''' version helps in projectile wars and also causes a knockdown. | ||
Cancelling into fireballs is usually a safe way of ending your | Cancelling into fireballs is usually a safe way of ending your block strings, but some characters can interrupt with a low-profiling move or reversal, and every character can get a punish if they Guard Cancel Roll the normal you cancelled. | ||
}} | }} | ||
| Line 358: | Line 358: | ||
|description3= | |description3= | ||
* Values in [] indicate when the move hits during later frames. | * Values in [] indicate when the move hits during later frames. | ||
* '''A''' version has upper body invincibility | * '''A''' version has upper body invincibility. | ||
* '''C and EX''' | * '''C and EX''' versions has full body invincibility. | ||
Classic shoto uppercut. The '''A''' version is ideal for anti airs, while the '''C''' and '''EX''' version can be used as reversals. The EX version is 4f start-up, which lets it beat some safe jumps. Both the A and C versions can be cancelled, and with the way their damage is distributed | Classic shoto uppercut. The '''A''' version is ideal for anti-airs, while the '''C''' and '''EX''' version can be used as reversals. The EX version is 4f start-up, which lets it beat some safe jumps. Both the A and C versions can be cancelled, and with the way their damage is distributed they will do the same amount of damage even though the C version is usually stronger. | ||
}} | }} | ||
| Line 382: | Line 382: | ||
|name=Hien Ryuujin Kyaku (air) | |name=Hien Ryuujin Kyaku (air) | ||
|input=j.214B/D/BD | |input=j.214B/D/BD | ||
|description3=* Strength determines the angle of the move | |description3=* Strength determines the angle of the move. | ||
* Frame advantage if the divekick hits the opponent's guard deep enough | * Frame advantage if the divekick hits the opponent's guard deep enough. | ||
* '''EX''' version sends the opponent upwards for better combos. | * '''EX''' version sends the opponent upwards for better combos. | ||
Robert's divekick. Although this can be used to vary your jump angles, this is primarily a combo tool from cancelled 6A as | Robert's divekick. Although this can be used to vary your jump angles, this is primarily a combo tool from cancelled 6A as it's difficult to get this to have frame advantage, although it is possible. | ||
}} | }} | ||
| Line 394: | Line 394: | ||
|name=Gen-ei Kyaku | |name=Gen-ei Kyaku | ||
|input=646B/D/BD | |input=646B/D/BD | ||
|description3=* Combo tool | |description3=* Combo tool. | ||
* '''EX''' version has anywhere juggle. | * '''EX''' version has anywhere juggle. | ||
| Line 408: | Line 408: | ||
* '''EX''' version can be juggled after. | * '''EX''' version can be juggled after. | ||
Robert grabs the opponent with his knee and combos them. A unique tool for a shoto to have, and makes Robert just the more scary when pressuring. The range is about the range for close proximity normals. This doesn't cause a hard knockdown, but | Robert grabs the opponent with his knee and combos them. A unique tool for a shoto to have, and makes Robert just the more scary when pressuring. The range is about the range for close proximity normals. This doesn't cause a hard knockdown, but Robert still has enough time to run up and establish a low/throw mix up, even on quick rise. The '''EX''' version leads to a short combo after, although the range on the initial grab is a little smaller. | ||
}} | }} | ||
| Line 418: | Line 418: | ||
|input=641236A/C/AC | |input=641236A/C/AC | ||
|description2= | |description2= | ||
* '''C Version''' is faster than the '''A Version''' | * '''C Version''' is faster than the '''A Version'''. | ||
* Can be reflected. | * Can be reflected. | ||
Revision as of 03:04, 31 May 2022

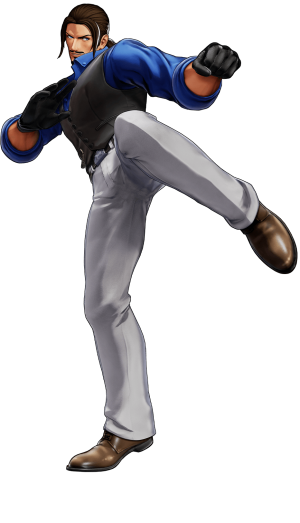
Robert is the assistant instructor at Ryo's dojo. As the legitimate heir of the Garcia Foundation in Italy, Robert joined the Kyokugenryu dojo against the wishes of his father and quickly became Ryo's best friend and training partner.
Robert excels at kick attacks with his long legs. Robert also has not-so-secret feelings for Ryo's sister, Yuri.
Robert excels at kick attacks with his long legs. Robert also has not-so-secret feelings for Ryo's sister, Yuri.
Gameplay Summary
| Robert has flip-flopped between being a motion input or charge character throughout the series, but in KOF XV Robert is a motion input "shoto" character, almost unchanged from KOF XIV. Playing Robert boils down to zoning the opponent with his Ryu-Geki Ken fireballs, knocking them out of the sky with his Ryuuga DP, and otherwise keeping them at bay with good neutral buttons like st.B and st.CD. Robert also has great meter burn options, with ample opportunity to combo into supers from Ryuuga. With easy combos and a straightforward game plan, Robert is a great choice for people looking for a traditional shoto character. He works well in any position, but is most popular at point, where his fireball game can shine. | |
| Pros | Cons |
|
|
Movelist
(*) = EX OK
(!) = MAX OK
(Midair Only) = Can only be done in the air.
Throws
Ryuuchou Kyaku - (close) ![]() /
/ ![]() +
+ ![]()
Kubikiri Nage - (close) ![]() /
/ ![]() +
+ ![]()
Command Normals
Ryuu Hanshu - ![]() +
+ ![]()
Kouryuu Koukyaku-Geri - ![]() +
+ ![]()
Special Moves
Ryuu-Geki Ken - ![]() +
+ ![]() /
/ ![]() (*)
(*)
Ryuuga - ![]() +
+ ![]() /
/ ![]() (*)
(*)
Hien Senpuu Kyaku - ![]() +
+ ![]() /
/ ![]() (*)
(*)
Hien Ryuujin Kyaku - ![]() +
+ ![]() /
/ ![]() (*) (Midair Only)
(*) (Midair Only)
Gen-ei Kyaku - ![]()
![]()
![]() +
+ ![]() /
/ ![]() (*)
(*)
Ryuuren Gen-ei Kyaku - ![]() +
+ ![]() /
/ ![]() (*)
(*)
Super Special Moves
Haoh Shoukou Ken - ![]()
![]() +
+ ![]() /
/ ![]() (!)
(!)
Ryuuko Ranbu - ![]()
![]()
![]() +
+ ![]() /
/ ![]() (!)
(!)
Climax Super Special Moves
Mu-Ei Senpuu Ryuu Zanshou - ![]()
![]()
![]() +
+ ![]()
![]()
Quick Combo Reference
| 0 Meter |
Placeholder |
( = dmg |
| 1 Meter |
Placeholder |
( = dmg |
| 2 Meters |
Placeholder |
( = dmg |
Normals
Far Standing Normals
far A
| far A
f.A
f.A  |
|---|
far B
| far B
f.B
f.B  |
|---|
far C
| far C
f.C
f.C  |
|---|
far D
| far D
f.D
f.D  |
|---|
Close Standing Normals
Close A
| close A
cl.A
cl.A  |
|---|
Close B
| close B
cl.B
cl.B  |
|---|
Close C
| close C
cl.C
cl.C  |
|---|
Close D
| close D
cl.D
cl.D  |
|---|
Crouch Normals
crouch A
| crouch A
2A
2A  |
|---|
crouch B
| crouch B
2B
2B  |
|---|
crouch C
| crouch C
2C
2C  |
|---|
crouch D
| crouch D
2D
2D  |
|---|
Jump Normals
Jump A
| jump A
j.A
j.A  |
|---|
Jump B
| jump B
j.B
j.B  |
|---|
Jump C
| jump C
j.C
j.C  |
|---|
Jump D
| jump D
j.D
j.D  |
|---|
Rush Moves
| rush
cl.AA/cl.AAX
cl.AA/cl.AAX   |
|---|
Blowback
Blowback
| Blowback
CD
CD  |
|---|
ShatterStrike
| Shatterstrike
236CD
236CD  |
|---|
jump CD
| jump CD
j.CD
j.CD  |
|---|
Throws
Ryuuchou Kyaku
| Ryuuchou Kyaku
(close) 4/6C
(close) 4/6C  |
|---|
Kubikiri Nage
| Kubikiri Nage
(close) 4/6D
(close) 4/6D  |
|---|
Command Moves
Kouryuu Koukyaku-Geri
| Kouryuu Koukyaku-Geri
6B
6B  |
|---|
Ryuu Hanshu
| Ryuu Hanshu
6A
6A  |
|---|
Special Moves
Ryuu-Geki Ken
| Ryuu-Geki Ken
236A/C/AC
236A/C/AC    |
|---|
Ryuuga
| Ryuuga
623A/C/AC
623A/C/AC  |
|---|
Hien Senpuu Kyaku
| Hien Senpuu Kyaku
214B/D/BD
214B/D/BD  |
|---|
Hien Ryuujin Kyaku (air)
| Hien Ryuujin Kyaku (air)
j.214B/D/BD
j.214B/D/BD  |
|---|
Gen-ei Kyaku
| Gen-ei Kyaku
646B/D/BD
646B/D/BD  |
|---|
Ryuuren • Gen-ei Kyaku
| Ryuuren • Gen-ei Kyaku
41236B/D/BD
41236B/D/BD   |
|---|
Super Special Moves
Haoh Shoukou Ken
| Haoh Shoukou Ken
641236A/C/AC
641236A/C/AC  |
|---|
Ryuuko Ranbu
| Ryuuko Ranbu
2363214A/C/AC
2363214A/C/AC
|
No results |
|---|
Climax Super Special Moves
Mu-Ei Senpuu Ryuu Zanshou
| Mu-Ei Senpuu Ryuu Zanshou
2141236CD
2141236CD  |
|---|


