
Difference between revisions of "XV Broken/Benimaru Nikaido"
Jump to navigation
Jump to search
Franck Frost (talk | contribs) |
Coliflowerz (talk | contribs) (updated for 1.62) |
||
| Line 120: | Line 120: | ||
|moveId=benimaru_fd | |moveId=benimaru_fd | ||
|description= | |description= | ||
* The one standing poke Benimaru has which will hit crouching opponents, but it's a little slow. Has | * The one standing poke Benimaru has which will hit crouching opponents, but it's a little slow. Has low invincibility during its active frames which can help during poking wars. | ||
}} | }} | ||
| Line 129: | Line 129: | ||
|moveId=benimaru_cla | |moveId=benimaru_cla | ||
|description= | |description= | ||
* Hop check. | * Hop check. Fast and plus on block. | ||
}} | }} | ||
====Close B==== | ====Close B==== | ||
| Line 147: | Line 147: | ||
|moveId=benimaru_cld | |moveId=benimaru_cld | ||
|description= | |description= | ||
* Deals more damage than cl.C, is even faster and has better recovery. Strictly better than cl.C. | * Deals more damage than cl.C, is even faster and has better recovery. Strictly better than cl.C. Also forces stand, guaranteeing combos into 236C. | ||
}} | }} | ||
| Line 300: | Line 300: | ||
|input=236B/D/BD~28B/D | |input=236B/D/BD~28B/D | ||
|description2=* A combo ender which deals the most meterless damage out of anything Benimaru has, but results in a soft knockdown. The first hit of this followup is super cancellable but the timing is tricky, so if you're aiming for consistency and are not confident in your execution then it's best to super cancel Iai Geri instead. The second hit of normal versions is also an anywhere juggle. | |description2=* A combo ender which deals the most meterless damage out of anything Benimaru has, but results in a soft knockdown. The first hit of this followup is super cancellable but the timing is tricky, so if you're aiming for consistency and are not confident in your execution then it's best to super cancel Iai Geri instead. The second hit of normal versions is also an anywhere juggle. | ||
The cancel window from 236K into this follow-up is particularly large, larger than the super cancel window, making it possible to single hit confirm 236Ks in neutral. This can be useful due to 236Ks speed and relative safety. | |||
If you're having trouble getting this follow-up to come out, inputting the 236D as 2369D and holding the D button will also cause the follow-up to come out. This doesn't work from the B version. | If you're having trouble getting this follow-up to come out, inputting the 236D as 2369D and holding the D button will also cause the follow-up to come out. This doesn't work from the B version. | ||
| Line 310: | Line 312: | ||
|name=Raimeitou | |name=Raimeitou | ||
|input=214A/C/AC | |input=214A/C/AC | ||
|description2=* Benimaru lances forward a set distance with a crescent lightning slash to cover him. Strength determines how far he travels. This counts as a projectile, meaning it will absorb one hit of fireball damage, but it can also be reflected. Despite appearances, the fireball is only active a little after Benimaru stops moving. The light version allows for juggles in the corner, while the heavy version lets you juggle into Iai Geri anywhere on the screen if you land it close enough. These are safe on block but will spell doom for you if they miss. Both strengths are super cancellable. | |description2=* Benimaru lances forward a set distance with a crescent lightning slash to cover him. Strength determines how far and how fast he travels. This counts as a projectile, meaning it will absorb one hit of fireball damage, but it can also be reflected. Despite appearances, the fireball is only active a little after Benimaru stops moving. The light version allows for juggles in the corner, while the heavy version lets you juggle into Iai Geri anywhere on the screen if you land it close enough. These are safe on block, with the C version being plus on block but will spell doom for you if they miss. Both strengths are super cancellable. | ||
|description3=* The EX version of this move sees Benimaru standing in place while firing off a fast projectile, which slices through normal fireballs while clashing with EX fireballs. This is chiefly meant to be an anti-fireball tool rather than a zoning tool on its own, although you can use this to snipe the opponent from afar. This move is normally safe but it may not be worth the meter in most situations, as it's not very rewarding and you might want to save it for bigger combos or your other characters. | |description3=* The EX version of this move sees Benimaru standing in place while firing off a fast projectile, which slices through normal fireballs while clashing with EX fireballs. This is chiefly meant to be an anti-fireball tool rather than a zoning tool on its own, although you can use this to snipe the opponent from afar. This move is normally safe but it may not be worth the meter in most situations, as it's not very rewarding and you might want to save it for bigger combos or your other characters. | ||
}} | }} | ||
| Line 319: | Line 321: | ||
|name=Raijinken | |name=Raijinken | ||
|input=236A/C/AC | |input=236A/C/AC | ||
|description=* Safe special to use in pressure, as it's fast, has decent priority and is safe on block. Best used when spaced properly so you don't have to deal with throw punishes. In neutral this can be used to kill fireballs and build meter for yourself, while also defending your ground as it can stop the opponent's approach when timed correctly. In the corner you can use this as a harassment tool, and the optimal spacing for it is also ideal for checking rolls. Super cancellable on | |description=* Safe special to use in pressure, as it's fast, has decent priority and is safe on block. Best used when spaced properly so you don't have to deal with throw punishes. In neutral this can be used to kill fireballs and build meter for yourself, while also defending your ground as it can stop the opponent's approach when timed correctly. In the corner you can use this as a harassment tool, and the optimal spacing for it is also ideal for checking rolls. Super cancellable even on whiff. | ||
|description2=* Benimaru aims his fist upward for an attack which can be used as a far anti-air, but usually isn't too dependable for this purpose given its speed. This | |description2=* Benimaru aims his fist upward for an attack which can be used as a far anti-air, but usually isn't too dependable for this purpose given its speed. This causes a high launch allowing for optimal combos in the corner. Whiffs on crouchers, but in confirms cl.D fixes that issue. | ||
|description3=* Results in a crumple on hit, making it essential for Benimaru's big punishes from close heavies. He can't combo into this from a low, however. This move is also safe on block, so all you really lose for not getting the hit confirm is half a stock. | |description3=* Results in a crumple on hit, making it essential for Benimaru's big punishes from close heavies. He can't combo into this from a low, however. This move is also safe on block, so all you really lose for not getting the hit confirm is half a stock. | ||
}} | }} | ||
| Line 329: | Line 331: | ||
|name=Air • Raijinken | |name=Air • Raijinken | ||
|input=j.236A/C/AC | |input=j.236A/C/AC | ||
|description2=* Another way to stall Benimaru's air momentum while also allowing him to control space. Benimaru will halt his air momentum, fire a Raijinken, then fall | |description2=* Another way to stall Benimaru's air momentum while also allowing him to control space. Benimaru will halt his air momentum, fire a Raijinken, then fall down or backward depending on whether you used the light or heavy version, respectively. The air Raijinken stays out for a decent amount of time, making it good as a zoning tool and sometimes for pressure. Can be input via a "tiger knee" motion (i.e. 2369+A/C), improving its recovery significantly and making it plus on block. | ||
|description3=* Benimaru fires a Raijinken which lasts for longer then falls | |description3=* Benimaru fires a Raijinken which lasts for longer then falls straight down. Only really useful in some combos. Has massive hitstun and can be followed up with many ground moves in the corner, most notably cl.C or cl.D or even CD. Can also be input via a "tiger knee" motion (i.e. 2369+AC). | ||
}} | }} | ||
| Line 339: | Line 341: | ||
|input=632146A/C/AC | |input=632146A/C/AC | ||
|description2=* Benimaru's classic command grab which gives him plenty of time for okizeme after the hit, giving you time to prepare safejumps, crossups and anything else you can think of. Only problem - it's not instant anymore. It's 5f just like [[The King of Fighters XV/Ramón|Ramón]]'s hcf+A, but unlike that move there's no invincibility at all. This is exactly as fast as his close normals, so as a punish too it's redundant. Use this for mixups only. | |description2=* Benimaru's classic command grab which gives him plenty of time for okizeme after the hit, giving you time to prepare safejumps, crossups and anything else you can think of. Only problem - it's not instant anymore. It's 5f just like [[The King of Fighters XV/Ramón|Ramón]]'s hcf+A, but unlike that move there's no invincibility at all. This is exactly as fast as his close normals, so as a punish too it's redundant. Use this for mixups only. | ||
|description3=* Another move which leaves the opponent in a crumple state, but the damage is heavily scaled. Only go for this if you're keen on the mixup, and you've got enough damage for the combo to kill. Using this in combos is not a wise choice. | |description3=* Another move which leaves the opponent in a crumple state, but the damage is heavily scaled. Only go for this if you're keen on the mixup, and you've got enough damage for the combo to kill. Using this in the middle of combos is not a wise choice. | ||
}} | }} | ||
Revision as of 03:29, 26 January 2023

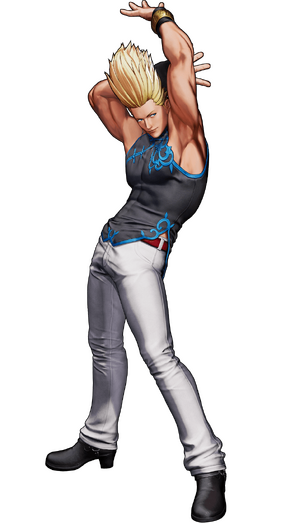
Born into a rich family and raised by his Japanese father and American mother, this shooting star takes fighting to a whole other level. His slender frame provides an excellent medium which enhances his electrostatics, and combining that with his chiseled legs (no doubt from years of shoot boxing experience), his kicks hit like bolts of lightning.
However for this tournament, his friend and rival, Kyo Kusanagi, all but forced him into this position where he has to watch over both Shun'ei and Meitenkun.
However for this tournament, his friend and rival, Kyo Kusanagi, all but forced him into this position where he has to watch over both Shun'ei and Meitenkun.
Movelist
(*) = EX OK
(!) = MAX OK
(Midair Only) = Can only be done in the air.
Throws
Catch and Shoot - (close) ![]() /
/ ![]() +
+ ![]()
Front Suplex - (close) ![]() /
/ ![]() +
+ ![]()
Spinning Knee Drop - (close) ![]() /
/ ![]() +
+ ![]() (Midair Only)
(Midair Only)
Command Normals
Jackknife Kick - ![]() +
+ ![]()
Flying Drill - ![]() +
+ ![]()
Special Moves
Iai-Geri - ![]() +
+ ![]() /
/ ![]() (*)
(*)
- ┗ Inazuma Sandan-Geri -

 +
+  /
/ 
Raimeitou - ![]() +
+ ![]() /
/ ![]() (*)
(*)
Raikinken - ![]() +
+ ![]() /
/ ![]() (*)
(*)
Air • Raijinken - ![]() +
+ ![]() /
/ ![]() (Midair Only) (*)
(Midair Only) (*)
Benimaru Collider - (close) ![]()
![]() +
+ ![]() /
/ ![]() (*)
(*)
Super Jinrai Kick - ![]() +
+ ![]() /
/ ![]() (*)
(*)
Super Special Moves
Rai-Kou Ken - ![]()
![]() +
+ ![]() /
/ ![]() (!)
(!)
Benimaru Rising Shot - ![]()
![]() +
+ ![]() /
/ ![]() (!)
(!)
Climax Super Special Moves
Raiha Jin-Ou Ken - ![]()
![]()
![]() +
+ ![]()
![]()
Quick Combo Reference
| 0 Meter |
Placeholder |
( = dmg |
| 1 Meter |
Placeholder |
( = dmg |
| 2 Meters |
Placeholder |
( = dmg |
Gameplay Overview
| Benimaru Nikaido is an honest test of one's KOF fundamentals. Sporting decent pokes, safe pressure, various mixup options and now his reversal from older games, Benimaru excels in key areas of KOF which allow him to control the match and to shift gears easily. His poor defense and lack of gimmicks force him to play honest at all times, although with his toolkit he is up to the task. Benimaru is effective on point and mid, as he conserves meter well while only spending half a stock for EX Raijinken combos which deal good damage. | |
| Pros | Cons |
|
|
Normals
Far Standing Normals
Far A
| far A
5A
5A  |
|---|
Far B
| far B
5B
5B   |
|---|
Far C
| far C
5C
5C   |
|---|
Far D
| far D
5D
5D   |
|---|
Close Standing Normals
Close A
| close A
cl.A
cl.A   |
|---|
Close B
| close B
cl.B
cl.B   |
|---|
Close C
| close C
cl.C
cl.C   |
|---|
Close D
| close D
cl.D
cl.D   |
|---|
Crouch Normals
Crouch A
| crouch A
2A
2A   |
|---|
Crouch B
| crouch B
2B
2B   |
|---|
Crouch C
| crouch C
2C
2C    |
|---|
Crouch D
| crouch D
2D
2D   |
|---|
Jump Normals
Jump A
| jump A
j.A
j.A   |
|---|
Jump B
| jump B
j.B
j.B    |
|---|
Jump C
| jump C
j.C
j.C    |
|---|
Jump D
| jump D
j.D
j.D    |
|---|
Blowback
Blowback
| Blowback
CD
CD   |
|---|
ShatterStrike
| Shatterstrike
236CD
236CD    |
|---|
jump CD
| jump CD
j.CD
j.CD   |
|---|
Rush Moves
| rush
c.AA/c.AAX
c.AA/c.AAX   |
|---|
Throws
Catch and Shoot
| Catch and Shoot
(close) 4/6C
(close) 4/6C   |
|---|
Front Suplex
| Front Suplex
(close) 4/6D
(close) 4/6D   |
|---|
Spinning Knee Drop
| Spinning Knee Drop
(close) j.4/6C
(close) j.4/6C   |
|---|
Command Moves
Jackknife Kick
| Jackknife Kick
6B
6B    |
|---|
Flying Drill
| Flying Drill
j.2D
j.2D   |
|---|
Special Moves
Iai-Geri
| Iai-Geri
236B/D/BD
236B/D/BD     |
|---|
Inazuma Sandan-Geri
| Inazuma Sandan-Geri
236B/D/BD~28B/D
236B/D/BD~28B/D        |
|---|
Raimeitou
| Raimeitou
214A/C/AC
214A/C/AC      |
|---|
Raijinken
| Raijinken
236A/C/AC
236A/C/AC      |
|---|
Air • Raijinken
| Air • Raijinken
j.236A/C/AC
j.236A/C/AC    |
|---|
Benimaru Collider
| Benimaru Collider
632146A/C/AC
632146A/C/AC     |
|---|
Super Jinrai Kick
| Super Jinrai Kick
623B/D/BD
623B/D/BD         |
|---|
Super Special Moves
Rai-Kou Ken
| Rai-Kou Ken
236236A/C/AC
236236A/C/AC         |
|---|
Benimaru Rising Shot
| Benimaru Rising Shot
236236B/D/BD
236236B/D/BD      |
|---|
Climax Super Special Moves
Raiha Jin-Ou Ken
| Raiha Jin-Ou Ken
2141236CD
2141236CD   |
|---|


