Real Bout Fatal Fury 2/Billy Kane
Gameplay Overview
Gameplay Notes
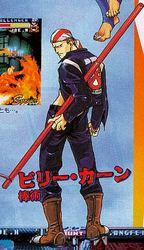
Billy is like a schoolyard bully. If you're the new kid whose green or a current weaker kid, Billy can prove to be a power house and beat most players. However, once you become more experienced and wise up to his tactics, he starts to really slack and not show as much use. Great for beginners, not so good against a high level player using someone like Rick or Mary.
But Billy is still capable of keeping up in this game, so thats no reason to quit using him. He has good pokes and can combo off of a few things. His f, df, d + C S-Power isn't exactly the most damaging, but comes out quick and helps his game plan. If you plan to use Billy, you better figure out whats good to use where and whats not quickly, because he'll start showing less usefulness if you gotta face a tougher player. Otherwise, he's kind of a scrub killer.
Pros
-Decent pokes and ranged game
Cons
-Not enough normals or Special Moves that cause knock down
-Hard pressed to do any high damaging combos with
Normals
Standing
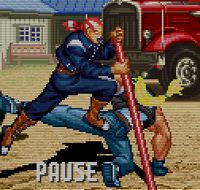
Far st. C - Billy does a sort of pole vault into the opponent.
-When the tip of the attacks hits, can follow up with B (Needs confirmation)
-Chonshu, Chonrei, Duck, and Bob can easily get around/side under this (Needs confirmation)
Crouching
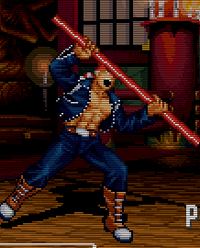
cr. A - Billy squats down and pokes at the opponent with the tip of his staff.
-Best to be used at medium range as a poke
cr. B - Billy crouches and throws out a quick kick to the legs.
-Best used at close range as opposed to longe range (Needs confirmation)
Jumping
j. A - Billy jumps into the air and hits the opponent over the head with his staff.
-Vulnerable to Breakshots if done at close enough range (Needs confirmation)
-Is vulnerable to counterattack (Needs confirmation)
nj. A - Billy jumps straight up and pokes his staff out at the opponent.
-Good range to poke and keep away
sh. C - Billy does an upward attack with one end of the staff, lowering the other end, while doing a short hop.
-Is decent as an anti-air
Throws
Pole Toss=(f/b + C) - Billy picks up the opponent with his staff and tosses them over his head.
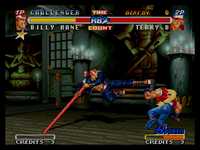
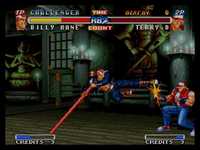
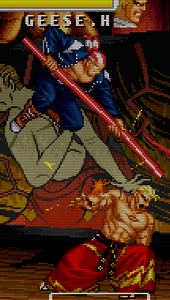
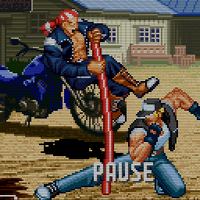
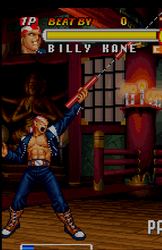
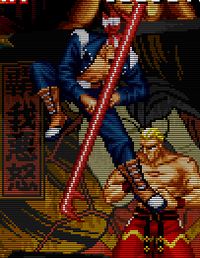
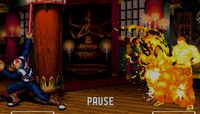
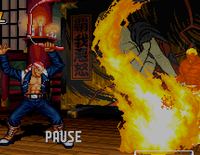
Pole Strangle=(df + C) - Billy picks up the opponent with his staff, but this time holds them up in the air and shakes them around a bit, strangling them on the end of the staff before slamming them on the other side of him.
-Can be followed up with Dragon Flame (qcb + B) as shown above (Picture on the right)
-Which can be useful for an extra hit or so but its pretty unsafe on hit
Avoid Attack
Leaning Pole Strike=(A + B) - Billy quickly dodges an attack and counters with his staff
-Has a decent length of invincibility (Needs confirmation)
-Can be used from a decent range and stay safe (Needs confirmation)
Feints
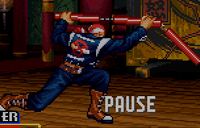
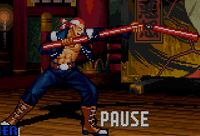
Feint Power Hi Sho Bonk=(b + A + C) - Billy starts to do the first bit of his Power Hi Sho Bonk, and then stops before it actually starts hitting.
-Good for dodging crouching attacks
-Franco, Duck, and Cheng can punish this (Needs confirmation)
Command Normals
Double Trip=(d + C)
-Both parts must be blocked low
Special Moves
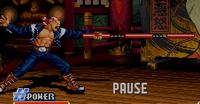
San Setsu Kon=(b~f + A) - Billy pokes his staff outward and hits the opponent with the tip
-Good as a long range poke
-Absorbs projectiles
-Try to refrain from doing this at close range
Flame San Setsu Kon=(b~f + C) - Billy finishes by setting the opponent on fire
-San Setsu Kon must connect in order to use this
Sparrow Drop=(qcb + A) - Billy pokes his staff diagonally into the air to hit the enemy.
-Good anti-air
-Breakshot
-If used at the height of the opponent's jump, can follow up with Scarlet Uppercut
[[image:Rbff2366.jpg]
Whirlwind Pole=(A) - Billys spins his staff in place in circles.
-Hit Detection: Close, Tap A repeatedly
-Absorbs projectiles
-Seems to be rather useless otherwise (Could be wrong)
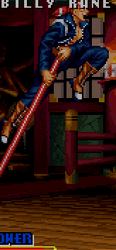
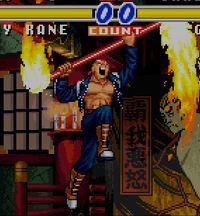
Power Hi Sho Bonk=(db, qcf + B) - Billy pole vaults up off the screen, and then lands with a kick
-Can be perfomed as hcf + B
-Breakshot
-Hard to combo with (Needs confirmation)
-Can control descent with b or f
Dragon Flame=(qcb + B) - Billy strikes the opponent with his staff twice
-Has some pretty bad recovery and does not cause knockdown
-Can be used to follow up his df + C, but it causes more harm than help there
S-Powers
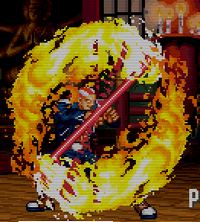
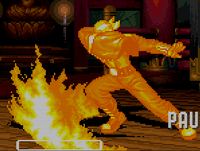
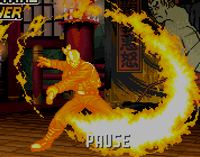
Fire Whirlwind=(f, hcf + B + C) - Billy spins his staff around with fire on it and then shoots the circle of fire outward.
-Rather useless from far away as it takes too long for the fire to shoot out
-Absorbs projectiles
-Better used in close-range combos (Needs confirmation)
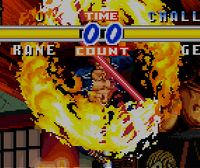
Crimson Killing=(f, df, d + C) - Billy spins his staff upward and it lights on fire as he hits the enemy.
-Works well to use as an anti-air
-Billy's better choice for an S-Power and can combo into this more easily
-Can be used to follow up Sparrow Drop with if timed at the height of the enemy's jump
P-Power
Salamander Stream=(f, hcf + C) - Billy whips his three-sectional staff around at the opponent and lights them, the staff, and himself on fire and bounces them off the ground.
Combos
Chain Combos
Punch Starters
``````````````
P close (*)----> S (*, E)
                f + S (*, ^, E)
P two steps----> S (E)
 away (*)
d + P (*)------> d + S (*, E)
P in air (O)---> S (1, H, O, E)
Kick Starters
`````````````
K in air (O)---> S (1, H, O, E)
Strong Starters
```````````````
d + S (_)------> S (1)      -----> qcf + S (E)
Miscellaneous
Notes
Frame Specifics
-> stands for continuation of the previous attack
Far A: 10f, -8 on block, -4 on hit
-> C: -13 on block, -7 on hit
Far B: 12f, -25 on block, -21 on hit
Far C: 20-26f depending on distance, -3 to +3 on block, +3 to +9 on hit
Close A: 6f, +0 on block, +4 on hit
-> C: -6 on block, +0 on hit
-> f+C: -9 on block
Close B: 8-10f depending on distance, -2 on block, +2 on hit
Close C: 10-12f depending on distance, -10 to -8 on block, -4 to -2 on hit
Crouching A: 9f, +0 on block, +4 on hit
-> d+C: -9 on block, -3 on hit
Crouching B: 8f, -3 on block, +1 on hit
Crouching C: 10-25f depending on distance, -6 on block
-> C: -9 on block, -3 on hit
-> C -> qcf+C: -8 on block, -2 on hit
Jumping A: 6f
Jumping B: 8f
Jumping C: 10f
Neutral Jumping A: 7f
Neutral Jumping/Hopping C: 14f
A+B: 12f, -10 on block, -4 on hit
Standing D: 13f, -3 on block, +0 on hit
Crouching D: 13f, -3 on block
Backplane A: 25f, +1 on block, +3 on hit
Backplane B: 23f, -1 on block, +1 on hit
Backplane C: 25f, -1 on block, +13 on hit
Charge b,f+A: Charge time = 30f, startup = 18-20f depending on distance, -16 to -14 on block, -10 to -8 on hit
-> b,f+C: No relevant data
qcb+A: 16f,
Mash A: 20f, has 13f recovery after the move stops
qcb+B: 11f, -6 on block, +0 on hit
d/b,qcf+B: 18f up close, 60f otherwise, -1 on block
f,hcf+B+C: 25f for initial hit, at least 84f for the projectile, -11 or better on block
f,d/f,d+C: 9f, -53 on block
f,hcf+C: 17f, -5 on block
b+A+C: 42f
Notes: The mash A move tends to stay out awhile, so it may not be safe even when it hits. The flame wheel S-Power can get you killed if it is blocked up close in the corner - the projectile will completely whiff, allowing opponents to do whatever they want. If the first part of the diving special is blocked, I think you can hit the actual dive, so it may not be safe like the -1 would indicate.
