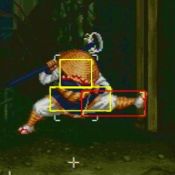
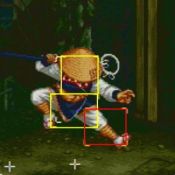
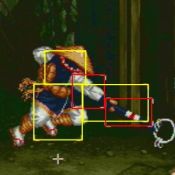
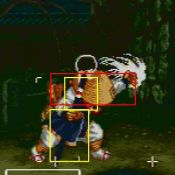
Gameplay Overview
Gameplay Notes
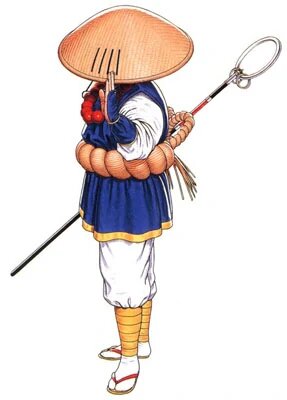
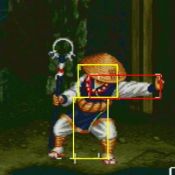
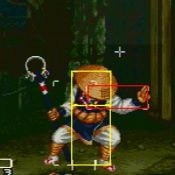
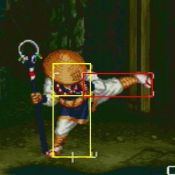
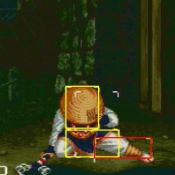
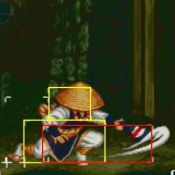
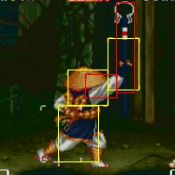
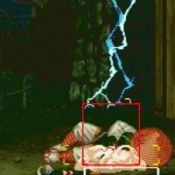
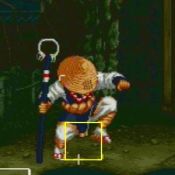
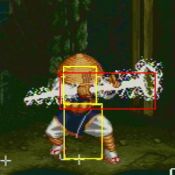
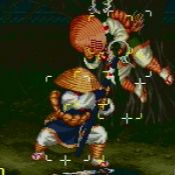
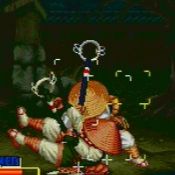
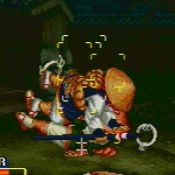
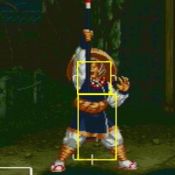
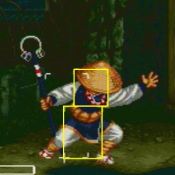
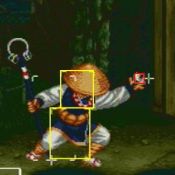
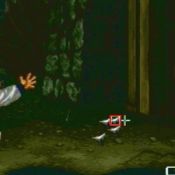
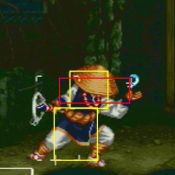
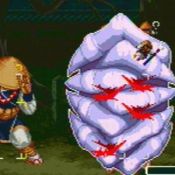
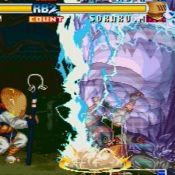
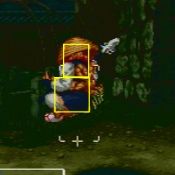
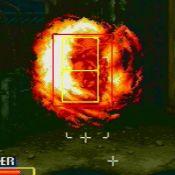
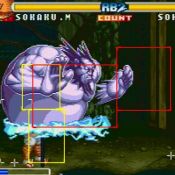
He used to sit comfortably in the top-tier and was probably his strongest in RBS, however he lost a lot of what made him strong in those games. He went from having a barrel-full of anti-airs to one (arguably two) and it's a normal. He has decent pokes, a fireball that can hit low, a nice command throw, a pursuit that hits anywhere on the screen and an infinite (far and away the hardest in the game). He has less range than you think he would with a staff, limited combos, huge recovery of many of his specials/supers and very few options to stop someone who's rushing.
| Pros |
Cons
|
- Fireball that can hit low
- Pursuit that hits anywhere on screen
- Has an infinite (hardest infinite to do in the game)
|
- Lost most of his anti-airs from RBS
- Less range than he should with a staff
- Huge recovery on many of his specials/supers
- Very few anti-rush options
|
Normals
Standing
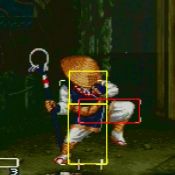
| 5A
|
| Damage
|
Stun
|
Startup
|
Active
|
Recovery
|
Hit Advantage
|
Block Advantage
|
Guard
|
Cancel
|
BS
|
Juggle
|
| 9
|
-
|
5
|
2
|
10
|
+4
|
0
|
HL
|
Y
|
-
|
-
|
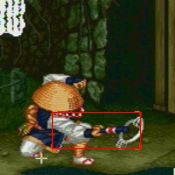
- Okay recovery time.
- Good poke, but B has better range, does more damage, and has better chain routes.
- Can't be mashed as you'll end up with Ja Kon Bu on the third press.
Chain Options: 5C
|
|
n.5A
(within 56 px of opponent)
|
| Damage
|
Stun
|
Startup
|
Active
|
Recovery
|
Hit Advantage
|
Block Advantage
|
Guard
|
Cancel
|
BS
|
Juggle
|
| 9
|
-
|
5
|
2
|
10
|
+4
|
0
|
HL
|
Y
|
-
|
-
|
|
|
|
| 5B
|
| Damage
|
Stun
|
Startup
|
Active
|
Recovery
|
Hit Advantage
|
Block Advantage
|
Guard
|
Cancel
|
BS
|
Juggle
|
| 11
|
-
|
7
|
4
|
12
|
0
|
-4
|
HL
|
Y
|
-
|
-
|
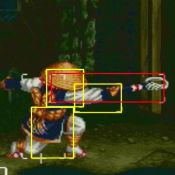
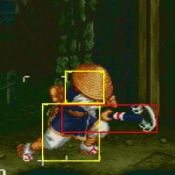
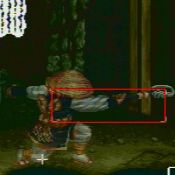
- Very strong poke.
- Covers the same range as A without extending your upper hurtbox.
- Recovery time doesn't matter at all because you will be chaining this most of the time.
Chain Options: 5C
|
|
n.5B
(within 56 px of opponent)
|
| Damage
|
Stun
|
Startup
|
Active
|
Recovery
|
Hit Advantage
|
Block Advantage
|
Guard
|
Cancel
|
BS
|
Juggle
|
| 11
|
-
|
7
|
4
|
12
|
0
|
-4
|
HL
|
Y
|
-
|
-
|
- Shorter range but retains the properties of the far version.
Chain Options: 5C
|
|
| 5C
|
| Damage
|
Stun
|
Startup
|
Active
|
Recovery
|
Hit Advantage
|
Block Advantage
|
Guard
|
Cancel
|
BS
|
Juggle
|
| 24
|
-
|
8
|
2
|
24(12)
|
+14
|
+8
|
HL
|
N
|
-
|
-
|
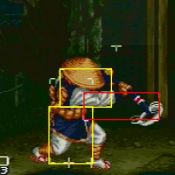
- Amazing poke
- Incredibly safe on hit and block with a very generous hitbox on the staff.
- Recovery time is reduced by half on block or hit.
Chain Options: 22C
|
|
n.5C
(within 74 px of opponent)
|
| Damage
|
Stun
|
Startup
|
Active
|
Recovery
|
Hit Advantage
|
Block Advantage
|
Guard
|
Cancel
|
BS
|
Juggle
|
| 12.12
|
-
|
8
|
3,3
|
20
|
+3
|
-3
|
HL
|
Y
|
-
|
-
|
- Hits twice
- Advantage on hit.
- Long recovery, but can be canceled.
Chain Options: 22C, 6B
|
|
Crouching
| 2A
|
| Damage
|
Stun
|
Startup
|
Active
|
Recovery
|
Hit Advantage
|
Block Advantage
|
Guard
|
Cancel
|
BS
|
Juggle
|
| 9
|
-
|
5
|
2
|
10
|
+4
|
0
|
HL
|
Y
|
-
|
-
|
- Mashable unlike 5A
- Doesn't have a worthwhile chain to follow up unless you desperately need a sweep.
Chain Options: 2C
|
|
| 2B
|
| Damage
|
Stun
|
Startup
|
Active
|
Recovery
|
Hit Advantage
|
Block Advantage
|
Guard
|
Cancel
|
BS
|
Juggle
|
| 11
|
-
|
6
|
3
|
12
|
+1
|
-3
|
L
|
Y
|
-
|
-
|
- Your best low for starting a chain
- Has the same path as 5B.
Chain Options: 5C, 6C
|
|
| 2C
|
| Damage
|
Stun
|
Startup
|
Active
|
Recovery
|
Hit Advantage
|
Block Advantage
|
Guard
|
Cancel
|
BS
|
Juggle
|
| 24
|
-
|
10
|
3
|
23
|
KD
|
-6
|
L
|
Y
|
-
|
-
|
- Standard sweep.
- Knockdown time might not be long enough for a 2C punish, if you're slow the lighting will strike on their invulnerable wakeup and you'll eat a combo.
|
|
Command
Shakujoh Joudan Uchi
3A
|
| Damage
|
Stun
|
Startup
|
Active
|
Recovery
|
Hit Advantage
|
Block Advantage
|
Guard
|
Cancel
|
BS
|
Juggle
|
| 19
|
-
|
8
|
9
|
20
|
-3
|
-9
|
HL
|
Y
|
-
|
-
|
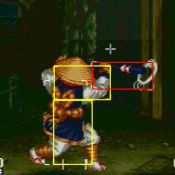
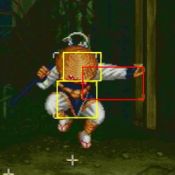
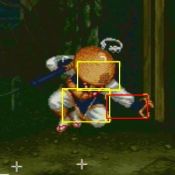
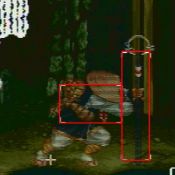
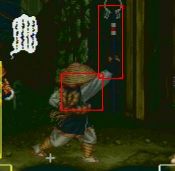
- The only anti-air Sokaku has left. It's still very useful and will beat most jump-ins.
- The hurtboxes on the arm and staff are wider than the hitbox, which can make it very unsafe for hop-ins.
- You're most likely better off trading with a jump attack in most situations.
|
|
Blitzkrieg Cudgel
2C on a downed opponent
|
| Damage
|
Stun
|
Startup
|
Active
|
Recovery
|
Hit Advantage
|
Block Advantage
|
Guard
|
Cancel
|
BS
|
Juggle
|
| 19
|
-
|
19
|
12
|
26
|
-
|
-
|
HL
|
N
|
-
|
-
|
- Punish.
- Can be done off of a long-range knock down anywhere on the screen, but the timing for some moves is more strict than others (after a throw is a relatively safe option).
- Use it too late and you'll whiff it on the invulnerable frames of the wakeup animation.
- If you can't get it off, don't use it.
|
|
Gut Staff
5AB
High Avoid Attack
|
| Damage
|
Stun
|
Startup
|
Active
|
Recovery
|
Hit Advantage
|
Block Advantage
|
Guard
|
Cancel
|
BS
|
Juggle
|
| 14
|
-
|
8
|
6
|
20
|
0
|
-6
|
HL
|
Y
|
-
|
-
|
|
|
|
Jumping
| j.A
Neutral Hop/Jump Diagonal Hop/Jump
|
| Version
|
Damage
|
Stun
|
Startup
|
Active
|
Recovery
|
Hit Advantage
|
Block Advantage
|
Guard
|
Cancel
|
BS
|
Juggle
|
| Neutral Hop
|
9
|
-
|
5
|
till landing
|
6
|
+8
|
+4
|
H
|
N
|
-
|
-
|
| Diagonal Hop
|
9
|
-
|
5
|
till landing
|
6
|
+8
|
+4
|
H
|
N
|
-
|
-
|
| Neutral Jump
|
9
|
-
|
5
|
8
|
6
|
+8
|
+4
|
H
|
N
|
-
|
-
|
| Diagonal Jump
|
9
|
-
|
5
|
10
|
6
|
+8
|
+4
|
H
|
N
|
-
|
-
|
|
| j.B
Neutral/Diagonal Hop Neutral/Diagonal Jump
|
| Version
|
Damage
|
Stun
|
Startup
|
Active
|
Recovery
|
Hit Advantage
|
Block Advantage
|
Guard
|
Cancel
|
BS
|
Juggle
|
| Neutral Hop
|
11
|
-
|
6
|
till landing
|
6
|
+8
|
+4
|
H
|
N
|
-
|
-
|
| Diagonal Hop
|
-
|
-
|
6
|
till landing
|
6
|
+8
|
+4
|
H
|
N
|
-
|
-
|
| Neutral Jump
|
11
|
-
|
6
|
6
|
6
|
+8
|
+4
|
H
|
N
|
-
|
-
|
| Diagonal Jump
|
11
|
-
|
5
|
8
|
6
|
+8
|
+4
|
H
|
N
|
-
|
-
|
|
| j.C
Neutral/Diagonal Hop Neutral/Diagonal Jump
|
| Version
|
Damage
|
Stun
|
Startup
|
Active
|
Recovery
|
Hit Advantage
|
Block Advantage
|
Guard
|
Cancel
|
BS
|
Juggle
|
| Neutral Hop
|
20
|
-
|
11
|
4
|
8
|
+15
|
+9
|
H
|
N
|
-
|
-
|
| Diagonal Hop
|
20
|
-
|
11
|
4
|
8
|
+15
|
+9
|
H
|
N
|
-
|
-
|
| Neutral Jump
|
20
|
-
|
10
|
5
|
8
|
+15
|
+9
|
H
|
N
|
-
|
-
|
| Diagonal Jump
|
20
|
-
|
10
|
5
|
8
|
+15
|
+9
|
H
|
N
|
-
|
-
|
|
Oversway Actions
5D
(opponent in oversway)
|
| Damage
|
Stun
|
Startup
|
Active
|
Recovery
|
Hit Advantage
|
Block Advantage
|
Guard
|
Cancel
|
BS
|
Juggle
|
| 20
|
-
|
5
|
3
|
17
|
+4
|
+1
|
H
|
Y
|
-
|
-
|
|
2D
(opponent in oversway)
|
| Damage
|
Stun
|
Startup
|
Active
|
Recovery
|
Hit Advantage
|
Block Advantage
|
Guard
|
Cancel
|
BS
|
Juggle
|
| 20
|
-
|
5
|
3,3
|
14
|
KD
|
+1
|
L
|
Y
|
-
|
-
|
|
A
(from oversway)
|
| Damage
|
Stun
|
Startup
|
Active
|
Recovery
|
Hit Advantage
|
Block Advantage
|
Guard
|
Cancel
|
BS
|
Juggle
|
| 11
|
-
|
24
|
5
|
12
|
+2
|
0
|
H
|
-
|
-
|
-
|
|
B
(from oversway)
|
| Damage
|
Stun
|
Startup
|
Active
|
Recovery
|
Hit Advantage
|
Block Advantage
|
Guard
|
Cancel
|
BS
|
Juggle
|
| 11
|
-
|
25
|
4
|
12
|
+1
|
-1
|
L
|
-
|
-
|
-
|
|
C
(from oversway)
|
| Damage
|
Stun
|
Startup
|
Active
|
Recovery
|
Hit Advantage
|
Block Advantage
|
Guard
|
Cancel
|
BS
|
Juggle
|
| 20
|
-
|
26
|
2
|
14
|
KD
|
-3
|
HL
|
-
|
-
|
-
|
|
Throw
Mudoh Shibari Nagen
4/6C
|
| Damage
|
Stun
|
Startup
|
Active
|
Recovery
|
Hit Advantage
|
Block Advantage
|
Guard
|
Cancel
|
BS
|
Juggle
|
| 26
|
-
|
-
|
-
|
-
|
-
|
-
|
-
|
-
|
-
|
-
|
- Put the opponent on the other side of Sokaku
|
|
Jigoku Kon
412 after Mudoh Shibari Nagen
|
| Damage
|
Stun
|
Startup
|
Active
|
Recovery
|
Hit Advantage
|
Block Advantage
|
Guard
|
Cancel
|
BS
|
Juggle
|
| 34
|
-
|
-
|
-
|
-
|
-
|
-
|
-
|
-
|
-
|
-
|
|
Shoten Satsu
1/3C in the air
|
| Damage
|
Stun
|
Startup
|
Active
|
Recovery
|
Hit Advantage
|
Block Advantage
|
Guard
|
Cancel
|
BS
|
Juggle
|
| 26
|
-
|
-
|
-
|
-
|
-
|
-
|
-
|
-
|
-
|
-
|
|
Feints
Feint Ikazuchi
2BC
|
| Damage
|
Stun
|
Startup
|
Active
|
Recovery
|
Hit Advantage
|
Block Advantage
|
Guard
|
Cancel
|
BS
|
Juggle
|
| -
|
-
|
-
|
-
|
18
|
-
|
-
|
-
|
-
|
-
|
-
|
|
Feint Makibishi Masher
2AC
|
| Damage
|
Stun
|
Startup
|
Active
|
Recovery
|
Hit Advantage
|
Block Advantage
|
Guard
|
Cancel
|
BS
|
Juggle
|
| -
|
-
|
-
|
-
|
19
|
-
|
-
|
-
|
-
|
-
|
-
|
|
Specials
Makibishi Masher
236A
|
| Damage
|
Stun
|
Startup
|
Active
|
Recovery
|
Hit Advantage
|
Block Advantage
|
Guard
|
Cancel
|
BS
|
Juggle
|
| 14
|
-
|
15
|
-
|
54 total
|
-3
|
-5
|
HL,L
|
-
|
Y
|
-
|
- If used from long-range, must be blocked low
|
|
Nozaru Geri
214A
|
| Damage
|
Stun
|
Startup
|
Active
|
Recovery
|
Hit Advantage
|
Block Advantage
|
Guard
|
Cancel
|
BS
|
Juggle
|
| 16
|
-
|
17
|
-
|
98 total
|
KD
|
+11
|
HL
|
-
|
Y
|
-
|
- Mix of a projectile and hitgrab
|
|
Mash A
|
| Damage
|
Stun
|
Startup
|
Active
|
Recovery
|
Hit Advantage
|
Block Advantage
|
Guard
|
Cancel
|
BS
|
Juggle
|
| 6,6,6,6(19)
|
-
|
11
|
3(8)5(2)3(8)5(2)3
|
22
|
-
|
-
|
HL
|
-
|
N
|
-
|
- Has five possible follow-ups
|
|
Ja Kon Bu Follow-ups
Mash A-6C/3C/9C/1C/5D
Toppa Fu Ha Kou Ha Ten Ha Tou Ha
|
| Version
|
Damage
|
Stun
|
Startup
|
Active
|
Recovery
|
Hit Advantage
|
Block Advantage
|
Guard
|
Cancel
|
BS
|
Juggle
|
| 6C
|
20
|
-
|
7
|
3
|
24
|
KD
|
0
|
HL
|
-
|
-
|
-
|
- Better used at long-range to prevent being punished
|
| Version
|
Damage
|
Stun
|
Startup
|
Active
|
Recovery
|
Hit Advantage
|
Block Advantage
|
Guard
|
Cancel
|
BS
|
Juggle
|
| 3C
|
20
|
-
|
10
|
3
|
20
|
KD
|
-4
|
L
|
-
|
-
|
-
|
- Low option from Ja Kon Bu
|
| Version
|
Damage
|
Stun
|
Startup
|
Active
|
Recovery
|
Hit Advantage
|
Block Advantage
|
Guard
|
Cancel
|
BS
|
Juggle
|
| 9C
|
20
|
-
|
13
|
6
|
14
|
+9
|
+4
|
H
|
-
|
-
|
-
|
- Overhead option from Ja Kon Bu
|
| Version
|
Damage
|
Stun
|
Startup
|
Active
|
Recovery
|
Hit Advantage
|
Block Advantage
|
Guard
|
Cancel
|
BS
|
Juggle
|
| 1C
|
20
|
-
|
7
|
6
|
24
|
+10
|
+1
|
HL
|
-
|
-
|
-
|
|
|
| Version
|
Damage
|
Stun
|
Startup
|
Active
|
Recovery
|
Hit Advantage
|
Block Advantage
|
Guard
|
Cancel
|
BS
|
Juggle
|
| 5D
|
20
|
-
|
5
|
3
|
18
|
+8
|
+6
|
HL/H
|
-
|
-
|
-
|
- Is an overhead ONLY if the opponent is in the backplane
- If the opponent is in the backplane, will pull them to the front plane
|
|
Shout!
63214B
Staff Thrust Hand Crush Finish
|
| Version
|
Damage
|
Stun
|
Startup
|
Active
|
Recovery
|
Hit Advantage
|
Block Advantage
|
Guard
|
Cancel
|
BS
|
Juggle
|
| 63214B
|
9,9,9(23)
|
-
|
12
|
24
|
13
|
-2
|
-4
|
-
|
-
|
Y
|
-
|
|
|
| Version
|
Damage
|
Stun
|
Startup
|
Active
|
Recovery
|
Hit Advantage
|
Block Advantage
|
Guard
|
Cancel
|
BS
|
Juggle
|
| -6C
|
7
|
-
|
4
|
13
|
20
|
KD
|
-
|
HL
|
-
|
-
|
-
|
- Cannot be connected unless Shout! hit the opponent (block/whiff doesn't count)
- C has to be pressed a little late (but not too late) during Shout!
|
| Version
|
Damage
|
Stun
|
Startup
|
Active
|
Recovery
|
Hit Advantage
|
Block Advantage
|
Guard
|
Cancel
|
BS
|
Juggle
|
| -6C-360C
|
26
|
-
|
-
|
-
|
-
|
-
|
-
|
-
|
-
|
-
|
-
|
- Must be performed quickly right after Staff Thrust
|
|
Kimon Jin
360C
|
| Damage
|
Stun
|
Startup
|
Active
|
Recovery
|
Hit Advantage
|
Block Advantage
|
Guard
|
Cancel
|
BS
|
Juggle
|
| 35
|
-
|
0
|
-
|
-
|
KD
|
-
|
-
|
-
|
-
|
-
|
- Has a wider reach than normal throws
|
|
Hametsu no Honou
82D from oversway
|
| Damage
|
Stun
|
Startup
|
Active
|
Recovery
|
Hit Advantage
|
Block Advantage
|
Guard
|
Cancel
|
BS
|
Juggle
|
| 14,14,14(36)
|
-
|
18
|
2,2,4
|
20
|
+4
|
-6
|
H
|
-
|
N
|
-
|
|
Hyoi Dan
646C
|
| Damage
|
Stun
|
Startup
|
Active
|
Recovery
|
Hit Advantage
|
Block Advantage
|
Guard
|
Cancel
|
BS
|
Juggle
|
| 6,6,6,6,10(26)
|
-
|
16
|
24(6)19
|
73
|
KD
|
-59
|
HL
|
-
|
Y
|
-
|
- Absorbs projectiles, but small, low to the ground ones can sneak by
- Sokaku crumples for a bit right after, leaving him very unsafe on block/whiff
|
|
S-Power
Ikazuchi
641236BC
|
| Damage
|
Stun
|
Startup
|
Active
|
Recovery
|
Hit Advantage
|
Block Advantage
|
Guard
|
Cancel
|
BS
|
Juggle
|
| 76
|
-
|
51
|
27,59
|
20
|
KD
|
-68
|
HL
|
-
|
N
|
-
|
- Hits over half the screen
- Can be difficult to use as anti-air due to a slow start-up
|
|
P-Power
Raijin no Ibuki
641236C
|
| Damage
|
Stun
|
Startup
|
Active
|
Recovery
|
Hit Advantage
|
Block Advantage
|
Guard
|
Cancel
|
BS
|
Juggle
|
| 96
|
-
|
1+25
|
3
|
59
|
KD
|
-24
|
Unblockeable/H
|
-
|
N
|
-
|
- Sokaku has a very slight rest period just after the P-Power
- From long-range and mid-range, this P-Power becomes unblockable
- From slightly past mid-range to close range, it loses its unblockable state and becomes an over-head
|
|
Chain Attacks
Punch Starters
``````````````
5A (*)  --------> 5C (*, _, E)
n.5a (*)
2A (*)------> 2C (*, _, E)
j.A (O)---> j.C (1, H, O, E)
Kick Starters
-------------
5B (*)  --------> 5C (*, E)
n.5B (*)----> 5C (*)         -----> 22C (1, E)
2B (*, _)---> 5C             -----> 22C (E)
                6C (^, E)
j.B (O)---> j.C (1, H, O, E)
Strong Starters
```````````````
n.5C (*)----> 6B (O) ----->  623A (A, E)
Chain Analysis

n.5C, 6B, 623A
-Causes knockdown


5B, 5C
-Recommended chain to use at medium range
Combos
Metered
Strategy
Miscellaneous
Notes
Frame Specifics
Notes: He gets a slight advantage on block from canceling heavy attacks into 2BC, which can make for some interesting rushdown once you factor in his 5C and 360 grab.
His 5C's animation is cut short if it hits or is blocked. When whiffed, its recovery is actually quite bad - if the opponent hops over it, expect to eat a nice combo.
