Introduction
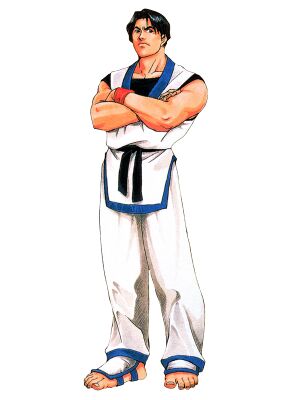
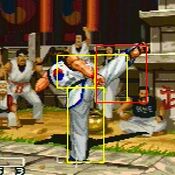
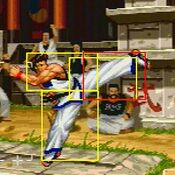
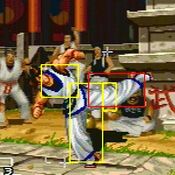
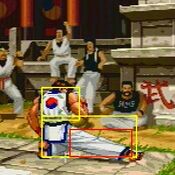
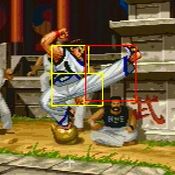
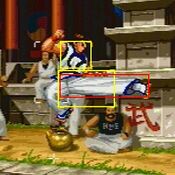
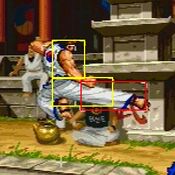
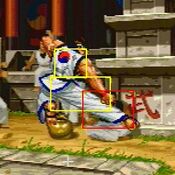
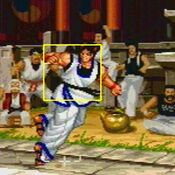
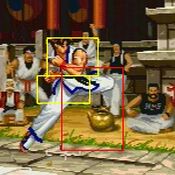
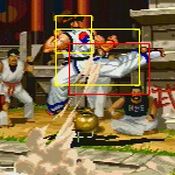
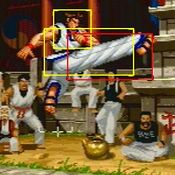
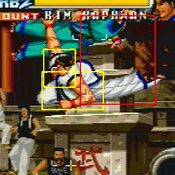
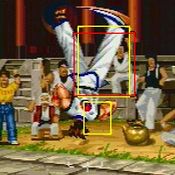
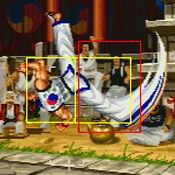
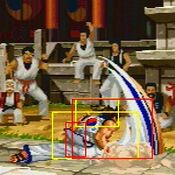
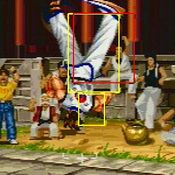
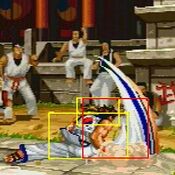
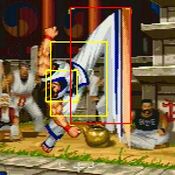
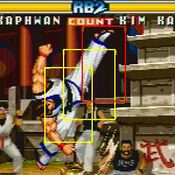
Kim Kaphwan is generally a phenomenal character in most games he's in and RB2 Kim is no exception. Kim functions as a defensive footsies focused character who has excellent recovery on his normals, many of which have good range and speed and can combo into his incredibly useful P-Power Hou'ou Kyaku. Add in a plethora of defensive tools to deter any approach and you have a character who thrives in neutral and can punish mistakes on a dime. While he shines on defense however he lacks somewhat in the offensive department; zoning can really stifle Kim's gameplan as he has no real way to counter projectiles. He can also be out-poked by certain characters with little effort. Lastly, he doesn't particularly excel at mixing up, owing to telegraphed and easily punished overhead options. As a result, Kim rarely wants to be the aggressor. Ideally, Kim wants to control the pace of the match and force the opponent to initiate pressure rather than initiate it himself. If you like a control-type playstyle that benefits off good defense, Kim is your man.
Normal Moves
Standing
| 5A
|
| Damage
|
Stun
|
Startup
|
Active
|
Recovery
|
Hit Advantage
|
Block Advantage
|
Guard
|
Cancel
|
BS
|
Juggle
|
| 7
|
3/11
|
5
|
2
|
10
|
4
|
0
|
HL
|
Yes
|
-
|
No
|
A short kick that confirms into two of Kim's chains; 5A>A>B>C and 5A>B>C with the latter working up to tip range. Can easily confirm into specials or super with 5A>B.
Note: You can get a version of 5A that slightly glides forward by inputting 2A during a dash, but this version doesn't go into chains and if you're too close will give you n.5A instead. Not much use, but it's good to know of.
|
|
| n.5A
|
| Damage
|
Stun
|
Startup
|
Active
|
Recovery
|
Hit Advantage
|
Block Advantage
|
Guard
|
Cancel
|
BS
|
Juggle
|
| 7
|
3/11
|
5
|
2
|
10
|
4
|
0
|
HL
|
Yes
|
-
|
No
|
For all intents and purposes it's the same button as 5A. It can whiff on smaller characters crouching however, so be cautious.
|
|
| 5B
|
| Damage
|
Stun
|
Startup
|
Active
|
Recovery
|
Hit Advantage
|
Block Advantage
|
Guard
|
Cancel
|
BS
|
Juggle
|
| 11
|
3/11
|
6
|
3
|
15
|
-2
|
-6
|
HL
|
Yes
|
-
|
No
|
Get very acquainted with this move. It's Kim's best standing poke, and a cancellable one at that. Unfortunately it's a bit more difficult to hit confirm as it does not chain into anything, but its range makes it an invaluable tool in Kim's footsies game.
|
|
| n.5B
|
| Damage
|
Stun
|
Startup
|
Active
|
Recovery
|
Hit Advantage
|
Block Advantage
|
Guard
|
Cancel
|
BS
|
Juggle
|
| 11
|
3/11
|
6
|
3
|
12
|
1
|
-3
|
HL
|
Yes
|
-
|
No
|
It's cancellable but it doesn't chain into anything so there's no real reason to use this over n.5A. It works pretty well as an anti air in a pinch due to a nice vertical hitbox, but with [2]8B in your pocket you shouldn't need to rely on it.
|
|
| 5C
Don't.
|
| Damage
|
Stun
|
Startup
|
Active
|
Recovery
|
Hit Advantage
|
Block Advantage
|
Guard
|
Cancel
|
BS
|
Juggle
|
| 23/23
|
4/22*2
|
7
|
8
|
32
|
-10
|
-16
|
HL
|
No
|
-
|
No
|
Hits twice for decent damage, but not consistently as the first hit has shorter range than the second. It's -10 on hit though it does push back. It's a lightning rod for punishment. More often than not, you're going to hit this by accident off a poorly spaced n.5C attempt and feel bad as a result. Best to just avoid this one.
|
|
| n.5C
|
| Damage
|
Stun
|
Startup
|
Active
|
Recovery
|
Hit Advantage
|
Block Advantage
|
Guard
|
Cancel
|
BS
|
Juggle
|
| 10/10
|
4/11*2
|
8
|
3
|
20
|
3
|
-3
|
HL
|
Yes
|
-
|
No
|
Kim's most damaging combo starter. Hits twice with both hits being cancellable. Not only is it the start to Kim's n.5C>A>B>C chain which follows easily into [2]8A~2A for just under half your opponent's health bar, it can also lead to some scary stagger pressure as a feint cancel leaves either hit neutral on block or +6 on hit for an easy link so long as you're close enough, though cancelling on the first hit is more consistent. Since the n.5C>A chain is cancellable it functions as an easy confirm into P-Power however at tip range the second hit can whiff, leaving Kim quite vulnerable.
|
|
Crouching
| 2A
|
| Damage
|
Stun
|
Startup
|
Active
|
Recovery
|
Hit Advantage
|
Block Advantage
|
Guard
|
Cancel
|
BS
|
Juggle
|
| 7
|
3/11
|
5
|
5
|
7
|
4
|
0
|
L
|
Yes
|
-
|
No
|
A fast low that can link into itself. Kim's best low starter as it chains directly into 5A and n.5A. As such, you can consider this an alternate starter to his chains.
|
|
| 2B
|
| Damage
|
Stun
|
Startup
|
Active
|
Recovery
|
Hit Advantage
|
Block Advantage
|
Guard
|
Cancel
|
BS
|
Juggle
|
| 11
|
3/11
|
6
|
3
|
14
|
-1
|
-5
|
L
|
Yes
|
-
|
No
|
Another one to familiarize yourself with. If 5B is Kim's best standing poke then 2B is his best low poke. It's effectively the same move as his far 5B but lowers his hurtbox and recovers faster.
|
|
| 2C
|
| Damage
|
Stun
|
Startup
|
Active
|
Recovery
|
Hit Advantage
|
Block Advantage
|
Guard
|
Cancel
|
BS
|
Juggle
|
| 23
|
6/26
|
8
|
6
|
20
|
-
|
-6
|
L
|
Yes
|
-
|
No
|
A cancellable sweep. It's fine but with 2B's range and utility you don't really need to throw this out unless you need a quick knockdown.
|
|
Air
| j.8A
|
| Damage
|
Stun
|
Startup
|
Active
|
Recovery
|
Hit Advantage
|
Block Advantage
|
Guard
|
Cancel
|
BS
|
Juggle
|
| 7
|
3/11
|
4
|
8
|
6
|
-
|
-
|
H
|
Yes
|
-
|
No
|
Cancellable jump in. Allows Kim a unique air chain with j.8A>B, though it doesn't work on smaller characters.
|
|
| j.7/9A
|
| Damage
|
Stun
|
Startup
|
Active
|
Recovery
|
Hit Advantage
|
Block Advantage
|
Guard
|
Cancel
|
BS
|
Juggle
|
| 7
|
3/11
|
5
|
10
|
6
|
-
|
-
|
H
|
Yes
|
-
|
No
|
Cancellable jump in that crosses up fairly easily. Allows Kim a unique air chain with j.7/9A>B, which will consistently work on the entire cast.
|
|
| j.8B
|
| Damage
|
Stun
|
Startup
|
Active
|
Recovery
|
Hit Advantage
|
Block Advantage
|
Guard
|
Cancel
|
BS
|
Juggle
|
| 11
|
3/11
|
6
|
6
|
6
|
-
|
-
|
H
|
Yes
|
-
|
No
|
Cancellable with a decently vertical hitbox making it somewhat practical for certain air-to-air situations.
|
|
| j.7/9B
|
| Damage
|
Stun
|
Startup
|
Active
|
Recovery
|
Hit Advantage
|
Block Advantage
|
Guard
|
Cancel
|
BS
|
Juggle
|
| 11
|
3/11
|
5
|
9
|
6
|
-
|
-
|
H
|
Yes
|
-
|
No
|
Cancellable with an decently horizontal hitbox making it somewhat practical for certain air-to-air situations.
|
|
| j.C
|
| Damage
|
Stun
|
Startup
|
Active
|
Recovery
|
Hit Advantage
|
Block Advantage
|
Guard
|
Cancel
|
BS
|
Juggle
|
| 19
|
6/22
|
7
|
7
|
8
|
-
|
-
|
H
|
Yes
|
-
|
No
|
Cancellable with a downward hitbox and good damage; due to its hitstun it makes confirms very easy.
|
|
| h.A
|
| Damage
|
Stun
|
Startup
|
Active
|
Recovery
|
Hit Advantage
|
Block Advantage
|
Guard
|
Cancel
|
BS
|
Juggle
|
| 7
|
3/11
|
5
|
~
|
6
|
-
|
-
|
H
|
No
|
-
|
No
|
An easy crossup that stays active until landing.
|
|
| h.8B
|
| Damage
|
Stun
|
Startup
|
Active
|
Recovery
|
Hit Advantage
|
Block Advantage
|
Guard
|
Cancel
|
BS
|
Juggle
|
| 11
|
3/11
|
6
|
~
|
6
|
-
|
-
|
H
|
No
|
-
|
No
|
Hop version of j.8B that can't be cancelled. It stays active until landing so it works pretty well at stuffing jumps and hops.
|
|
| h.7/9B
|
| Damage
|
Stun
|
Startup
|
Active
|
Recovery
|
Hit Advantage
|
Block Advantage
|
Guard
|
Cancel
|
BS
|
Juggle
|
| 11
|
3/11
|
6
|
~
|
6
|
-
|
-
|
H
|
No
|
-
|
No
|
Stays active until landing. More or less functions as an aerial poke. The range on it is exceptional.
|
|
| h.C
|
| Damage
|
Stun
|
Startup
|
Active
|
Recovery
|
Hit Advantage
|
Block Advantage
|
Guard
|
Cancel
|
BS
|
Juggle
|
| 19
|
6/22
|
7
|
7
|
8
|
-
|
-
|
H
|
Yes
|
-
|
No
|
Not much different than j.C outside of not being cancellable.
|
|
Throws
| 4/6C
Body Toss
|
| Damage
|
Stun
|
Startup
|
Active
|
Recovery
|
Hit Advantage
|
Block Advantage
|
Guard
|
Cancel
|
BS
|
Juggle
|
| 26
|
-
|
-
|
-
|
-
|
-
|
-
|
Unblockable
|
No
|
-
|
No
|
Standard throw. Will always switch sides, no matter which direction you hold.
|
|
Command Moves
| 6B
|
| Damage
|
Stun
|
Startup
|
Active
|
Recovery
|
Hit Advantage
|
Block Advantage
|
Guard
|
Cancel
|
BS
|
Juggle
|
| 16
|
4/22
|
18
|
5
|
22
|
-3
|
-9
|
H
|
No
|
-
|
No
|
An easily telegraphed overhead that can beat lows. Sadly Kim's only real way to get the opponent to stand block outside of jumps or hops. It has its purpose but don't get attached to this one.
|
|
| 5A+B
|
| Damage
|
Stun
|
Startup
|
Active
|
Recovery
|
Hit Advantage
|
Block Advantage
|
Guard
|
Cancel
|
BS
|
Juggle
|
| 14
|
5/18
|
8
|
6
|
19
|
-9
|
-9
|
HL
|
Yes
|
-
|
No
|
Kim's evade move. Shrinks his hurtbox to just his leading foot before the kick comes out but the evasion window is so small you're more likely to trade at best. An FC on hit or block increases the frame advantage to -4, making it safe should you choose not to cancel. Honestly it's pretty weak for an evade move.
|
|
Fake-out Moves
Hou'ou Kyaku Feint
2B+C
|
| Damage
|
Stun
|
Startup
|
Active
|
Recovery
|
Hit Advantage
|
Block Advantage
|
Guard
|
Cancel
|
BS
|
Juggle
|
| -
|
-
|
-
|
-
|
19
|
-
|
-
|
-
|
-
|
-
|
-
|
A feint of Kim's P-Power and in tandem with his normals and chains, one of the best in the game. This is a big part of Kim's gameplan on both offense and defense. It's basically a swiss army knife; you can use it for frame traps, safety, pressure and so on. It shaves enough frames off n.5C to leave it neutral on block and +6 on hit which enables a confirm into any 5A starter chains. You can also abuse it at the end of Kim's 5A>B>C chain to either reduce recovery on block or make his line shift game truly terrifying on hit, which we'll cover below in the strategies section.
|
|
Special Moves
Ku Sa Zan
[2]8A
Lower body invuln
|
| Damage
|
Stun
|
Startup
|
Active
|
Recovery
|
Hit Advantage
|
Block Advantage
|
Guard
|
Cancel
|
BS
|
Juggle
|
| 12*3(31)
|
1*3
|
4
|
2,2,7
|
49
|
KD
|
Death
|
HL
|
N
|
N
|
Y
|
Kim's best combo ender, which juggles easily. It looks like an anti-air, and it technically is but it is nowhere near as good as [2]8B so don't use it outside of combos. Seriously, the block recovery is extremely variable but it is always punishable and the last hit can whiff easily on those crouch blocking, setting you up for disaster. That being said it can launch on any hit and is decently active so it's possible to catch mistakes, but you have much safer tools for punishment.
|
|
Ku Sa Zan Finish
[2]8A~2A
|
| Damage
|
Stun
|
Startup
|
Active
|
Recovery
|
Hit Advantage
|
Block Advantage
|
Guard
|
Cancel
|
BS
|
Juggle
|
| 13(9)
|
-
|
8
|
3
|
39
|
KD
|
-
|
-
|
N
|
N
|
Y
|
A follow up to [2]8A that is only accessible on hit. There's no reason not to tack this on for the extra damage.
|
|
Hangetsuzan
214B/C
Light Hangetsuzan Heavy Hangetsuzan
|
| Version
|
Damage
|
Stun
|
Startup
|
Active
|
Recovery
|
Hit Advantage
|
Block Advantage
|
Guard
|
Cancel
|
BS
|
Juggle
|
| B
|
8*2+16(29)
|
1*3
|
9
|
2,2,3
|
25
|
0
|
-6
|
HL
|
N
|
Y
|
Y
|
Light Hangetsuzan. Hits up to three times and resets neutral on hit. One of Kim's most consistent enders. You'll go into this in cases where you don't have a charge and need a quick confirm which happens quite often. A great Break Shot as well.
|
| C
|
16+19(32)
|
7
|
18
|
2,3
|
29
|
KD
|
-10
|
HL
|
N
|
Y
|
Y
|
Heavy Hangetsuzan. This one knocks down, but is much harder to confirm into as it has twice the startup. Like 214B it's a Break Shot, but due to its startup it's best to stick to 214B.
|
|
Hienzan
[2]7/8/9B
|
| Damage
|
Stun
|
Startup
|
Active
|
Recovery
|
Hit Advantage
|
Block Advantage
|
Guard
|
Cancel
|
BS
|
Juggle
|
| 35
|
5
|
6
|
11
|
44
|
KD
|
-32
|
HL
|
N
|
Y
|
N
|
One of the best reversals in the game. Hienzan comes out quick, has great startup invulnerability, and above average damage. It can be angled either straight up, slightly forward, or decently forward depending on which direction you held up towards. As if it needed anything more, it's also one of the best Break Shots due to its speed. Despite all these positives it has a much more vertical than horizontal hitbox, and like any reversal not named Sky of Fire the recovery is terrible so try to make sure this lands.
|
|
Hakikyaku
22B
|
| Damage
|
Stun
|
Startup
|
Active
|
Recovery
|
Hit Advantage
|
Block Advantage
|
Guard
|
Cancel
|
BS
|
Juggle
|
| 15
|
5
|
15
|
5
|
9
|
14
|
8
|
L
|
N
|
Y
|
N
|
A staggering low that gives heavy plus frames. It's Kim's best Break Shot as well if you're in P-Power. In neutral, considering Kim's opponents have little reason to respect his overheads, it's +8 on block allowing you to maintain your pressure. Assuming you do land a hit up close for a +14 advantage you can link with 5A>B at close range or 214B which is more consistent, but will still whiff at the farthest range. This is also true for Break Shot usage. That being said, with P-Power a hit from 22B at any range can easily link straight into Hou'ou Kyaku essentially giving you a P-Power Break Shot. And hey, you can just throw this out to build meter. Crazy. Keep this one in your pocket.
|
|
Hi Sho Kyaku
j.2B
|
| Damage
|
Stun
|
Startup
|
Active
|
Recovery
|
Hit Advantage
|
Block Advantage
|
Guard
|
Cancel
|
BS
|
Juggle
|
| 9*4(28)
|
1*4
|
8
|
1,1,1,1
|
22
|
-
|
-
|
HL
|
N
|
N
|
N
|
Kim's divekick. Can hit up to 4 times and will do so until it lands so be wary of Break Shots. You can cancel into it off any of Kim's jumping air normals. It's actually not an overhead so it can be crouch blocked, though it's relatively safe if blocked, but keep in mind it has a couple frames of landing recovery.
|
|
Judgment Kick
j.2B~3b
|
| Damage
|
Stun
|
Startup
|
Active
|
Recovery
|
Hit Advantage
|
Block Advantage
|
Guard
|
Cancel
|
BS
|
Juggle
|
| 14(+10)
|
1
|
6
|
25
|
12
|
KD
|
-15
|
L
|
N
|
N
|
N
|
A follow up to Kim's divekick that causes a KD and must be blocked low. You can use it on hit or block but not whiff. It's heavily punishable on block so it's best to confirm into this. On a blocked j.2B however it is possible to frame trap opponents trying to mash after with this so pay attention to what they do in response. You can even mess with the timing as you have a huge window to go into it.
|
|
Super Special Moves
Hou'ou Tenbu Kyaku
j.41236B+C
|
| Damage
|
Stun
|
Startup
|
Active
|
Recovery
|
Hit Advantage
|
Block Advantage
|
Guard
|
Cancel
|
BS
|
Juggle
|
| 70
|
-
|
14
|
~
|
16
|
KD
|
~
|
HL
|
N
|
N
|
N
|
A divekick super that can actually be tiger knee'd or confirmed off a j.C. Stays active until it lands or is blocked and is relatively safe on block as well. Despite being a jump super it does not hit overhead.
|
|
Super Desperation Move
Hou'ou Kyaku
21416C
|
| Damage
|
Stun
|
Startup
|
Active
|
Recovery
|
Hit Advantage
|
Block Advantage
|
Guard
|
Cancel
|
BS
|
Juggle
|
| 90
|
-
|
1+2
|
24
|
5
|
KD
|
-6
|
HL
|
N
|
N
|
N
|
Legitimately one of the best P-Powers in the game. Crazy easy to confirm, comes out insanely fast, does a ton of damage, is only BARELY unsafe and travels 3/4ths of the screen. This move is so good opponents just have to play differently when you are in P-Power. The fact that you can Break Shot 22B into it means they can't even pressure you on block without fear of this coming out. Quite literally a game changer.
|
|
Chains
Strategy
