Difference between revisions of "The King of Fighters 2002 UM/Kyo Kusanagi"
Franck Frost (talk | contribs) |
Franck Frost (talk | contribs) () |
||
| Line 630: | Line 630: | ||
{{MoveData | {{MoveData | ||
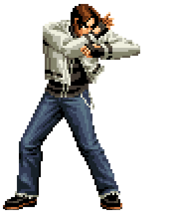
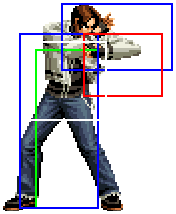
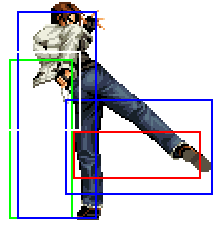
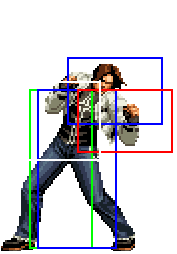
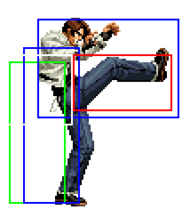
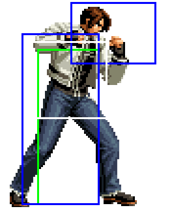
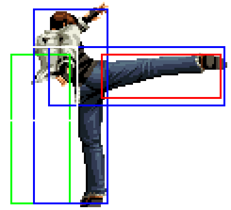
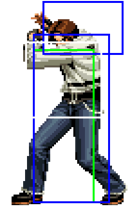
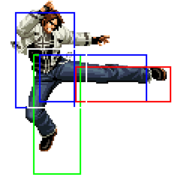
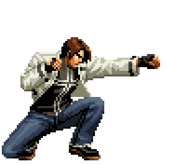
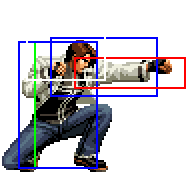
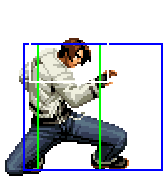
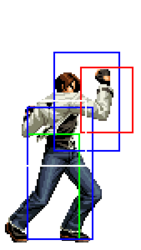
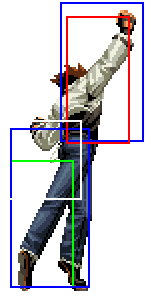
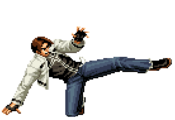
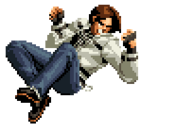
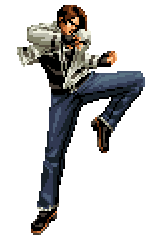
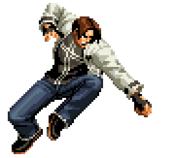
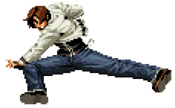
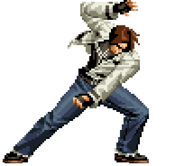
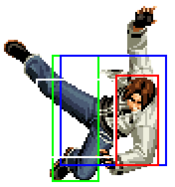
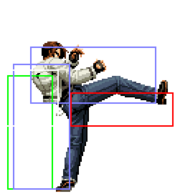
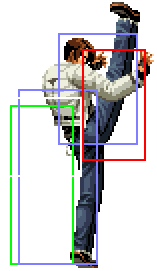
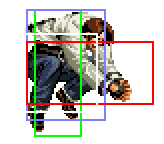
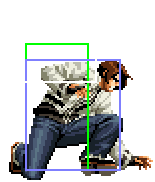
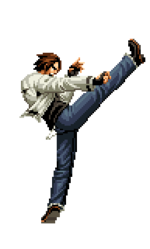
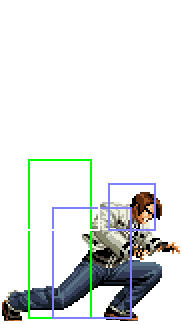
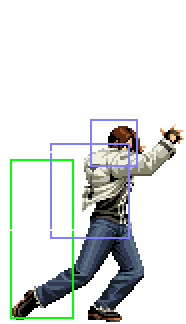
|image=02UM_Kyo_raw_f+B_2_ima.png | |image=02UM_Kyo_raw_f+B_2_ima.png | ||
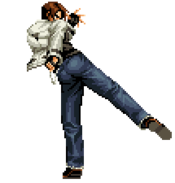
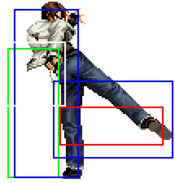
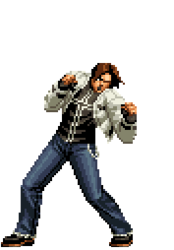
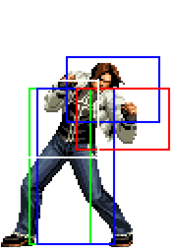
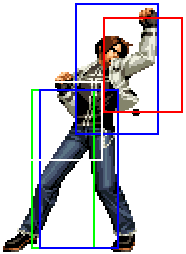
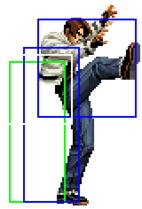
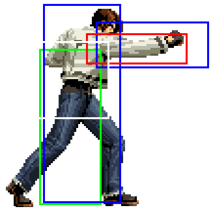
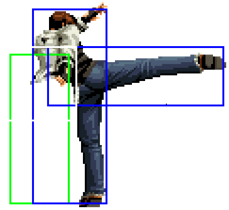
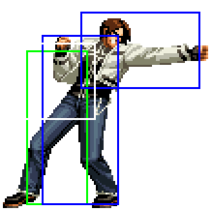
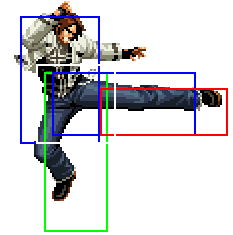
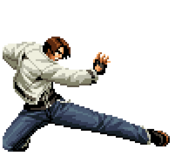
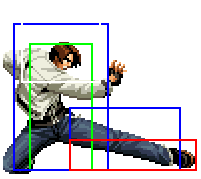
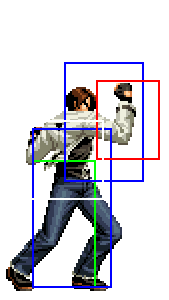
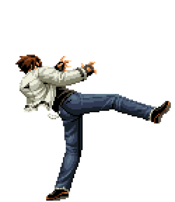
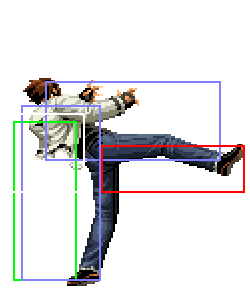
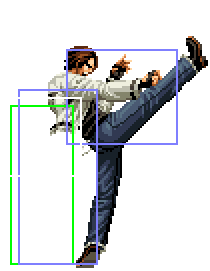
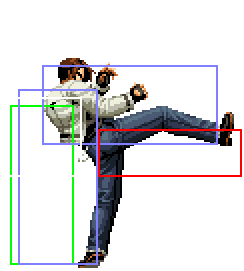
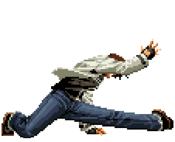
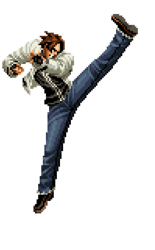
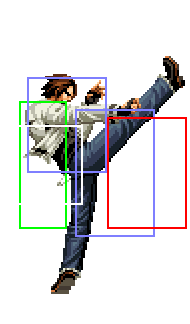
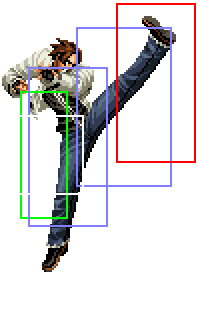
|image2= | |image2=02UM_Kyo_can_f+B_3_ima.png | ||
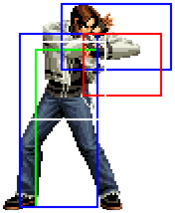
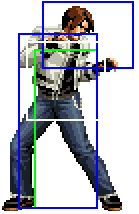
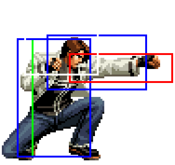
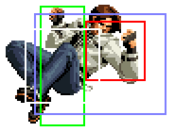
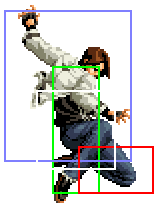
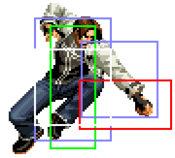
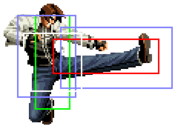
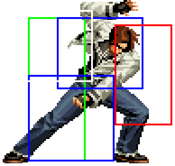
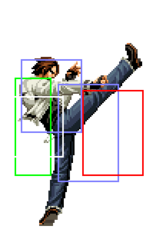
|hitbox=02UM_Kyo_raw_f+B_2.png | |hitbox=02UM_Kyo_raw_f+B_2.png | ||
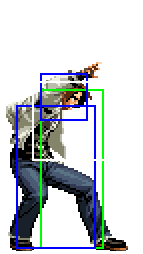
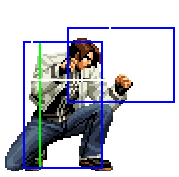
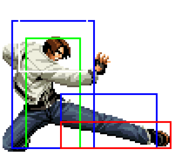
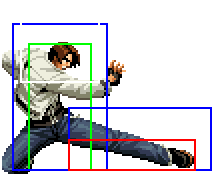
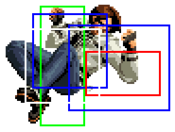
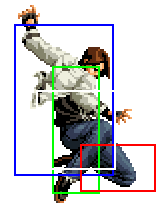
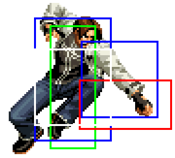
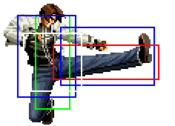
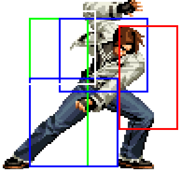
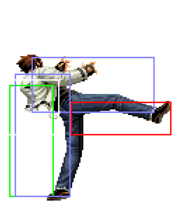
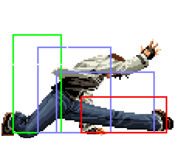
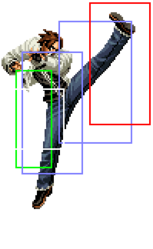
|hitbox2= | |hitbox2=02UM_Kyo_can_f+B_3.png | ||
|caption= | |caption= | ||
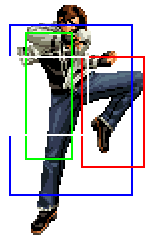
|name=Ge Shiki Goufu You | |name=Ge Shiki Goufu You | ||
| Line 672: | Line 672: | ||
Phases= | Phases= | ||
<gallery mode=packed-hover heights=200px> | <gallery mode=packed-hover heights=200px> | ||
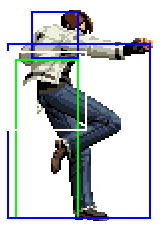
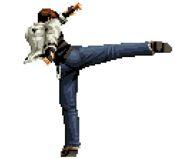
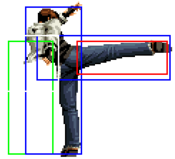
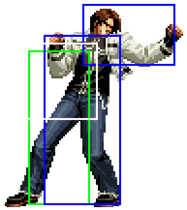
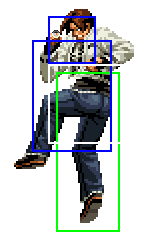
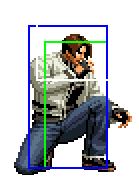
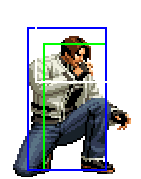
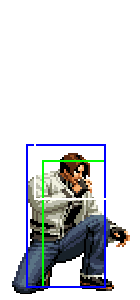
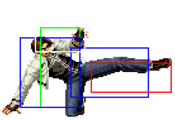
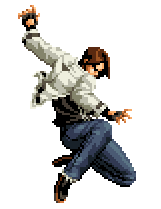
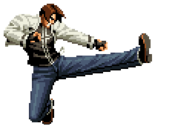
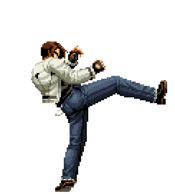
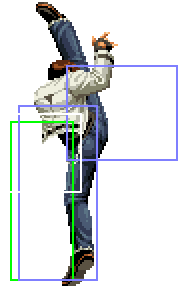
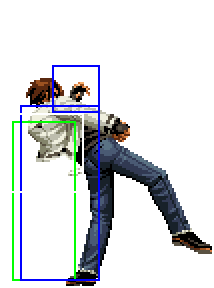
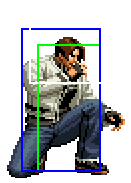
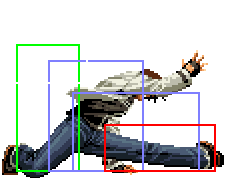
File: | File:02UM_Kyo_can_f+B_1.png|'''1st hit''' | ||
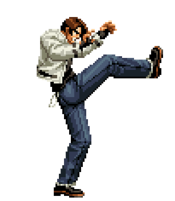
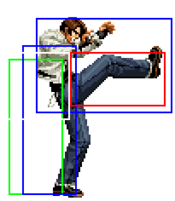
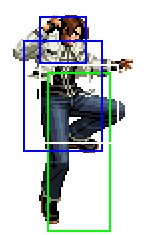
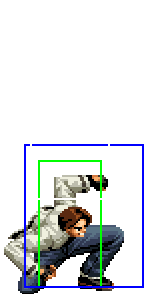
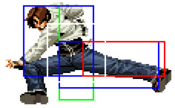
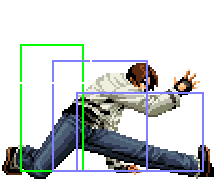
File: | File:02UM_Kyo_can_f+B_2.png|'''Gap''' | ||
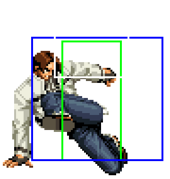
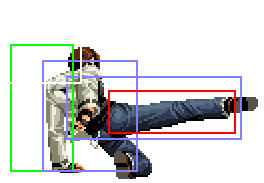
File: | File:02UM_Kyo_can_f+B_3.png|'''2nd hit''' | ||
</gallery> | </gallery> | ||
</tabber> | </tabber> | ||
Revision as of 19:47, 29 December 2021
Movelist
Throws
Issetsu Seoi Swimming - close, ![]() /
/ ![]() +
+ ![]()
Command Moves
Ge Shiki Naraku Otoshi - in air, ![]() +
+ ![]()
Special Moves
Desperation Moves
Ura 108 Shiki Orochinagi - ![]()
![]()
![]() +
+ ![]() /
/ ![]() (Hold
(Hold ![]() or
or ![]() to charge)
to charge)
182 Shiki - ![]()
![]() +
+ ![]() /
/ ![]() (Hold
(Hold ![]() or
or ![]() to charge)
to charge)
Super Desperation Move
Ura 108 Shiki Orochinagi - ![]()
![]()
![]() +
+ ![]()
![]() (Hold
(Hold ![]() or
or ![]() to charge)
to charge)
Hidden Super Desperation Move
| 0 Bar |
Low Anywhere Very Close Corner Only |
cr.B, cr.A, df+D = 17% (jump-in), cl.C, qcf+C > hcb+P > f+P > dp+P = 21% (optional cross-up), cl.C, qcf+D>K, hcb+B, qcf+A/st.D = 22-27% (jump-in), cl.C, qcf+D>K, hcb+B, qcf+A > hcb+P > hcb+K = 33% |
| 1 Bar |
Low
Very Close |
cr.B, st.A/cr.A, qcfx2+A = 27% (jump-in), cl.C/cl.D, qcfx2+A = 29-32% (optional cross-up), cl.C, qcf+D>K, qcb,hcf+P = 34% |
| 2 Bar |
Anywhere Very Close |
(jump-in), cl.C, df+D(1), qcf+BC, [(C)qcf+A, (C)qcf+C]x2 (SC) qcfx2+A = 43% (optional cross-up), cl.C, qcf+D>K, hcb+B (SC) qcb,hcf+P = 40% |
| 3 Bar |
Very Close |
(optional cross-up), cl.C, qcf+D>K, qcb,hcf+AC = 45% |
Gameplay Overview
The main main protagonist is back with the same Nests style but long time fans will surely notice and enjoy some welcomed improvements. With a limited but good set of mid range tools to keep the opponent pinned down (st.B, qcf+A) Kyo then aims to force his way in (j.D/CD) to do what he's best at, pressuring and mixing up the opponent (cr.B, j.B/d+C) until landing a solid cl.C for great meterless and meter conversions.
Although the main focus is on starting his own offense, Kyo does also have some good tools to protect his space and defend himself (nj.B, dp+P). With some nice match-up coverage tools sprinkled in (st.D), Kyo proves to be a potentially very strong character with an answer to most midrange situations although still lacking when further away.
As the saying goes, with great power comes great execution. With a number of simple and decent options to fall back on, the first wall to break to become a better Kyo will be building up the execution for his optimal meter conversions that make him shine as an anchor.
Normals
Close
| cl.A | No results |
|---|
| cl.B | No results |
|---|
| cl.C | No results |
|---|
| cl.D | No results |
|---|
Stand
| st.A | No results |
|---|
| st.B | No results |
|---|
| st.C | No results |
|---|
| st.D | No results |
|---|
Crouch
| cr.A | No results |
|---|
| cr.B | No results |
|---|
| cr.C | No results |
|---|
| cr.D | No results |
|---|
Jump
| j.A | No resultsNo resultsNo results |
|---|
| j.B | No resultsNo resultsNo results |
|---|
| j.C | No resultsNo results |
|---|
| j.D | No resultsNo resultsNo results |
|---|
Blowback Attack
| st.CD | No results |
|---|
| j.CD | No resultsNo results |
|---|
Throws
Hachi Tetsu - (b/f+C) close
- Grabs the opponent and performs a shoulder attack
- Can be broken
- Regular knockdown
Issetsu Seoi - (b/f+D) close
- Kyo slams the opponent onto the ground then does an elbow drop.
- Can be broken
- Reverse knockdown
Advice: Reverse Knockdown gives Kyo a ton of options, mainly run-up j.d+C to cross-up BnB to combo ender, practice timing it so that you'll catch them as soon as they get up backward.
Command Moves
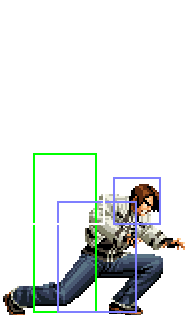
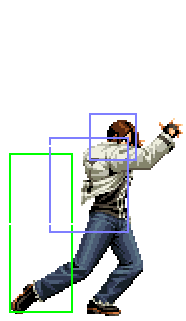
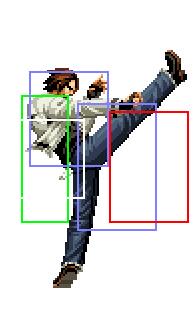
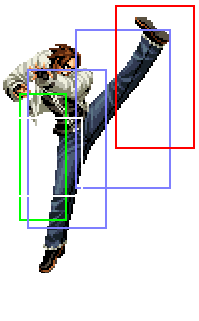
| Ge Shiki Goufu You f+B |
No resultsNo results |
|---|
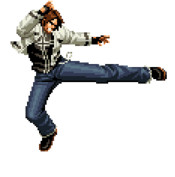
| Ge Shiki Naraku Otoshi j/sj/h/hh.d+C |
No results |
|---|
| 88 Shiki df+D |
No results |
|---|
Special Moves
100 Shiki Oniyaki - (dp+A/C)
- Kyo does a quick rising flaming uppercut, a standard dp with the usual options. Weak version goes slightly into the air while the strong version goes much higher and does two hits. It has some invincibility (about 9 frames) but can be easily punished if done on block or whiffed altogether. The combo options are there but don't expect anything that will wow you unless you enter Max Mode. Has a variety of super cancel points but most of it involves him using his 75 Shiki Kai launcher first.
- Anti-Air
- Super Cancel-able on hit
SC Advice: 182 Shiki is almost always guaranteed as a follow-up, a great juggle SC ender.
427 Shiki Hikigane - (hcb+B/D)
- The weak version makes Kyo do a low invincible spin jump to a punch that launches them into the air, while the strong variant makes him lower his head in a high invincible stance then a quick punch in place. Despite the look of the flames at the end of his elbows they are just for show and do not extend the active hit-box any further, that and neither version of the move are guaranteed when dealing with grounded opponents because the start-ups are too long. However both versions of this move work extremely well after his strong Kai launcher and will juggle the opponent on contact.
- Super Cancel-able on Hit
SC Advice: The SC points are on hit for both, but to get the most out of it try a launcher (qcf+D~D) then Hikigane (hcb+B, or hcb+D in corner) then you can freely SC into any of his DM's, 182 Shiki DM requires you to hold it for a little bit otherwise you'll whiff.
RED Kick - (rdp+B/D)
- Kyo jumps and swings his leg down to kick the opponent on the head, good move for the right situations. Weak version has a smaller jump arch than the strong version. Neither of them are all that combo friendly although they do have a few set-ups. It's a good move for Kyo but it's still prone to trade with dp's, jump CD's, and air normals that exceed the height of Kyo's hit-box.. You can play around with the weak version at it's not as restricted as the strong one, use in moderation with back-dashing and such to throw your opponent off. The strong version also whiffs on opponents that are crouching and guarding in the corner.
- Hard Knockdown
Combo Advice: Works well after simple BnB's (e.g. cl.C, qcf+D~D, rdp+B) at any range.
| 75 Shiki Kai qcf+B > K or qcf+D > K |
No resultsNo results |
|---|
114 Shiki Aragami - (qcf + A)
- Kyo steps forward and performs a flaming hook punch. This is the start of his branching Aragami special moves. By itself it has a good amount of autoguard frames which can stop and counter against incoming pokes and even certain projectiles if timed correctly. You can use this punch by itself as a poke to stop opponents from dashing into your close range space or even trying to hop towards you. On hit, it doesn't knock the opponent down, they are just briefly inflamed, then they recover while standing. On block it really isn't very safe but it provides a good amount of push back to keep you out of certain harms way.
- Combo Advice: This punch connects well after close C, crouching C and close D. You can juggle with it after the qcf+D~D launcher but be careful of the timing.
- 128 Shiki Kono Kizu - after Aragami, (qcf + P)
- This followup looks like an uppercut with emphasis on Kyo's elbow. On contact this uppercut ::will give the opponent a techable knockdown. On block, the Kono Kizu is very unsafe, even the amount of push back it grants the player (which isn't much) can not help from certain punishment from the opponent. You can use this move as sort of a frame trap if you delay it after a blocked Aragami (qcf+A).
- 127 Shiki Yano Sabi - after Aragami, (hcb + P)
- Kyo thrusts his elbow hard down after the Aragami. This is an overhead follow to his Aragami series. It doesn't combo from his Aragami so it's more like a delayed followup just incase the opponent is committed to blocking low. It causes a hard knockdown for you can follow with the next Aragami attack, or for you can cross-up with a jump or hop meaty attack or any other okizeme options. On block, this is very unsafe as well, so it's rather risky to throw out there unless you are sure your opponent will not block it.
- 127 Shiki Yano Sabi - after Aragami, (hcb + P)
- 125 Shiki Nana Se - after Kono Kizu or Yano Sabi, (K)
- Kyo peforms a fast, high inside roundhouse kick. This is one of Kyo's last branches to the Aragami series. On contact, it sends the opponent FLYING across the screen for a techable knockdown. It only combos after the Kono Kizu followup, while misses (and causes you to be vulnerable) if you use the Yano Sabi instead. On block it is actually quite safe but you can be punished by 1 frame command throws and special move a few frames less faster. You can try to employ a frame trap using this kick on block by using dp+C which will beat out any opponents attempting to punish you with a normal attack, or a very slow special move but use that with caution, and only if you witness any forms of attempted punishment from your opponent. This kick is actually more safe and pushes back farther on block if done after the Yano Sabi rather than the Kono Kizu which places you a bit more close to the opponent.
- Combo Advice: This kick will combo only after the Kono Kizu follow up.
- 125 Shiki Nana Se - after Kono Kizu or Yano Sabi, (K)
- 212 Shiki Kototsuki You - Aragami, Yano Sabi, then: (hcb + K)
- Kyo scoops the opponent up after knocking them down with Yano Sabi, then blasts them in the air with a fire explosion. This is another finisher to the Aragami series. The blast give the opponent a hard knockdown which is possible for you to quickly follow-up with any viable wake-up option. Even though you can follow up this move after a successful connected Yano Sabi, you can also combo this fully in the corner with qcf+D~D as a launcher. On block, this move is very unsafe, even with the amount of push back it gets. It's best to use this move after a juggle combo; to use it to finish a block string is very risky.
- Combo Advice: Best to use at the end of a juggle with qcf+D~D as the launcher.
- 212 Shiki Kototsuki You - Aragami, Yano Sabi, then: (hcb + K)
- Ge Shiki Migiri Ugachi - Aragami, Yano Sabi, then: (P)
- Kyo punches the opponent while they are on the ground after being plummeted by the Yano Sabi. This is the last finisher to the Aragami series. It serves the same purpose as the Kotosuki You follow up but the damage is a bit lower. It still give the opponent a hard knockdown, and their body is placed directly next to Kyo instead of a half screen away. The hit property on this move is a low attack, so it might surprise some defending opponents when they have finished blocking the Yano Sabi (which is an overhead). On block this move does push Kyo a good and safe distance away, but the opponent can actually roll or attack Kyo before it hits them. Similar to the Kototsuki You, it's best to use this finsiher during a juggle that has qcf+D~D as the launcher.
- Ge Shiki Migiri Ugachi - Aragami, Yano Sabi, then: (P)
115 Shiki Doku Kami - (qcf + C)
- Kyo throws out a heavy flame imbued haymaker. This is the start to his Doku Kami rekkas series. By itself it covers a good distance but it has rather slow start-up. It does have auto-guard frames during the start-up, but its rather brief (during the part of the animation where it looks like Kyo is turning around or winding up his punch). This slow start-up can cause this move to be beaten out by simple attacks like a quick jab or any other move that can reach him in time before attacks anyone. It's best to use this move during a combo because it is rather unsafe and risky to perform alone, even on block and it doesn't knock the opponent down by itself. If you must indulge, use his qcf+A to try to poke around with in mid-range.
- 401 Shiki Tumi Yomi - Domu Kami, then: (hcb + P)
- This follow-up looks sort of like a quick back-hand Kyo strikes on the opponent. It's very unsafe on block, so be sure to properly hit confirm the Doku Kami first. If you connect with it by itself, it's just asking to be followed up as it doesn't provide much damage and doesn't knockdown at all.
- 402 Shiki Batu Yomi - Tumi Yomi, then: (f + P)
- After the Tumi Yomi back-hand hits, a short shoulder looking uppercut is followed. It gives the opponent a tech-able knockdown on hit in which they land near a half screen away. If this whiffs or is blocked, Kyo can be punished when he lands back to the ground. Only use it when confirmed properly.
- 402 Shiki Batu Yomi - Tumi Yomi, then: (f + P)
- 100 Shiki Oniyaki - Batu Yomi, then (dp + P)
- Kyo performs his Oni Yaki (the light punch version) at the end of this rekka string. It's always best to end with this finisher rather than just Tumi Yomi (which looks like its proper finisher but isn't) to maximize its damage. Also, the opponent lands a bit close to you if they tech the knockdown.
- 100 Shiki Oniyaki - Batu Yomi, then (dp + P)
Combo Advice: It's best to use this rekkas after a stand C, crouching C, or a stand D. You cannot juggle using these rekkas similar to the Aragami rekkas when using qcf+D~D as a launcher.
Desperation Moves
Ura 108 Shiki Orochinagi - qcb, hcf + A/C (Hold A/C to charge)
- Kyo holds a flame in his left hand before releasing a wave of fire that goes a bit further than halfscreen. As usual Orochinagi makes for a mediocre reversal/anti-air as it only has a short window of full invuln before being low/high invuln during the charge depending on A/C version. That said, it's very useful for Kyo, as his best ender for most of his max combos and an easy 1 bar conversion off qcf+D>K. While charging doesn't increase damage and actually slightly decreases its range, the charged version of Orochinagi has a faster release, which is very important.
- Regular Orochinagi is normally too slow to combo off anything on the ground but if you charge it to get the speed boost and let go in time to fit the hitstun window, you can combo into it. Learning it is very useful but qcfx2+A can make for a nice and easy substitute in most cases.
Combo Advice: Linking Orochinagi after qcf+D>K is decent damage for 1 bar midscreen. During a grounded max mode combo, charging it slightly after canceling from his qcf+C will make it connect and combo together. Read more about the timing in the combo section.
182 Shiki - qcf, qcf + A/C (Hold A/C to charge)
- Kyo charges up briefly, then spins around and charges at the opponent with a short ranged looking uppercut. This super should be only used in max mode combos because it can't seem to connect fluidly from any normals or special moves, even super cancelled. It has slow start-up, doesn't have any invincibility (he can be hit during his charge towards the opponent), and has bad recovery too. The light version can punish moves with bad recovery, including GCCDs after baiting them but it still fails as a reversal option.
- It has 4 levels of charge that respectively do 22%, 28%, 42% and the full charge where the move becomes unblockable and is instantly released, doing 60%
Combo Advice: The level 2 charge can be reached very fast, so fast that depending on range you can still combo off a special hitstun making qcfx2+A do more damage than Orochinagi in a ground max combo where you have enough range and the proper spacing to charge it.
Super Desperation Move
Ura 108 Shiki Orochinagi - (qcb, hcf + AC)
- This beefed up version of Kyo's Orochinagi features flames surrounding his body (which causes damage to the opponent upon contact) and a short range fire projectile traveling in-front of him when the fire strike is released. If timed correctly, the flames surrounding Kyo can eat fireballs, while the fire projectiles can override them and hit the opponent if close enough. When you charge the Orochinagi, Kyo can be hit before the fire strike is released. When fully charged there is not damage or distance increase to the range to the fire strike or the flames traveling in-front of him. The start-up compared to the original Orochinagi DM is the same but because the flames surround him immediately, it can give Kyo very quick shield against any attacks. You can even try to use the shield on your wake up if you briefly hold it, snuffing any meaty attacks (hops attacks might be safejumped). This SDM during its recovery is more safe than the original DM version because the flame projectiles push the opponent back a few distances. If you have the meter to use this super, be sure it's going to hit them in some form or fashion because if it misses, you will be without 3 stocks.
Combo Advice: You can Super Cancel this easily from his hcb+B which will overall cost 4 meter stocks (2 stocks in max mode). You can also perform it immediately after a qcf+D~D launch when not in max mode. This SDM can also come into play in a few of his juggled max mode combos.
Hidden Super Desperation Move
524 Shiki Kamichiri - (hcb, hcb + AC)
- This is Kyo's 2f command throw HSDM. He grabs the opponent by the head, smacks them, then unleashes a flurry of rekkas covered in flames to end in a Oki Yaki dragon punch. It's good to surprise the living daylights out of your opponent by empty jumping into it, or bursting it out on your wake if they are trying to meaty attack you with a ground normal. You can combo it from his standing and crouching light punch, as well as his stand C, but beyond that there isn't many other offensive options to use this HSDM. You can use this as a quick punish option against whiffed specials or DMs during their recovery if you are close enough, or to punish certain moves that are not safe on block, as well.
Combo Advice: Not something you'll lose any often in combos. It'll mostly be as a surprise option or a punish to remind the opponent that you do have a grab.
Tips
- Learn how to properly cross-up your opponent with j.B or j.2C during an untechable, hard knockdown. Either after a heavy kick normal throw, rdp+B or after a Ge Shiki Migiri Ugachi (qcf+A, hcb+P, P). Learn the proper spacing, correct jump angles and attack timings to make the cross-up as ambiguous as possible.
- Learn Kyo's max mode combos. He has some rather easy ones that cause good damage.
Combos
- As written, you can add a non-cross-up jump-in to every combo unless specified otherwise.
- Two possible shortcuts for dp+C(1) (SC) qcb,hcf+P are hcb,f+C(1) (SC) qcf+P and qcb,f,d,df+C(1) (SC) f+P
- qcb,hcf+P is normally too slow to combo from any grounded move's hitstun but you can make it faster by charging it briefly by holding A or C. You need to charge and release around just after the super flash or when Kyo finishes saying "Kura". Anytime you'll need that version it'll be noted as qcb,hcf+P(Charge).
- His corner max combos do require to be in the corner for the very end but he easily carries over a screen of distance so round start position is more than enough to get the combo.
- Unless specified otherwise, you can replace cl.C by cr.B,cr.A for a low starter for max combos but it makes the BC run, if there is one, tighter. You can also use f+B instead of cl.C, df+D for an overhead starter.
- cl.C, dp+C whiffs on crouching (Vice, Mature, Bao). Against those, you can replace cl.C by cl.A/cr.A or go straight into dp+C after a BC run.
- Don't use the qcb,hcf+AC(2) juggle combos on Angel, Nameless, May Lee and Maxima, simply land the full SDM.
0 Stock
Anywhere
- cr.Bx1~3, st.B
★ cr.B, cr.A / st.A, df+D / dp+C
- dp+C is a knockdown while df+D is more damage and provides max conversion while being safe on hit/block. Default to df+D.
★ cl.C, qcf+C > hcb+P > f+P > dp+P
- Most reliable. If you have any doubt about spacing, just use this.
★ cl.C, qcf+D>K, hcb+B, qcf+A / st.D / j.d+C
- More damage than the previous but you need to be almost point blank. qcf+A gives more carry, st.D more damage, j.d+C -either super jump or hyper hop- hard knockdown.
Corner
★ cl.C, qcf+D>K, hcb+B, qcf+A > hcb+P > hcb+K
- cl.C, qcf+D>K, hcb+B, qcf+A/qcf+B>K, dp+C
- cl.C, qcf+D>K, qcf+A, qcf+A, dp+C
- cl.C, qcf+A > qcf+P > P/K
- The last three all do less damage and/or have less range than the first. No reason to use them over the one above unless you aren't sure cl.C is gonna land, in which case the last route is safer.
1 Stock
Anywhere
- cr.Bx1~2, st.A/cr.A, qcfx2+A
- You can shortcut it as cr.Bx1~2, qcf, st.A/cr.A, qcf+A.
- cl.C, qcf+D>K, (hcb+B,) qcb,hcf+P
- To use hcb+B, you need to delay the second kick of qcf+D and qcb,hcf+P(Charge) for it to link. 40%.
2 Stocks
Anywhere
- cl.C, qcf+D>K, hcb+B (SC) qcb,hcf+P
- If you don't want to bother with max mode, this is it. You can hardly add a jump-in if not a cross-up, not ideal. 40%.
- cl.C, dp+C(1) (SC) qcfx2+P / qcb,hcf+P(Charge)
- Please don't use this. 38%.
★ cl.C, df+D(1), qcf+BC, [(C)qcf+A, (C)qcf+C]x2 (SC) qcfx2+A
- If you use df+D(2) super whiffs on Robert and these inconsistent characters minus the st.Kyo_Jhun-tier and standing (Foxy, Leona). To add a front jump-in, use cr.B, cr.A and just more consistency altogether stick to df+D(1), keep df+D(2) for after a cross-up. 43%; 50% with df+D(2).
★ cl.C, df+D, qcf+BC, [(C)qcf+A, (C)qcf+C]x2 (SC) qcb,hcf+P(Charge)
- A bit harder but a more consistent basic route. You can add the hcb+P follow-up on the last qcf+C but it's little extra damage for less range, avoid it. 51%.
★ cl.C, df+D(1), BC run, cl.C, dp+C(1), (C)qcf+D>K, hcb+B, qcf+A (SC) qcb,hcf+P
- The basic option when you can do a decent max run. 49%.
★ cl.C, df+D(1), BC run, cl.C, dp+C(1), (C)hcb+D, (C)qcf+C, (C)qcf+A, (C)qcf+C (SC) qcfx2+A / qcb,hcf+P(Charge)
- Better option with a harder max run. You can still add the hcb+P follow-up on the last qcf+C if you use qcb,hcf+P but not worth it. 52%.
- cl.C, df+D(1), BC run, cl.C, dp+C(1), (C)hcb+D, (C)qcf+C, (C)qcf+D>K, hcb+B, [qcf+A / (C)qcf+A(whiff), dp+C(1)] (SC) qcb,hcf+P
- Works as long as you didn't start literally in the opposite corner. 56%.
- cl.C, df+D(1), BC run, cl.C, dp+C(1), (C)qcf+D>K, hcb+B, (C)qcf+A(whiff), delay dp+C(1), (C)hcb+B, qcf+A, dp+C(1) (SC) qcb,hcf+P
- Works at the same spacing as the previous one but has a fairly tight delay. Remove the last qcf+A or dp+C(1) for complete fullscreen but a bit less damage. 58%.
Corner
- cl.C, qcf+D>K, (hcb+B,) hcb+D (SC) qcb,hcf+P
- Delay the second kick of qcf+D to add hcb+B and still link hcb+D. 51%.
★ cl.C, qcf+D>K, hcb+B, qcf+A, dp+C(1) (SC) qcb,hcf+P
- 53%.
★ cl.C, df+D(1), BC run, cl.C, dp+C(1), (C)qcf+D>K, hcb+B, qcf+A, dp+C(1) (SC) qcb,hcf+P
- The basic option when you can do a decent max run. 53%.
- cl.C, df+D(1), BC run, cl.C, dp+C(1), (C)qcf+D>K, hcb+B, qcf+A, dp+C(1), (C) qcf+A(whiff) > fast qcf+P, (C) delay qcf+C(whiff) > fast hcb+P, (SC) qcb,hcf+P
- The rekka cancels need to be timed appropriately to avoid qcfx2+P. Not worth much if you can do the previous one or the next ones, 55%.
- cl.C, df+D(1), BC run, cl.C, dp+C(1), (C)hcb+D, (C)qcf+C, (C)qcf+D>K, (hcb+B,) hcb+D (SC) qcb,hcf+P
- Delay the second kick of qcf+D to add hcb+B and still link hcb+D. 58%.
- cl.C, df+D(1), BC run, cl.C, dp+C(1), (C)hcb+D, (C)qcf+C, (C)qcf+A > qcf+A, (C)hcb+B, delay dp+C(1) (SC) qcb,hcf+P
- 58%.
★ cl.C, df+D(1), BC run, cl.C, dp+C(1), (C)hcb+D, (C)qcf+C, (C)qcf+D>K, hcb+B, qcf+A, dp+C(1) (SC) qcb,hcf+P
- 59%.
3 Stocks
Anywhere
- cr.B, st.A/cr.A, hcbx2+AC
- You can shortcut it as cr.B, hcb, st.A/cr.A, hcb+AC. No reason to use this over a max combo. 41%.
- cl.C, qcf+D>K, qcb,hcf+AC
- Very basic option to just spend meter for some damage. 45%
- cl.C, df+D(1), BC run, cl.C/cr.C, hcbx2+AC
- 62%.
★ cl.C, df+D(1), BC run, cl.C, dp+C(1), (C)qcf+D>K, hcb+B, qcf+A (SC) qcb,hcf+AC
- The basic option when you can do a decent max run. 60%. If you slightly charge the super to get a flamebody hit then let go immediately you get 68%.
★ cl.C, df+D(1), BC run, cl.C, dp+C(1), (C)hcb+D, (C)qcf+C, (SC)qcb,hcf+AC(slight charge)
- You need to briefly charge the super for the body flame to hit the opponent and put them in juggle before you let it go, it won't combo otherwise. Great combo for how easy it is. 67%. You can get 3 flamebody(fb) hits in the corner for 72%.
- cl.C, df+D(1), BC run, cl.C, dp+C(1), (C)hcb+D, (C)qcf+C, (C)qcf+A, (C)qcf+C (SC)qcb,hcf+AC(slight charge)
- Only backturned opponent except Chang in corner. 71% with j.C cross-up. In corner 75%. Doesn't work on the st.Kyo_Name-tier and crouching Kensou. Stick to the previous one.
- cl.C, df+D(1), BC run, cl.C, dp+C(1), (C)hcb+D, (C)qcf+C, (C)qcf+D>K, hcb+B, [qcf+A / (C)qcf+A(whiff), dp+C(1)] (SC) qcb,hcf+AC
- Works as long as you didn't start literally in the opposite corner. 3fb 80%.
- cl.C, df+D(1), BC run, cl.C, dp+C(1), (C)qcf+D>K, hcb+B, (C)qcf+A(whiff), delay dp+C(1), (C)hcb+B, qcf+A, dp+C(1) (SC) qcb,hcf+AC
- Works at the same spacing as the previous one but has a fairly tight delay. If you reach corner for 3fb, 82%.
Corner
- cl.C, df+D(1), BC run, cl.C, dp+C(1), (C)hcb+D, (C)qcf+C, (C)qcf+D>K, hcb+B (SC) qcb,hcf+AC(1), qcf+A, dp+C
- Don't hold the super and link the rest immediately behind it. 65%.
- cl.C, df+D(1), BC run, cl.C, dp+C(1), (C)hcb+D, (C)qcf+C, (C)qcf+A > qcf+A, (C)hcb+B (SC) qcb,hcf+AC(1), qcf+A, dp+C
- Don't hold the super and link the rest immediately behind it. 68%.
- cl.C, df+D(1), BC run, cl.C, dp+C(1), (C)qcf+D>K, hcb+B, qcf+A, dp+C(1), (C) qcf+A(whiff) > fast qcf+P, (C) delay qcf+C(whiff) > fast hcb+P, (SC) qcb,hcf+AC
- The rekka cancels need to be timed appropriately to avoid qcfx2+P. Not worth much if you can do the next ones, if you do qcf+A then dp+C low enough to get 3 flamebody(fb), 79%.
- cl.C, df+D(1), BC run, cl.C, dp+C(1), (C)qcf+D>K, hcb+B, qcf+A, dp+C(1), (C) qcf+A(whiff) > fast qcf+P, (C) delay qcf+C(whiff) > fast hcb+P, (SC) qcb,hcf+AC(2), qcf+A, dp+C
- You need to land Ex Orochinagi as low as you can and get 3 flamebody hits before the super can do 2 hits and juggle. 91%
★ cl.C, df+D(1), BC run, cl.C, dp+C(1), (C)qcf+D>K, hcb+B, qcf+A, dp+C(1) (SC) qcb,hcf+AC
- The basic option when you can do a decent max run. If you do qcf+A then dp+C low enough to get 3 flamebody(fb), 76%.
- cl.C, df+D(1), BC run, cl.C, dp+C(1), (C)hcb+D, (C)qcf+C, (C)qcf+D>K, hcb+B, hcb+D (SC) qcb,hcf+AC
- 2 flamebody(fb) hits at most for 80%.
★ cl.C, df+D(1), BC run, cl.C, dp+C(1), (C)hcb+D, (C)qcf+C, (C)qcf+D>K, hcb+B, qcf+A, (dp+C(1)) (SC) qcb,hcf+AC
- Optimized version. 3 fb, without dp+C(1) 78%, with it 82%.
★ cl.C, df+D(1), BC run, cl.C, dp+C(1), (C)hcb+D, (C)qcf+C, (C)qcf+A > qcf+A, (C)hcb+B, qcf+A (SC) qcb,hcf+AC
- Optimized version. 3 fb, 81%.
- cl.C, df+D(1), BC run, cl.C, dp+C(1), (C)hcb+D, (C)qcf+C, (C)qcf+A > qcf+A, (C)hcb+B, delay dp+C(1) (SC) qcb,hcf+AC(2), qcf+A, dp+C
- At a height where you can only get 2 fb, you can also delay super to only do 2 hits, which juggles so you can follow-up for a 94%. This is hard.
4 Stocks
Anywhere
- cl.C, qcf+D>K, hcb+B (SC) qcb,hcf+AC
- 51%.
Corner
- cl.C, qcf+D>K, (hcb+B,) hcb+D (SC) qcb,hcf+AC
- 2 fb, 73%.
- cl.C, df+D(1), BC run, cl.C, dp+C(1), (C)hcb+D, (C)qcf+C, (C)qcf+A, (C)qcf+C, (C)qcf+D>K, raw BC, dp+C(1), (C)hcb+B, [qcf+A, dp+C(1), (C)hcb+B]x2 (SC) qcb,hcf+AC
- Delay the 2nd kick of qcf+D to get more time to raw activate max. 87%.
- cl.C, df+D(1), BC run, cl.C, dp+C(1), (C)hcb+D, (C)qcf+C, (C)qcf+A, (C)qcf+C, (C)qcf+D>K, raw BC, dp+C(1), (C)hcb+B, [qcf+A, dp+C(1), (C)hcb+B]x2 (SC) qcb,hcf+AC(1), qcf+A, dp+C
- If you release super right away, it only does one hit that juggles and you can link after it. 89%.
5 Stocks
Corner
★ cl.C, df+D(1), BC run, cl.C, dp+C(1), (C)hcb+D, (C)qcf+C, (C)qcf+A > qcf+A, (C)hcb+B, (SC) qcb,hcf+AC(1), qcf+A, dp+C(1) (SC) qcb,hcf+P
- If you release super right away, it only does one hit and juggles so you can link after it. 89%.
- cl.C, df+D(1), BC run, cl.C, dp+C(1), (C)hcb+D, (C)qcf+C, (C)qcf+A, (C)qcf+C, (C)qcf+D>K, raw BC, dp+C(1), (C)hcb+B, [qcf+A, dp+C(1), (C)hcb+B]x2 (SC) qcb,hcf+AC(1), qcb,hcf+P(Charge)
- Delay the 2nd kick of qcf+D to get more time to raw activate max. 96%. This is hard.
Videos
External Links
Check Kyo Kusanagi's frame data and move data
Discuss at 02UM Discord server
Discuss at Dream Cancel
Discuss at ON
