Difference between revisions of "The King of Fighters '98 UMFE/EX Kyo"
Franck Frost (talk | contribs) |
|||
| (24 intermediate revisions by 6 users not shown) | |||
| Line 1: | Line 1: | ||
{{CharNavbox_98FE}} | |||
{| style="margin-right:1em;" align="right" | {| style="margin-right:1em;" align="right" | ||
| __TOC__ | | __TOC__ | ||
|} | |} | ||
[[File:EX-Kyo-member.png]] | <section begin="image"/>[[File:EX-Kyo-member.png]]<section end="image"/> | ||
[[File:Notationkof.png|left]] | [[File:Notationkof.png|left]] | ||
[[File:Kof98umfeexkyomovelist.png|left]] | [[File:Kof98umfeexkyomovelist.png|left]] | ||
| Line 8: | Line 9: | ||
== Introduction == | == Introduction == | ||
{{StrengthsAndWeaknesses | |||
| description =EX Kyo is a balanced fighter that has tools to fight at all ranges. In neutral, he has access to a grounded projectile, a good 623, and a super backdash, alongside some decent pokes for controlling space with. Up close, he has an excellent pressure tool in his air command normal that allows for strong blockstrings and also works as a good crossup. His combo game from heavies is excellent due to his special launcher and his multiple hard knockdown finishers. He also benefits from cornering the opponent, as he gets access to more damaging corner combos. His main weakness is his pretty weak low confirm options.}} | |||
== Changes from Previous Versions == | |||
'''98 to 98UM''' | |||
Normals: | |||
* cl.C's activation range has been decreased | |||
* | |||
* Far A now has reduced priority | |||
* | |||
* Far D now starts up 4 frames faster | |||
* | |||
''' | * The first hitbox on 2C has been shortened, and the second hitbox has been lengthened | ||
* | |||
* | * 2D now has reduced priority | ||
* j.D now has reduced priority | |||
* You can no longer use j.2C during Extra mode step dash | |||
Specials: | |||
* 236P's hitbox size has been reduced | |||
* 623C now reliably hits 2 times, even when hitting an airborne opponent | |||
* 421B's recovery has been reduced by 2 frames | |||
* 421D's startup has been reduced by 1 frame, and its recovery has been reduced by 3 frames | |||
* 63214K's damage has been increased | |||
* EX Kyo now uses sound files from '95 | |||
'''98UM to 98UMFE''' | |||
Normals: | |||
* cl.A now has 2 frames less recovery | |||
* 2A now has 1 frame less recovery | |||
Specials: | |||
* 236P now has 3 frames less recovery, but builds less meter | |||
==Normals== | |||
===Close=== | |||
{{MoveData | |||
|image=UMFE-Kyo-c5A.png | |||
|caption= | |||
|name=Close A | |||
|input=cl.A | |||
|data= | |||
{{AttackData-KOF98FE | |||
|startup=3 | |||
|active=4 | |||
|recovery=3 | |||
|guard=HL | |||
|adv hit=? | |||
|adv Block=+3 | |||
|cancel=Y | |||
|knockdown=N | |||
|juggle=Y | |||
|description=*Can work as a close-range anti-air against hops. Whiffs on crouchers. | |||
*Chainable. | |||
}} | |||
}} | |||
{{MoveData | |||
|image=UMFE-Kyo-c5B.png | |||
|caption= | |||
|name=Close B | |||
|input=cl.B | |||
|data= | |||
{{AttackData-KOF98FE | |||
|startup=5 | |||
|active=4 | |||
|recovery=8 | |||
|guard=L | |||
|adv hit=? | |||
|adv Block=-2 | |||
|cancel=Y | |||
|knockdown=N | |||
|juggle=Y | |||
|description=*Standing low. | |||
*Chainable. | |||
}} | |||
}} | |||
{{MoveData | |||
|image=UMFE-Kyo-c5C.png | |||
|image2=UMFE-Kyo-c5C-2.png | |||
|caption= | |||
|name=Close C | |||
|input=cl.C | |||
|data= | |||
{{AttackData-KOF98FE | |||
|startup=2 | |||
|active=3,9 | |||
|recovery=9 | |||
|guard=HL | |||
|adv hit=? | |||
|adv Block=-3 | |||
|cancel=Y | |||
|knockdown=N | |||
|juggle=Y | |||
|description=*Has very fast start-up. Great combo starter and anti-air. | |||
}} | |||
}} | |||
{{MoveData | |||
|image=UMFE-Kyo-c5D.png | |||
|caption= | |||
|name=Close D | |||
|input=cl.D | |||
|data= | |||
{{AttackData-KOF98FE | |||
|startup= 4 | |||
|active= 3 | |||
|recovery= 22 | |||
|guard= HL | |||
|hitAdv= ? | |||
|blockAdv= -7 | |||
|cancel= Y | |||
|knockdown= N | |||
|juggle= Y | |||
|description=*A bit slower than Close C | |||
}} | |||
}} | |||
===Far=== | |||
{{MoveData | |||
|image=UMFE-Kyo-f5A.png | |||
|caption= | |||
|name=Far A | |||
|input=f.A | |||
|data= | |||
{{AttackData-KOF98FE | |||
|startup=3 | |||
|active=4 | |||
|recovery=5 | |||
|guard=HL | |||
|adv hit=? | |||
|adv Block=+1 | |||
|cancel=Y | |||
|knockdown=N | |||
|juggle=Y | |||
|description=*Good for stopping hops. Whiffs on crouchers. | |||
}} | |||
}} | |||
{{MoveData | |||
|image=UMFE-Kyo-f5B.png | |||
|caption= | |||
|name=Far B | |||
|input=f.B | |||
|data= | |||
{{AttackData-KOF98FE | |||
|startup=7 | |||
|active=3 | |||
|recovery=13 | |||
|guard=HL | |||
|adv hit=? | |||
|adv Block=-6 | |||
|cancel=Y | |||
|knockdown=N | |||
|juggle=Y | |||
|description=*Has more recovery than Far A, but more range. | |||
}} | |||
}} | |||
{{MoveData | |||
|image=UMFE-Kyo-f5C.png | |||
|caption= | |||
|name=Far C | |||
|input=f.C | |||
|data= | |||
{{AttackData-KOF98FE | |||
|startup=12 | |||
|active=2 | |||
|recovery=17 | |||
|guard=HL | |||
|adv hit=? | |||
|adv Block=-1 | |||
|cancel=Y | |||
|knockdown=N | |||
|juggle=Y | |||
|description=*Poke with lots of startup. Cancelable on hit, block, and whiff. | |||
}} | |||
}} | |||
{{MoveData | |||
|image=UMFE-Kyo-f5D.png | |||
|caption= | |||
|name=Far D | |||
|input=f.D | |||
|data= | |||
{{AttackData-KOF98FE | |||
|startup= 10 | |||
|active= 5 | |||
|recovery= 12 | |||
|guard= HL | |||
|hitAdv= ? | |||
|blockAdv= +1 | |||
|cancel= N | |||
|knockdown= N | |||
|juggle= Y | |||
|description=*A sobat kick. Can avoid lows. | |||
}} | |||
}} | |||
{{MoveData | |||
|image=UMFE-Kyo-f5CD.png | |||
|caption= | |||
|name=Blowback | |||
|input=5CD | |||
|data= | |||
{{AttackData-KOF98FE | |||
|startup= 19 | |||
|active= 4 | |||
|recovery= 16 | |||
|guard= HL | |||
|hitAdv= ? | |||
|blockAdv= +2 | |||
|cancel= Y | |||
|knockdown= Soft | |||
|juggle= Y | |||
|description=*Average start-up. | |||
*Cancelable on hit, block, and whiff. | |||
}} | |||
}} | |||
===Crouching=== | |||
{{MoveData | |||
|image=UMFE-Kyo-2A.png | |||
|caption= | |||
|name=Crouching A | |||
|input=2A | |||
|data= | |||
{{AttackData-KOF98FE | |||
|startup=3 | |||
|active=4 | |||
|recovery=4 | |||
|guard= HL | |||
|adv hit=? | |||
|adv Block=+2 | |||
|cancel=Y | |||
|knockdown=N | |||
|juggle=Y | |||
|description=*Standard outward jab. | |||
*Chainable. | |||
}} | |||
}} | |||
{{MoveData | |||
|image=UMFE-Kyo-2B.png | |||
|caption= | |||
|name=Crouching B | |||
|input=2B | |||
|data= | |||
{{AttackData-KOF98FE | |||
|startup=3 | |||
|active=4 | |||
|recovery=5 | |||
|guard=L | |||
|adv hit=? | |||
|adv Block=+1 | |||
|cancel=N | |||
|knockdown=N | |||
|juggle=Y | |||
|description=*Fast low combo starter. | |||
*Chainable. | |||
}} | |||
}} | |||
{{MoveData | |||
|image=UMFE-Kyo-2C.png | |||
|image2=UMFE-Kyo-2C-2.png | |||
|caption= | |||
|name=Crouching C | |||
|input=2C | |||
|data= | |||
{{AttackData-KOF98FE | |||
|startup=4 | |||
|active=3,3 | |||
|recovery=20 | |||
|guard=HL | |||
|adv hit=? | |||
|adv Block=-8 | |||
|cancel=Y | |||
|knockdown=N | |||
|juggle=Y | |||
|description=*Standard anti-air against jumps and hops. | |||
*Cancelable on hit, block, and whiff. | |||
}} | |||
}} | |||
{{MoveData | |||
|image=UMFE-Kyo-2D.png | |||
|caption= | |||
|name=Crouching D | |||
|input=2D | |||
|data= | |||
{{AttackData-KOF98FE | |||
|startup= 4 | |||
|active= 3 | |||
|recovery= 22 | |||
|guard= HL | |||
|hitAdv= ? | |||
|blockAdv= -4 | |||
|cancel= Y | |||
|knockdown= Soft | |||
|juggle= Y | |||
|description=*Can low-profile some moves. | |||
}} | |||
}} | |||
===Jumping=== | |||
{{MoveData | |||
|image=UMFE-Kyo-jA.png | |||
|caption= | |||
|name=Jumping A | |||
|data= | |||
{{AttackData-KOF98FE | |||
|startup=5 | |||
|active=8 | |||
|recovery=x | |||
|guard=H | |||
|adv hit=? | |||
|adv Block=? | |||
|cancel=N | |||
|knockdown=N | |||
|juggle=Y | |||
|description=*Ok air-to-air. | |||
}} | |||
}} | |||
{{MoveData | |||
|image=UMFE-Kyo-njB.png | |||
|caption= | |||
|name=Neutral Jump B | |||
|data= | |||
{{AttackData-KOF98FE | |||
|startup=5 | |||
|active=9 | |||
|recovery=x | |||
|guard=H | |||
|adv hit=? | |||
|adv Block=? | |||
|cancel=N | |||
|knockdown=N | |||
|juggle=Y | |||
|description=*Decent air-to-air. | |||
}} | |||
}} | |||
{{MoveData | |||
|image=UMFE-Kyo-jB.png | |||
|caption= | |||
|name=Jumping B | |||
|data= | |||
{{AttackData-KOF98FE | |||
|startup=5 | |||
|active=9 | |||
|recovery=x | |||
|guard=H | |||
|adv hit=? | |||
|adv Block=? | |||
|cancel=N | |||
|knockdown=N | |||
|juggle=Y | |||
|description=*Great crossup and jump-in from a hop. Also an instant-overhead. Swiss army knife of a button. | |||
}} | |||
}} | |||
{{MoveData | |||
|image=UMFE-Kyo-jC.png | |||
|caption= | |||
|name=Jumping C | |||
|data= | |||
{{AttackData-KOF98FE | |||
|startup=6 | |||
|active=4 | |||
|recovery=x | |||
|guard=H | |||
|adv hit=? | |||
|adv Block=? | |||
|cancel=N | |||
|knockdown=N | |||
|juggle=Y | |||
|description=*Another good jump-in. | |||
}} | |||
}} | |||
{{MoveData | |||
|image=UMFE-Kyo-njD.png | |||
|caption= | |||
|name=Neutral Jump D | |||
|data= | |||
{{AttackData-KOF98FE | |||
|startup=7 | |||
|active=8 | |||
|recovery=x | |||
|guard=H | |||
|adv hit=? | |||
|adv Block=? | |||
|cancel=N | |||
|knockdown=N | |||
|juggle=Y | |||
|description=*Good air-to-air. | |||
}} | |||
}} | |||
{{MoveData | |||
* | |image=UMFE-Kyo-jD.png | ||
|caption= | |||
|name=Jumping D | |||
|data= | |||
{{AttackData-KOF98FE | |||
|startup= 9 | |||
|active= 5 | |||
|recovery=x | |||
|guard=H | |||
|adv hit=? | |||
|adv Block=? | |||
|cancel=N | |||
|knockdown=N | |||
|juggle=Y | |||
|description=*Can act as a pressure tool when spaced. | |||
*A bit difficult to crossup with. | |||
}} | |||
}} | |||
== | {{MoveData | ||
|image=UMFE-Kyo-jCD.png | |||
|caption= | |||
|name=Jumping CD | |||
|data= | |||
{{AttackData-KOF98FE | |||
|startup=17 | |||
|active=4 | |||
|recovery=x | |||
|guard=H | |||
|adv hit=? | |||
|adv Block=? | |||
|cancel=N | |||
|knockdown=Soft | |||
|juggle=Y | |||
|description=*Has more recovery than Far A, but more range. | |||
*Chainable. | |||
}} | |||
}} | |||
===Command Normals=== | |||
*Two-hit axe-kick. | {{MoveData | ||
|image=UMFE-Kyo-6B.png | |||
|image2=UMFE-Kyo-6B-2.png | |||
|caption= | |||
|name=Thundering Axe Burst | |||
|input=6B | |||
|data= | |||
{{AttackData-KOF98FE | |||
|startup=11 | |||
|active=7(3)7 | |||
|recovery=18 | |||
|guard=HL,H | |||
|adv hit=? | |||
|adv Block=-7 | |||
|cancel=N | |||
|knockdown=N | |||
|juggle=Y | |||
|description=*Two-hit axe-kick. | |||
*Second hit hits overhead. | *Second hit hits overhead. | ||
*Can be | *Can be canceled into from normals at the cost of its overhead property, making it cancelable. | ||
*If late-canceled into, it acts like the overhead version, allowing you to slip overheads into pressure. | |||
}} | |||
}} | |||
{{MoveData | |||
|image=UMFE-Kyo-3D.png | |||
|image2=UMFE-Kyo-3D-2.png | |||
|caption= | |||
|name=Style 818 | |||
|input=3D | |||
|data= | |||
{{AttackData-KOF98FE | |||
|startup=2 | |||
|active=3(12)4 | |||
|recovery=24 | |||
|guard=L | |||
|adv hit=? | |||
|adv Block=-10 | |||
|cancel=N | |||
|knockdown=N | |||
|juggle=Y | |||
|description=*Kyo kicks near the ground twice, one foot then the other. | |||
*Hits low, even when canceled into. | |||
}} | |||
}} | |||
{{MoveData | |||
|image=UMFE-Kyo-j2C.png | |||
|caption= | |||
|name=Drop to Naraku | |||
|input=j.2C | |||
|data= | |||
{{AttackData-KOF98FE | |||
|startup=6 | |||
|active=5 | |||
|recovery=x | |||
|guard=H | |||
|adv hit=? | |||
|adv Block=? | |||
|cancel=N | |||
|knockdown=Hard (Airborne) | |||
|juggle=Y | |||
|description=*Two-handed hammerfiFar | |||
*Has a ton of hitstun and blockstun on grounded opponents, allowing Kyo to continue pressure. | |||
*Causes a hard knockdown on airborne opponents. | |||
*Great crossup. Aim to have Kyo's bent legs right over the opponent's head. | |||
}} | |||
}} | |||
== Throws == | |||
'''Anvil Slam [Hachi Tetsu]:''' <code>b/f+C (close)</code> | |||
* Regular throw, techable. EX Kyo smacks his opponent in the face with his forearm. | |||
''' | '''Swift Shoulder Throw [Issestsu Seoi Nage]:''' <code>b/f+D (close)</code> | ||
* Regular throw, techable. EX Kyo throws his opponent behind him, then performs an elbow drop. Switches sides, hard knockdown. | |||
*Kyo | |||
== Special Moves == | == Special Moves == | ||
'''Dark | '''Dark Thrust [Yami Barai]:''' <code>236A/C</code> | ||
*Kyo's grounded projectile | |||
* EX Kyo's grounded projectile. C version goes faster and does a bit more damage than the A version. | |||
* Either version can be used to control space or to safely end a blockstring. | |||
* | |||
''' | '''Fire Ball [Oniyaki]:''' <code>623A/C</code> | ||
* EX Kyo's 623. Can be combo-ed into from most cancelable normals. | |||
*Kyo | |||
'''Crescent Slash [Kototsuki Yo]:''' | * Causes a soft knockdown. | ||
*Kyo runs after the opponent, faster than his normal run, then | |||
* | * Has both autoguard and invincibility at the beginning of the move. | ||
*Can be combo | |||
* | * The hitbox is all around EX Kyo, but does not extend as high as his normal variant. | ||
* A version deals one hit and is safer to use in combos; C version deals two hits, travels higher, and has more invincibility, making it a good reversal. | |||
'''Spinning kick [Oboroguruma]:''' <code>421B/D</code> | |||
* Can be combo-ed into from most normals. | |||
* Will whiff on crouching opponents. | |||
* B version has EX Kyo do an upwards jump kick. If the opponent is hit by this move in the air, they're put in a juggle state, which ends in a soft knockdown if not followed up. | |||
* D version has Kyo fly through the air, traveling roughly 3/4 of the screen, with two of the upwards kicks, then flips forward with his foot, sending the opponent into the ground. Has good corner carry, deals more damage than 623C, and causes a hard knockdown with good oki. Your ideal combo ender. | |||
'''New Wave Smash [Kai]:''' <code>236B/D,B/D</code> | |||
* EX Kyo does an upwards jumping kick, then a second one after the kick button is pressed a second time. | |||
* Second hit juggles the opponent; if not followed up, it deals a soft knockdown. | |||
* B version only allows for 623P to connect afterward, while the D version can be followed up with a variety of moves, including the B version. | |||
'''Crescent Slash [Kototsuki Yo]:''' <code>63214+B/D</code> | |||
* EX Kyo runs after the opponent, faster than his normal run, then performs a hitgrab. | |||
* Very unsafe on block. | |||
* Can be combo-ed into from heavy normals and f+B. | |||
* Causes a hard knockdown, allowing for an okizeme opportunity. | |||
== Desperation Moves == | == Desperation Moves == | ||
{{MoveData | |||
|image=UMFE-Kyo-2141236AC.png | |||
|image2=UMFE-Kyo-2141236P.png | |||
|caption=Hitbox only activates if it is MAX version | |||
|name=Serpent Wave | |||
|input=2141236P (can be held) | |||
|data= | |||
{{AttackData-KOF98FE | |||
|startup=20 | |||
|active=16 | |||
|recovery=25 | |||
|guard=HL | |||
|adv hit=? | |||
|adv Block=? | |||
|cancel=N | |||
|knockdown=Soft | |||
|juggle=Y | |||
|description=*Kyo throws a wave of fire in front of him. | |||
*Causes a soft knockdown. | |||
*Regular version does one hit. C version seems to have slightly faster startup and can combo from heavy attacks on the ground. | |||
*A version has lower-body invincibility. | |||
*C version has upper-body invincibility. | |||
*MAX version has Kyo set his own body on fire, having its own hitbox with up to 3 hits. The fire wave itself does 3 hits as well. | |||
*Both versions can be juggled into from 236K>K. | |||
*If timed right, only two hits of the MAX version will connect. This puts the opponent in a juggle state that can be followed up with 623C/421D | |||
}} | |||
}} | |||
== Combos == | == Combos == | ||
General Notes: | |||
===Meterless=== | |||
''Low'' | |||
: <code>2B, 2A, 421D</code> | |||
: Basic low confirm into hard knockdown. Has good corner carry. | |||
''Mid/Jump-In'' | |||
: <code>(j.X), cl.C, 421D</code> | |||
: <code>(j.B/j.D/j.2C), cl.C, 236D,D, j.2C/63214D/421D</code> | |||
: Combo off of a grounded heavy or crossup jump-in. j.2C ender must be done off a superjump, and 421D ender requires a short run before doing. | |||
''Corner'' | ''Corner'' | ||
: <code>(j.X), cl.C, 236D,D, 421B, 421D</code> | |||
: Must be executed as quickly as possible for the combo to fully connect. | |||
===With Meter=== | |||
''Mid/Jump-In'' | |||
: <code>(j.X), 2C, 2141236C</code> | |||
: <code>cl.C, 236D,D, 2141236C</code> | |||
( | : <code>(j.X), cl.C, 236D,D, 2141236AC, 421D</code> | ||
: Second D in 236D,D must be delayed as much as possible and 2141236AC must be timed to hit only twice for it to juggle into 421D properly. | |||
===With Quick MAX=== | |||
'' | ''At or Approaching Corner'' | ||
: <code>(j.X), cl.C, 236D,D, 421B, ABC, 421B, 623C</code> | |||
''Corner'' | |||
: <code>(j.X), cl.C, 236D,D, 421B, ABC, 2141236C</code> | |||
== Strategy & Tips == | == Strategy & Tips == | ||
The second button press of | The second button press of 236D,D must be delayed as late as possible to get SDM 2141236P to hit only twice. | ||
== Videos == | == Videos == | ||
{{#ev:youtube|2UvB-V-Pzr4|||'''King of Fighters 98 UM FE: EX Kyo Guide''' by [https://twitter.com/MashItOut Mash It Out]|frame}} | |||
''' | |||
{{#ev:youtube|f_Ml_0owCxU}} | {{#ev:youtube|f_Ml_0owCxU}} | ||
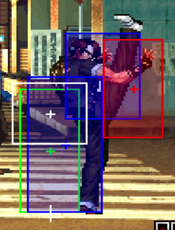
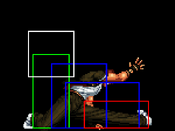
'''(2:35)''' Shows the difference between regular and EX Kyo's hitboxes on 623. It seems no other hitboxes differ between the two. | |||
== External Links == | == External Links == | ||
{{CharNavbox_98FE}} | |||
{{Navbox 98UMFE}} | {{Navbox 98UMFE}} | ||
[[Category:The King of Fighters '98 Ultimate Match Final Edition]] | [[Category:The King of Fighters '98 Ultimate Match Final Edition]] | ||
[[Category:Kyo Kusanagi]] | [[Category:Kyo Kusanagi]] | ||
Latest revision as of 20:47, 25 September 2022
Introduction
EX Kyo is a balanced fighter that has tools to fight at all ranges. In neutral, he has access to a grounded projectile, a good 623, and a super backdash, alongside some decent pokes for controlling space with. Up close, he has an excellent pressure tool in his air command normal that allows for strong blockstrings and also works as a good crossup. His combo game from heavies is excellent due to his special launcher and his multiple hard knockdown finishers. He also benefits from cornering the opponent, as he gets access to more damaging corner combos. His main weakness is his pretty weak low confirm options.
Changes from Previous Versions
98 to 98UM
Normals:
- cl.C's activation range has been decreased
- Far A now has reduced priority
- Far D now starts up 4 frames faster
- The first hitbox on 2C has been shortened, and the second hitbox has been lengthened
- 2D now has reduced priority
- j.D now has reduced priority
- You can no longer use j.2C during Extra mode step dash
Specials:
- 236P's hitbox size has been reduced
- 623C now reliably hits 2 times, even when hitting an airborne opponent
- 421B's recovery has been reduced by 2 frames
- 421D's startup has been reduced by 1 frame, and its recovery has been reduced by 3 frames
- 63214K's damage has been increased
- EX Kyo now uses sound files from '95
98UM to 98UMFE
Normals:
- cl.A now has 2 frames less recovery
- 2A now has 1 frame less recovery
Specials:
- 236P now has 3 frames less recovery, but builds less meter
Normals
Close
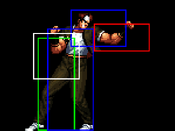
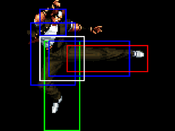
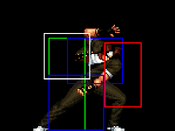
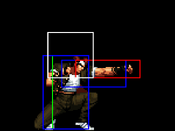
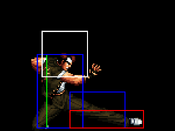
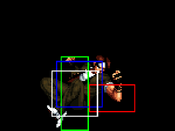
| Close A cl.A |
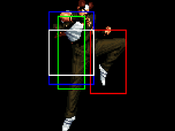
|---|
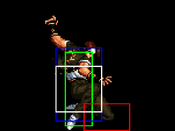
| Close B cl.B |
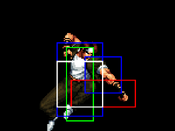
|---|
| Close C cl.C |
|---|
| Close D cl.D |
|---|
Far
| Far A f.A |
|---|
| Far B f.B |
|---|
| Far C f.C |
|---|
| Far D f.D |
|---|
| Blowback 5CD |
|---|
Crouching
| Crouching A 2A |
|---|
| Crouching B 2B |
|---|
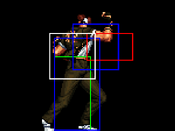
| Crouching C 2C |
|---|
| Crouching D 2D |
|---|
Jumping
| Jumping A |
|---|
| Neutral Jump B |
|---|
| Jumping B |
|---|
| Jumping C |
|---|
| Neutral Jump D |
|---|
| Jumping D |
|---|
| Jumping CD |
|---|
Command Normals
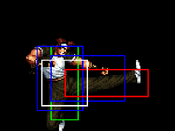
| Thundering Axe Burst 6B |
|---|
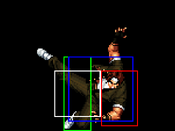
| Style 818 3D |
|---|
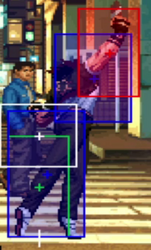
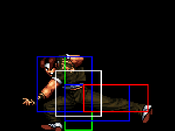
| Drop to Naraku j.2C |
|---|
Throws
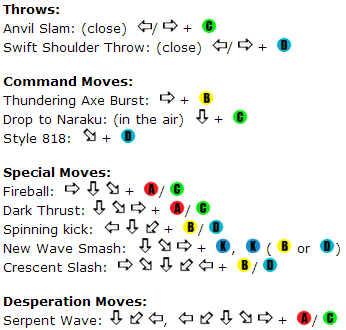
Anvil Slam [Hachi Tetsu]: b/f+C (close)
- Regular throw, techable. EX Kyo smacks his opponent in the face with his forearm.
Swift Shoulder Throw [Issestsu Seoi Nage]: b/f+D (close)
- Regular throw, techable. EX Kyo throws his opponent behind him, then performs an elbow drop. Switches sides, hard knockdown.
Special Moves
Dark Thrust [Yami Barai]: 236A/C
- EX Kyo's grounded projectile. C version goes faster and does a bit more damage than the A version.
- Either version can be used to control space or to safely end a blockstring.
Fire Ball [Oniyaki]: 623A/C
- EX Kyo's 623. Can be combo-ed into from most cancelable normals.
- Causes a soft knockdown.
- Has both autoguard and invincibility at the beginning of the move.
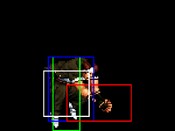
- The hitbox is all around EX Kyo, but does not extend as high as his normal variant.
- A version deals one hit and is safer to use in combos; C version deals two hits, travels higher, and has more invincibility, making it a good reversal.
Spinning kick [Oboroguruma]: 421B/D
- Can be combo-ed into from most normals.
- Will whiff on crouching opponents.
- B version has EX Kyo do an upwards jump kick. If the opponent is hit by this move in the air, they're put in a juggle state, which ends in a soft knockdown if not followed up.
- D version has Kyo fly through the air, traveling roughly 3/4 of the screen, with two of the upwards kicks, then flips forward with his foot, sending the opponent into the ground. Has good corner carry, deals more damage than 623C, and causes a hard knockdown with good oki. Your ideal combo ender.
New Wave Smash [Kai]: 236B/D,B/D
- EX Kyo does an upwards jumping kick, then a second one after the kick button is pressed a second time.
- Second hit juggles the opponent; if not followed up, it deals a soft knockdown.
- B version only allows for 623P to connect afterward, while the D version can be followed up with a variety of moves, including the B version.
Crescent Slash [Kototsuki Yo]: 63214+B/D
- EX Kyo runs after the opponent, faster than his normal run, then performs a hitgrab.
- Very unsafe on block.
- Can be combo-ed into from heavy normals and f+B.
- Causes a hard knockdown, allowing for an okizeme opportunity.
Desperation Moves
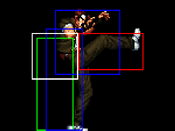
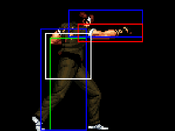
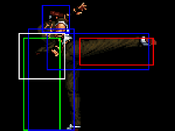
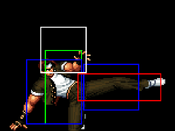
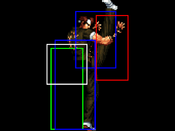
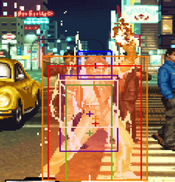
| Serpent Wave 2141236P (can be held) Hitbox only activates if it is MAX version |
|---|
Combos
General Notes:
Meterless
Low
2B, 2A, 421D- Basic low confirm into hard knockdown. Has good corner carry.
Mid/Jump-In
(j.X), cl.C, 421D
(j.B/j.D/j.2C), cl.C, 236D,D, j.2C/63214D/421D- Combo off of a grounded heavy or crossup jump-in. j.2C ender must be done off a superjump, and 421D ender requires a short run before doing.
Corner
(j.X), cl.C, 236D,D, 421B, 421D- Must be executed as quickly as possible for the combo to fully connect.
With Meter
Mid/Jump-In
(j.X), 2C, 2141236C
cl.C, 236D,D, 2141236C
(j.X), cl.C, 236D,D, 2141236AC, 421D- Second D in 236D,D must be delayed as much as possible and 2141236AC must be timed to hit only twice for it to juggle into 421D properly.
With Quick MAX
At or Approaching Corner
(j.X), cl.C, 236D,D, 421B, ABC, 421B, 623C
Corner
(j.X), cl.C, 236D,D, 421B, ABC, 2141236C
Strategy & Tips
The second button press of 236D,D must be delayed as late as possible to get SDM 2141236P to hit only twice.
Videos
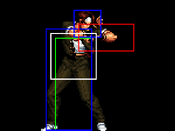
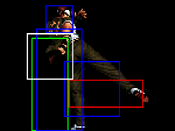
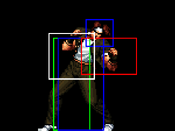
(2:35) Shows the difference between regular and EX Kyo's hitboxes on 623. It seems no other hitboxes differ between the two.


