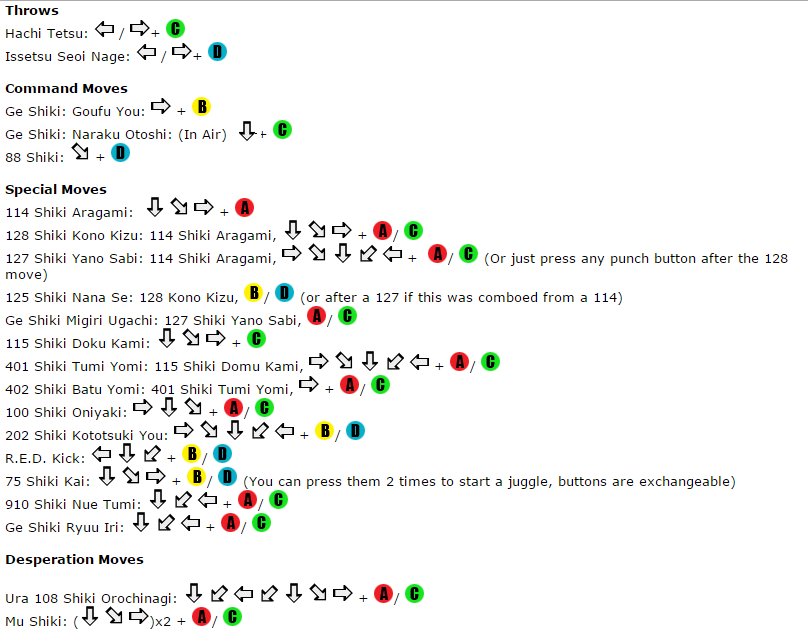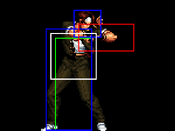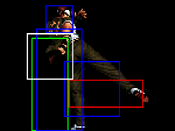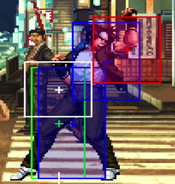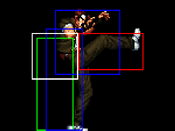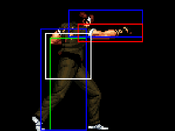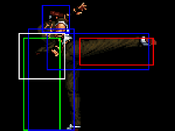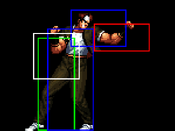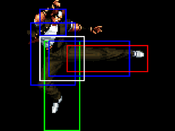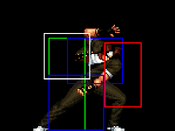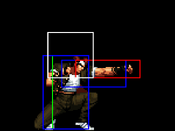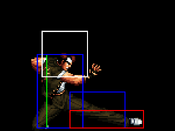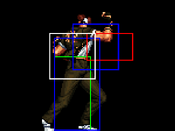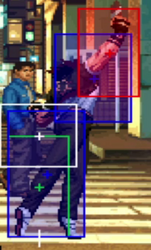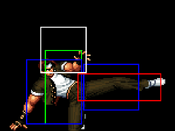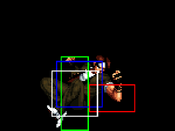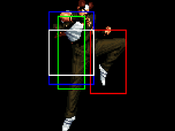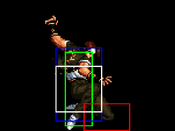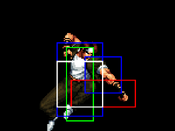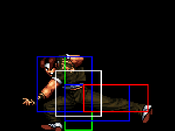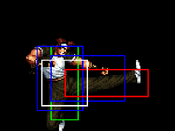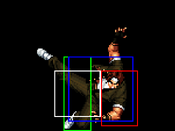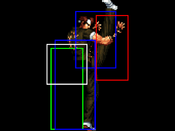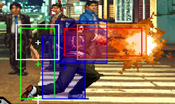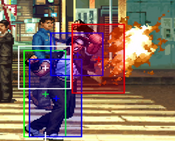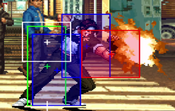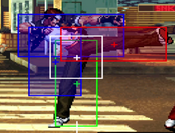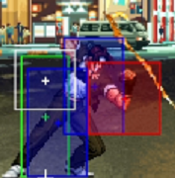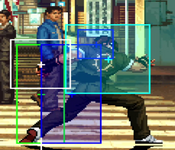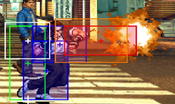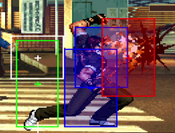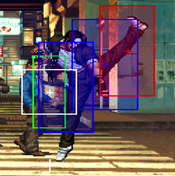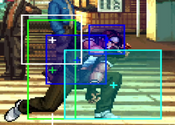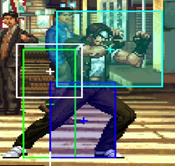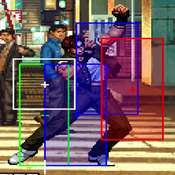
Introduction
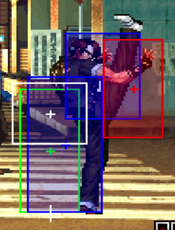
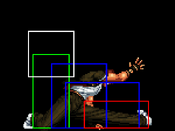
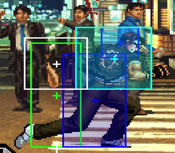
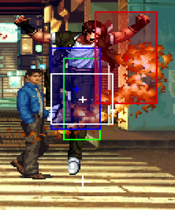
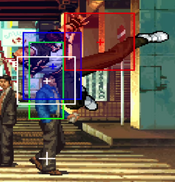
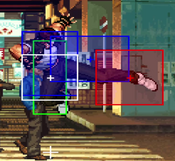
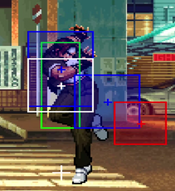
Kyo is primarily a close-range pressure and mixup character. In neutral, he has access to some helpful moves for getting in, including his guard-point rekkas, as well as some solid poking normals. Close range is where Kyo is really good, as he can use his strong hop normals and lows to open up the opponent. He has good confirms into his DMs from both lows and heavies, as well as strong corner juggles, making his damage fairly high overall. On defense he has access to a good invincible DP. Kyo's weaknesses are that he lacks anything to fight at long range, since he doesn't have a projectile, and that his meterless low confirms are pretty lackluster.
Preferred Mode and Position
Although he slightly prefers some aspects of Advanced mode, Kyo can be effective in both Advanced and Extra mode.
Run vs Step
- Kyo prefers Run over Step as it helps him with his up-close, rushdown game and it makes it easier to set up cross-ups after knockdowns.
- However, Kyo isn't bad with Step as his step dash has good length and speed, and the increased walk speed helps with tick throws and can make a couple quick max combos easier.
Roll vs Dodge
Advanced vs Extra Gauge
- Kyo prefers Advanced gauge over Extra gauge, as he can build meter with his offense, Advanced gauge can store multiple stocks at once which allows Kyo to have more consistent access to his cr.B, cr.A, qcfx2+P super combo as a mid or anchor which is quite useful as his meterless low options are not great, and he doesn't need to stop his offense to charge after using meter.
- However, Kyo can make pretty good use of Extra gauge as well since he has good quick max combos.
Preferred Position
- Kyo benefits from being further back in your team order with both gauges. With Advanced gauge, he likes to have access to more saved up stocks for his super combos. With Extra gauge, he wants to take advantage of the greater red health window for free supers, which gets progressively bigger from the first to the third character.
- Although, Kyo on point is more effective in Extra mode as he can charge up to get meter more quickly.
Changes from Previous Versions
98 to 98UM
Normals:
- cl.C activation range has been decreased
- Far A now has reduced priority
- Far D now has 4 frames less startup
- The first hitbox on 2C has been shortened and the second hitbox has been lengthened
- 2D now has reduced priority
- j.D now has reduced priority
- You can no longer use j.2C during step dash
Specials:
- 63214K now has increased damage
- 236P now has reduced reach
- 623C now reliably hits twice, even when hitting an airborne opponent
Supers:
- 2141236P now has increased damage
- 236236P now has decreased damage
98UM to 98UMFE
Normals:
- cl.A now has 2 frames less recovery
- cr.A now has 1 frame less recovery
Specials:
- 236A damage has been increased from 10 to 13, guard point has been lengthened by 2 frames
- More moves will now trigger 214P's counterhit during the startup frames
Normals
Close
Close A
cl.A
|
| Startup
|
Active
|
Recovery
|
Guard
|
Adv Hit
|
Adv Block
|
Cancel
|
Knockdown
|
Juggle
|
| 3
|
4
|
3
|
HL
|
-
|
-
|
Y
|
N
|
Y
|
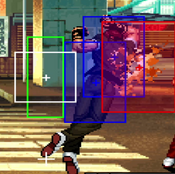
- Can work as a close-range anti-air against hops. Whiffs on crouchers.
- Chainable.
|
|
Close B
cl.B
|
| Startup
|
Active
|
Recovery
|
Guard
|
Adv Hit
|
Adv Block
|
Cancel
|
Knockdown
|
Juggle
|
| 5
|
4
|
8
|
L
|
-
|
-
|
Y
|
N
|
Y
|
|
|
|
Close C
cl.C
|
| Startup
|
Active
|
Recovery
|
Guard
|
Adv Hit
|
Adv Block
|
Cancel
|
Knockdown
|
Juggle
|
| 2
|
3,9
|
9
|
HL
|
-
|
-
|
Y
|
N
|
Y
|
- Has very fast start-up. Great combo starter and anti-air.
|
|
Close D
cl.D
|
| Startup
|
Active
|
Recovery
|
Guard
|
Adv Hit
|
Adv Block
|
Cancel
|
Knockdown
|
Juggle
|
| 4
|
3
|
22
|
HL
|
?
|
-7
|
Y
|
N
|
Y
|
- A bit slower than Close C
|
|
Far
Far A
f.A
|
| Startup
|
Active
|
Recovery
|
Guard
|
Adv Hit
|
Adv Block
|
Cancel
|
Knockdown
|
Juggle
|
| 3
|
4
|
5
|
HL
|
-
|
-
|
Y
|
N
|
Y
|
- Good for stopping hops. Whiffs on crouchers.
|
|
Far B
f.B
|
| Startup
|
Active
|
Recovery
|
Guard
|
Adv Hit
|
Adv Block
|
Cancel
|
Knockdown
|
Juggle
|
| 7
|
3
|
13
|
HL
|
-
|
-
|
Y
|
N
|
Y
|
- Has more recovery than st.A, but more range.
|
|
Far C
f.C
|
| Startup
|
Active
|
Recovery
|
Guard
|
Adv Hit
|
Adv Block
|
Cancel
|
Knockdown
|
Juggle
|
| 12
|
2
|
17
|
HL
|
-
|
-
|
Y
|
N
|
Y
|
- Poke with lots of startup. Cancelable on hit, block, and whiff.
|
|
Far D
f.D
|
| Startup
|
Active
|
Recovery
|
Guard
|
Adv Hit
|
Adv Block
|
Cancel
|
Knockdown
|
Juggle
|
| 10
|
5
|
12
|
HL
|
?
|
+1
|
N
|
N
|
Y
|
- A sobat kick. Can avoid lows.
|
|
Blowback
5CD
|
| Startup
|
Active
|
Recovery
|
Guard
|
Adv Hit
|
Adv Block
|
Cancel
|
Knockdown
|
Juggle
|
| 19
|
4
|
16
|
HL
|
?
|
+2
|
Y
|
Soft
|
Y
|
- Average start-up.
- Cancelable on hit, block, and whiff.
|
|
Crouching
Crouching A
2A
|
| Startup
|
Active
|
Recovery
|
Guard
|
Adv Hit
|
Adv Block
|
Cancel
|
Knockdown
|
Juggle
|
| 3
|
4
|
4
|
HL
|
-
|
-
|
Y
|
N
|
Y
|
- Standard outward jab.
- Chainable.
|
|
Crouching B
2B
|
| Startup
|
Active
|
Recovery
|
Guard
|
Adv Hit
|
Adv Block
|
Cancel
|
Knockdown
|
Juggle
|
| 3
|
4
|
5
|
L
|
-
|
-
|
N
|
N
|
Y
|
- Fast low combo starter.
- Chainable.
|
|
Crouching C
2C
|
| Startup
|
Active
|
Recovery
|
Guard
|
Adv Hit
|
Adv Block
|
Cancel
|
Knockdown
|
Juggle
|
| 4
|
3,3
|
20
|
HL
|
-
|
-
|
Y
|
N
|
Y
|
- Standard anti-air against jumps and hops.
- Cancelable on hit, block, and whiff.
|
|
Crouching D
2D
|
| Startup
|
Active
|
Recovery
|
Guard
|
Adv Hit
|
Adv Block
|
Cancel
|
Knockdown
|
Juggle
|
| 4
|
3
|
22
|
HL
|
?
|
-4
|
Y
|
Soft
|
Y
|
- Can low-profile some moves.
|
|
Jumping
| Jumping A
|
| Startup
|
Active
|
Recovery
|
Guard
|
Adv Hit
|
Adv Block
|
Cancel
|
Knockdown
|
Juggle
|
| 5
|
8
|
x
|
H
|
-
|
-
|
N
|
N
|
Y
|
|
|
|
| Neutral Jump B
|
| Startup
|
Active
|
Recovery
|
Guard
|
Adv Hit
|
Adv Block
|
Cancel
|
Knockdown
|
Juggle
|
| 5
|
9
|
x
|
H
|
-
|
-
|
N
|
N
|
Y
|
|
|
|
| Jumping B
|
| Startup
|
Active
|
Recovery
|
Guard
|
Adv Hit
|
Adv Block
|
Cancel
|
Knockdown
|
Juggle
|
| 5
|
9
|
x
|
H
|
-
|
-
|
N
|
N
|
Y
|
- Great crossup and jump-in from a hop. Also an instant-overhead. Swiss army knife of a button.
|
|
| Jumping C
|
| Startup
|
Active
|
Recovery
|
Guard
|
Adv Hit
|
Adv Block
|
Cancel
|
Knockdown
|
Juggle
|
| 6
|
4
|
x
|
H
|
-
|
-
|
N
|
N
|
Y
|
|
|
|
| Neutral Jump D
|
| Startup
|
Active
|
Recovery
|
Guard
|
Adv Hit
|
Adv Block
|
Cancel
|
Knockdown
|
Juggle
|
| 7
|
8
|
x
|
H
|
-
|
-
|
N
|
N
|
Y
|
|
|
|
| Jumping D
|
| Startup
|
Active
|
Recovery
|
Guard
|
Adv Hit
|
Adv Block
|
Cancel
|
Knockdown
|
Juggle
|
| 9
|
5
|
x
|
H
|
-
|
-
|
N
|
N
|
Y
|
- Can act as a pressure tool when spaced.
- A bit difficult to crossup with.
|
|
| Jumping CD
|
| Startup
|
Active
|
Recovery
|
Guard
|
Adv Hit
|
Adv Block
|
Cancel
|
Knockdown
|
Juggle
|
| 17
|
4
|
x
|
H
|
-
|
-
|
N
|
Soft
|
Y
|
- Has more recovery than st.A, but more range.
- Chainable.
|
|
Command Normals
Thundering Axe Burst
6B
|
| Startup
|
Active
|
Recovery
|
Guard
|
Adv Hit
|
Adv Block
|
Cancel
|
Knockdown
|
Juggle
|
| 11
|
7(3)7
|
18
|
HL,H
|
-
|
-
|
N
|
N
|
Y
|
- Two-hit axe-kick.
- Second hit hits overhead.
- Can be canceled into from normals at the cost of its overhead property, making it cancelable.
- If late-canceled into, it acts like the overhead version, allowing you to slip overheads into pressure.
|
|
Style 818
3D
|
| Startup
|
Active
|
Recovery
|
Guard
|
Adv Hit
|
Adv Block
|
Cancel
|
Knockdown
|
Juggle
|
| 2
|
3(12)4
|
24
|
L
|
-
|
-
|
N
|
N
|
Y
|
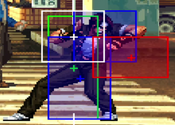
- Kyo kicks near the ground twice, one foot then the other.
- Hits low, even when canceled into.
|
|
Drop to Naraku
j.2C
|
| Startup
|
Active
|
Recovery
|
Guard
|
Adv Hit
|
Adv Block
|
Cancel
|
Knockdown
|
Juggle
|
| 6
|
5
|
x
|
H
|
-
|
-
|
N
|
Hard (Airborne)
|
Y
|
- Two-handed hammerfist.
- Has a ton of hitstun and blockstun on grounded opponents, allowing Kyo to continue pressure.
- Causes a hard knockdown on airborne opponents.
- Great crossup. Aim to have Kyo's bent legs right over the opponent's head.
|
|
Throws
Anvil Slam: b/f+C (close)
- Regular throw, techable. Kyo smacks his opponent in the face with his forearm for a soft knockdown.
Swift Shoulder Throw: b/f+D (close)
- Regular throw, techable. Kyo throws his opponent behind him, then does an elbow drop. Causes a backturned hard knockdown.
Special Moves
Wicked Chew
236A
236A Masticate (236A-236A) Oxidation (236A-236A-6P) Rapids of Rage (236A-236A-6K) Oxidation (236A-236A-63214P) Instantaneous Smash (236A-63214P-6P) Rapids of Rage (236A-63214P-6K)
|
| Version
|
Startup
|
Active
|
Recovery
|
Guard
|
Adv Hit
|
Adv Block
|
Cancel
|
Knockdown
|
Juggle
|
| 236A
|
11
|
8
|
20
|
HL
|
-
|
-
|
N
|
N
|
Y
|
- A lunging punch, and one of Kyo's rekka starters.
- Has autoguard at the beginning of the move (Frames 1-4)
- Can nullify projectiles.
- Combos from close heavy attacks.
|
| Version
|
Startup
|
Active
|
Recovery
|
Guard
|
Adv Hit
|
Adv Block
|
Cancel
|
Knockdown
|
Juggle
|
| 236A-236A
|
6
|
8
|
22
|
HL
|
-
|
-
|
N
|
Soft
|
Y
|
- Rekka followup to 236A. Kyo takes another step forward and does an uppercut with his other hand.
- Combos from 236A on the ground, unlike 63214P. Launches the opponent for further rekka followups.
- Causes a soft knockdown if not followed up.
|
| Version
|
Startup
|
Active
|
Recovery
|
Guard
|
Adv Hit
|
Adv Block
|
Cancel
|
Knockdown
|
Juggle
|
| 236A-236A-6P
|
14
|
6
|
20
|
H
|
-
|
-
|
N
|
Hard
|
Y
|
- Identical to 63214P followup to 236A, but since qcf+P launches the opponent it actually combos on the ground this time. As a tradeoff, it no longer has an OTG followup.
|
| Version
|
Startup
|
Active
|
Recovery
|
Guard
|
Adv Hit
|
Adv Block
|
Cancel
|
Knockdown
|
Juggle
|
| 236A-236A-6K
|
9
|
3
|
27
|
HL,H
|
-
|
-
|
N
|
N
|
Y
|
- Identical to the K followup to 63214P, but here it's your damage-optimal ender.
- Launches the opponent fullscreen, causing a soft knockdown.
|
| Version
|
Startup
|
Active
|
Recovery
|
Guard
|
Adv Hit
|
Adv Block
|
Cancel
|
Knockdown
|
Juggle
|
| 236A-63214P
|
21
|
4
|
30
|
H
|
-
|
-
|
N
|
Hard
|
Y
|
- Overhead rekka followup to qcf+A.
- Too slow to combo on the ground, but causes a hard knockdown if it hits.
|
| Version
|
Startup
|
Active
|
Recovery
|
Guard
|
Adv Hit
|
Adv Block
|
Cancel
|
Knockdown
|
Juggle
|
| 236A-63214P-6P
|
23
|
14
|
17
|
H
|
-
|
-
|
N
|
Hard
|
Y
|
- OTG followup to hcb+P, adding more damage if that move connected.
|
| Version
|
Startup
|
Active
|
Recovery
|
Guard
|
Adv Hit
|
Adv Block
|
Cancel
|
Knockdown
|
Juggle
|
| 236A-63214P-6K
|
9
|
3
|
27
|
HL,H
|
-
|
-
|
N
|
N
|
Y
|
- Alternate followup to hcb+P.
|
|
Poison Gnawfest
236C
236C Recitation of Sins (236A-63214P) Verdict (236A-63214C-6P)
|
| Version
|
Startup
|
Active
|
Recovery
|
Guard
|
Adv Hit
|
Adv Block
|
Cancel
|
Knockdown
|
Juggle
|
| 236C
|
17
|
6
|
19
|
HL
|
-
|
-
|
N
|
N
|
Y
|
- A bigger lunging punch, and Kyo's other rekka starter.
- Has autoguard at the beginning of the move (Frames 1-5)
- Can nullify projectiles.
|
| Version
|
Startup
|
Active
|
Recovery
|
Guard
|
Adv Hit
|
Adv Block
|
Cancel
|
Knockdown
|
Juggle
|
| 236C-63214P
|
9
|
3
|
34
|
HL
|
-
|
-
|
N
|
Soft
|
Y
|
- Rekka followup to 236C.
- Unsafe on block, so don't use if 236C is blocked.
|
| Version
|
Startup
|
Active
|
Recovery
|
Guard
|
Adv Hit
|
Adv Block
|
Cancel
|
Knockdown
|
Juggle
|
| 236C-63214P-6P
|
9
|
5
|
39
|
HL
|
-
|
-
|
N
|
Soft
|
Y
|
- Final hit of the 236C rekka.
- Causes a soft knockdown.
- Even more unsafe on block. If the first two hits are blocked, do NOT use this or you will be punished severely.
|
|
Fire Ball
623P
623A Startup 623C Startup
|
| Version
|
Startup
|
Active
|
Recovery
|
Guard
|
Adv Hit
|
Adv Block
|
Cancel
|
Knockdown
|
Juggle
|
| 623A
|
5
|
4,13
|
27
|
HL
|
-
|
-
|
N
|
Soft
|
Y
|
- Kyo's DP. Can be combo-ed into from most normals.
- Causes a soft knockdown.
- Has some invincibility on startup, but not extending through the active frames, making neither version a good reversal. A version has upper body armor (Frames 1-3)
- The hitbox hits high and in front of Kyo.
- A version deals one hit. Safer to use in combos.
|
| Version
|
Startup
|
Active
|
Recovery
|
Guard
|
Adv Hit
|
Adv Block
|
Cancel
|
Knockdown
|
Juggle
|
| 623C
|
11
|
8
|
20
|
HL
|
-
|
-
|
N
|
Soft
|
Y
|
- C version deals two hits, travels higher, and has more invincibility, making it a better reversal.
- Upper body armor (Frames 1-3), Invul starts at 2nd active frame
|
|
R.E.D Kick
421K
|
| Version
|
Startup
|
Active
|
Recovery
|
Guard
|
Adv Hit
|
Adv Block
|
Cancel
|
Knockdown
|
Juggle
|
| 421B
|
16
|
2,2,2
|
18
|
HL
|
-
|
-
|
N
|
Hard
|
Y
|
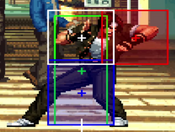
- Kyo flies through the air and lands his foot directly on top of the opponent.
- Hits mid. Hard knockdown.
- B version travels 1/2 screen distance.
|
| Version
|
Startup
|
Active
|
Recovery
|
Guard
|
Adv Hit
|
Adv Block
|
Cancel
|
Knockdown
|
Juggle
|
| 421D
|
26
|
3,2,2,2
|
17
|
HL
|
-
|
-
|
N
|
Hard
|
Y
|
- D version travels 3/4 screen distance
|
|
New Wave Smash
236K-K
|
| Version
|
Startup
|
Active
|
Recovery
|
Guard
|
Adv Hit
|
Adv Block
|
Cancel
|
Knockdown
|
Juggle
|
| 236B-B
|
13
|
3(7)9
|
14
|
HL
|
-
|
-
|
N
|
Soft
|
Y
|
- Kyo does a hopping kick with one foot, then kicks with the other foot. The second kick is triggered by the second button press.
- Both hits launch the opponent, but the second launches them high enough for followups.
- Causes a soft knockdown if not followed up.
- B version only allows for dp+P to connect afterward,
|
| Version
|
Startup
|
Active
|
Recovery
|
Guard
|
Adv Hit
|
Adv Block
|
Cancel
|
Knockdown
|
Juggle
|
| 236D-D
|
17
|
3(7)9
|
14
|
HL
|
-
|
-
|
N
|
Soft
|
Y
|
- D version can be followed with almost anything, including full rekka strings.
|
|
Phantom Mauler
214P
|
| Version
|
Startup
|
Active
|
Recovery
|
Guard
|
Adv Hit
|
Adv Block
|
Cancel
|
Knockdown
|
Juggle
|
| 214A
|
2(autoguard)
|
6(10)4,5
|
24
|
HL
|
-
|
-
|
N
|
Hard/Soft
|
Y
|
- Kyo does a sort of uppercut. Has counters associated with it if it's hit during certain parts of move.
- Causes a soft knockdown if it hits raw.
- Can counter lows when arm is lowered, and mids and highs while the arm is rising.
- Low counter causes a hard knockdown.
- Mid/high counter causes a soft knockdown.
|
| Version
|
Startup
|
Active
|
Recovery
|
Guard
|
Adv Hit
|
Adv Block
|
Cancel
|
Knockdown
|
Juggle
|
| 214C
|
2 (autoguard)
|
10(2)4,5
|
24
|
HL
|
-
|
-
|
N
|
Hard/Soft
|
Y
|
- C version has Kyo wait longer before rising than the A version, letting the low counter stay active for longer.
|
|
Crescent Slash
63214K
|
| Version
|
Startup
|
Active
|
Recovery
|
Guard
|
Adv Hit
|
Adv Block
|
Cancel
|
Knockdown
|
Juggle
|
| 63214B
|
13 (pointblank)
|
4
|
12 (run) 25 (grab)
|
HL
|
-
|
-
|
N
|
Hard
|
Y
|
- Kyo runs after the opponent, faster than his normal run, then does a hitgrab.
- Very unsafe on block.
- Can be combo-ed into from heavy normals and 6B.
- Causes a hard knockdown, with good oki, if it connects.
- B version travels 3/4 screen distance.
|
| Version
|
Startup
|
Active
|
Recovery
|
Guard
|
Adv Hit
|
Adv Block
|
Cancel
|
Knockdown
|
Juggle
|
| 63214D
|
13 (pointblank)
|
4
|
12 (run) 25 (grab)
|
HL
|
-
|
-
|
N
|
Hard
|
Y
|
- D version travels full screen distance.
|
|
Desperation Moves
Final Showdown
236236P
|
| Startup
|
Active
|
Recovery
|
Guard
|
Adv Hit
|
Adv Block
|
Cancel
|
Knockdown
|
Juggle
|
| 6
|
15
|
39
|
HL
|
-
|
-
|
N
|
Soft
|
Y
|
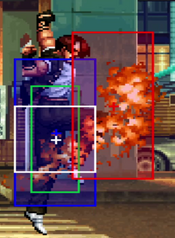
- Kyo throws down a pillar of fire and follows up with a chain of punches.
- Causes a soft knockdown.
- Can be combo'd into from lights, including low confirms.
- Regular version deals 5 hits. Press C or D at the end for a special taunt.
- MAX version deals 14 hits and a lot more damage.
|
|
Serpent Wave
2141236P (can be held)
Hitbox only activates if it is MAX version
|
| Startup
|
Active
|
Recovery
|
Guard
|
Adv Hit
|
Adv Block
|
Cancel
|
Knockdown
|
Juggle
|
| 20
|
16
|
25
|
HL
|
-
|
-
|
N
|
Soft
|
Y
|
- Kyo throws a wave of fire in front of him.
- Causes a soft knockdown.
- Regular version does one hit. C version seems to have slightly faster startup and can combo from heavy attacks on the ground.
- A version has lower-body invincibility.
- C version has upper-body invincibility.
- MAX version has Kyo set his own body on fire, having its own hitbox with up to 3 hits. The fire wave itself does 3 hits as well.
- Both versions can be juggled into from 236K>K.
- If timed right, only two hits of the MAX version will connect. This puts the opponent in a juggle state that can be followed up with 623C.
|
|
General Notes
- In Max Mode moves have more pushback, so some combos won't work the same. Most notably for Kyo, you cannot do two 2Bs into a 2A, and cl.C into 236D will only work at the corner, at midscreen it will miss even if do a cross-up or you don't do a jump-in.
- cl.C is generally the preferred close normal to use in combos as it is slightly faster, but cl.D has a larger cancellable window which can be useful if you have trouble comboing into say, 236236P.
- In any metered combo, you can replace 236236P with 236236AC or 2141236P with 2141236AC if you have 3 stocks in Advanced mode or are at low health and in max mode in Extra Mode.
Videos
External Links


