Difference between revisions of "The King of Fighters XIV/Blue Mary"
| (147 intermediate revisions by 4 users not shown) | |||
| Line 1: | Line 1: | ||
[[File: | [[File:Charaimg_mary.png]] | ||
=Movelist= | ==Movelist== | ||
(*) = EX OK | (*) = EX OK | ||
| Line 37: | Line 37: | ||
:Backdrop Real (Real Counter) - [[image:qcf.gif]] + [[image:a.gif]] / [[image:c.gif]] | :Backdrop Real (Real Counter) - [[image:qcf.gif]] + [[image:a.gif]] / [[image:c.gif]] | ||
M. Breaker - - [[image:dp.gif]] + [[image: | M. Breaker - - [[image:dp.gif]] + [[image:a.gif]] / [[image:c.gif]] (*) | ||
| Line 51: | Line 51: | ||
M. Dynamite Swing - [[image:qcf.gif]] [[image:qcf.gif]] + [[image:b.gif]] [[image:d.gif]] | M. Dynamite Swing - [[image:qcf.gif]] [[image:qcf.gif]] + [[image:b.gif]] [[image:d.gif]] | ||
= | ==Quick Combo Reference== | ||
''' | {| border="1" align="center" style="font-size:90%" | ||
|+ | |||
== Quick Combo Reference == | |||
'''[http://dreamcancel.com/wiki/index.php?title=The_King_of_Fighters_XIV#Notation Notation]''' | |||
|- | |||
| '''0 Meter''' | |||
| | |||
Low, Anywhere<br/> | |||
Anywhere<br/> | |||
Close, Anywhere<br/> | |||
| | |||
(cr. B (x2 to x3), Far B) = 85 to 110 dmg<br/> | |||
(cr. B (x1 to x2), cr. A, b~f+B) = 107 to 131 dmg<br/> | |||
(cl. C (1 hit), b+B (2 hits), b~f+D, qcf+B/D) = 216 dmg<br/> | |||
|- | |||
| '''1 Meter''' | |||
| | |||
Anywhere<br/> | |||
Anywhere<br/> | |||
| | |||
(cr. B (x1-x2), cr. A, b~f+B (SC), qcf, hcb+A/C) = 259 to 275 dmg<br/> | |||
(cl. C (1 hit), b+B (2 hits), b~f+B(SC), qcf, hcb+A/C) = 309 dmg<br/> | |||
|- | |||
| '''2 Meters''' | |||
| | |||
Anywhere<br/> | |||
Anywhere<br/> | |||
| | |||
(cr. B (x2 to x3), Far B, qcf, hcb+AC) = 378 to 386 dmg <br/> | |||
(cl. C (1 hit), b+B (2 hits), b~f+B(SC), qcf, hcb+AC) = 441 dmg<br/> | |||
|- | |||
|} | |||
==Gameplay Overview== | |||
'''Health: 1000''' | |||
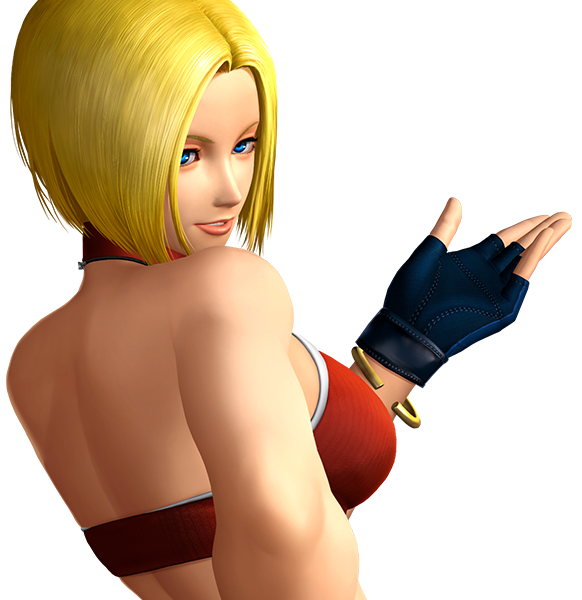
Blue Mary is a very strong character in KOFXIV. She has many tools such as: | |||
* | * An invincible dodge that leads into a command grab. | ||
* A wide air CD that is good for pressure. | |||
* | * Plenty of easy mix-ups. | ||
* | * An invincible reversal, dp+K, that puts the opponent in a hard knockdown state. | ||
She can make the opponent second guess their approach easily, with her invincible moves, while forcing her way in neutral. | |||
==Normals== | |||
''' | <div class="toccolours mw-collapsible mw-collapsed">'''Far Standing Normals''' | ||
<div class="mw-collapsible-content"> | |||
{{MoveData | |||
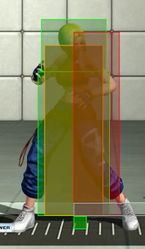
|image=Blue_Mary_Far_A.jpg | |||
|caption= | |||
|name=Far A | |||
|data= | |||
{{AttackData-KOFXIV | |||
|damage=25 | |||
|stun=30 | |||
|startup=5 | |||
|active=4 | |||
|recovery=10 | |||
|hitAdv=1 | |||
|blockAdv=-1 | |||
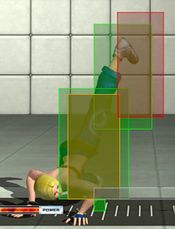
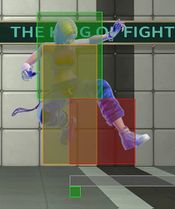
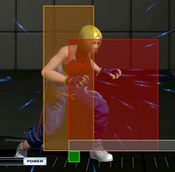
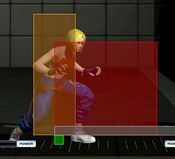
|hitbox=[https://drive.google.com/open?id=1SGhcRYqJuOMSJSz9cJ6V-b_wfHTv4KE0 Hitbox] | |||
|invul= | |||
|description= *Standard jab, which use to poke against hops. | |||
*Whiffs on some characters crouching. | |||
*Cant cancel into command normals. | |||
*Special cancel-able | |||
}} | |||
}} | |||
* | {{MoveData | ||
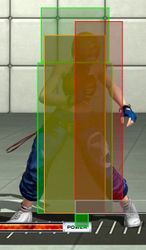
|image=Blue_Mary_Far_B.jpg | |||
|caption= | |||
|name=Far B | |||
|data= | |||
{{AttackData-KOFXIV | |||
|damage=30 | |||
|stun=30 | |||
|startup=6 | |||
|active=4 | |||
|recovery=13 | |||
|hitAdv=-2 | |||
|blockAdv=-4 | |||
|hitbox=[https://drive.google.com/open?id=1RFIx42PZTKed1-VlHWTZul-P287Xe1_2 Hitbox] | |||
|invul= | |||
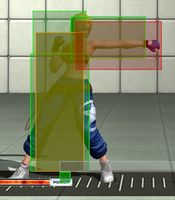
|description= *More range than st.A. | |||
*Great poke against standing opponents. | |||
*Hits crouches. Only super Cancel-able. | |||
}} | |||
}} | |||
* | {{MoveData | ||
|image=Blue_Mary_Far_C.jpg | |||
|caption= | |||
|name=Far C | |||
|data= | |||
{{AttackData-KOFXIV | |||
|damage=78 | |||
|stun=80 | |||
|startup=14 | |||
|active=7 | |||
|recovery=18 | |||
|hitAdv=-2 | |||
|blockAdv=-4 | |||
|hitbox=[https://drive.google.com/open?id=1KZLOlg6ADQ-05YvM91ePBMs61OIo2i04 Hitbox] | |||
|invul= | |||
|description= *Hits twice. | |||
*Only super cancelable. | |||
*Moves her hitbox forward. | |||
}} | |||
}} | |||
* | {{MoveData | ||
|image=Blue_Mary_Far_D.jpg | |||
|caption= | |||
|name=Far D | |||
|data= | |||
{{AttackData-KOFXIV | |||
|damage=80 | |||
|stun=70 | |||
|startup=14 | |||
|active=4 | |||
|recovery=23 | |||
|hitAdv=-6 | |||
|blockAdv=-8 | |||
|hitbox=[https://drive.google.com/open?id=1OGgbE2RnsdDE8WPDXNywi_dZi2pVhQBw Hitbox] | |||
|invul= Low: 7 to 21 (15 Frames) | |||
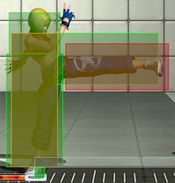
|description= *Great range, but slow. | |||
*Crushes slow lows or spamming cr. B (x2). | |||
*Not command/special/super cancel-able. | |||
*Cannot quick max cancel. | |||
}} | |||
}} | |||
</div> | |||
</div> | |||
* | <div class="toccolours mw-collapsible mw-collapsed">'''Close Standing Normals''' | ||
<div class="mw-collapsible-content"> | |||
{{MoveData | |||
|image=Blue_Mary_Close_A.jpg | |||
|caption= | |||
|name=Close A | |||
|data= | |||
{{AttackData-KOFXIV | |||
|damage=25 | |||
|stun=30 | |||
|startup=4 | |||
|active=3 | |||
|recovery=8 | |||
|hitAdv=4 | |||
|blockAdv=2 | |||
|hitbox=[https://drive.google.com/open?id=16FOxvmNfho1PdZ7BLxRwTgp07iUkbq61 Hitbox] | |||
|invul= | |||
|description= *Standard close jab. | |||
*Like Far A, cl. A is useful to stop hops if the opponent hops close towards Blue Mary. | |||
}} | |||
}} | |||
{{MoveData | |||
|image=Blue_Mary_Close_B.jpg | |||
|caption= | |||
|name=Close B | |||
|data= | |||
{{AttackData-KOFXIV | |||
|damage=30 | |||
|stun=30 | |||
|startup=5 | |||
|active=3 | |||
|recovery=13 | |||
|hitAdv=-1 | |||
|blockAdv=-3 | |||
|hitbox=[https://drive.google.com/open?id=1T6UZP8VS_qg7iT0dHrSewD34WOEGfWPK Hitbox] | |||
|invul= | |||
|description= *Standing low Attack. | |||
*Can cancel into itself. | |||
*Point blank cl.B, cl.B, cr.B or Far B works. | |||
*Can cancel, but will not combo into command normals. | |||
*Special/super cancel-able. | |||
}} | |||
}} | |||
* | {{MoveData | ||
|image=Blue_Mary_Close_C.jpg | |||
|caption= | |||
|name=Close C | |||
|data= | |||
{{AttackData-KOFXIV | |||
|damage=78 | |||
|stun=80 | |||
|startup=6 | |||
|active=2 (1) 2 | |||
|recovery=20 | |||
|hitAdv=-1 | |||
|blockAdv=-3 | |||
|hitbox=[https://drive.google.com/open?id=1GaFpqPuUncYdULqHt-DNXOkr_Fp3dNfu Hitbox] | |||
|invul= | |||
|description= *Hits twice. | |||
*Command/special cancel-able. | |||
*Does not hit very high above her head. | |||
*Useful for grab/ close heavey OS against close empty hop/jump. | |||
}} | |||
}} | |||
{{MoveData | |||
|image=Blue_Mary_Close_D.jpg | |||
|caption= | |||
|name=Close D | |||
|data= | |||
{{AttackData-KOFXIV | |||
|damage=80 | |||
|stun=70 | |||
|startup=5 | |||
|active=4 | |||
|recovery=23 | |||
|hitAdv=2 | |||
|blockAdv=0 | |||
|hitbox=[https://drive.google.com/open?id=1PowNpwGQW5WpQUHAyNHIlp6ycY29bFRu Hitbox] | |||
|invul= | |||
|description= *Most damaging close heavy normal. | |||
*The second best heavy normal to start combos after cross-ups and quick max. | |||
*Has a lot of pushback that can make f+B whiff. | |||
}} | |||
}}</div> | |||
</div> | |||
''' | <div class="toccolours mw-collapsible mw-collapsed">'''Crouching Normals''' | ||
* | <div class="mw-collapsible-content"> | ||
* | {{MoveData | ||
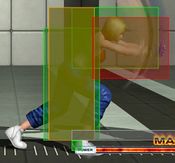
* | |image=Blue_Mary_Crouch_A.jpg | ||
|caption= | |||
|name=Crouch A | |||
|data= | |||
{{AttackData-KOFXIV | |||
|damage=25 | |||
|stun=30 | |||
|startup=5 | |||
|active=4 | |||
|recovery=6 | |||
|hitAdv=5 | |||
|blockAdv=3 | |||
|hitbox=[https://drive.google.com/open?id=1trr-cYEme5tEfXL6UxKIBAWMEk8DUaZ2 Hitbox] | |||
|invul= | |||
|description= *Hits mid. | |||
*Slightly less range than cr.B. command/special/super cancel-able. | |||
*Useful for mid-range into cr. D frame trap and can link into cl. D at point-blank range. | |||
}} | |||
}} | |||
' | {{MoveData | ||
* | |image=Blue_Mary_Crouch_B.jpg | ||
|caption= | |||
|name=Crouch B | |||
|data= | |||
{{AttackData-KOFXIV | |||
|damage=30 | |||
|stun=30 | |||
|startup=4 | |||
|active=4 | |||
|recovery=7 | |||
|hitAdv=4 | |||
|blockAdv=2 | |||
|hitbox=[https://drive.google.com/open?id=1w9syEjVkhdd9dV8HMnqn32FJCwZW9ZqN Hitbox] | |||
|invul= | |||
|description= *Hits low and fast. | |||
*Lowers her crouching hitbox a lot. | |||
*Can't command/special cancel. | |||
*Standard quick max starter. | |||
}} | |||
}} | |||
{{MoveData | |||
|image=Blue_Mary_Crouch_C.jpg | |||
|caption= | |||
|name=Crouch C | |||
|data= | |||
{{AttackData-KOFXIV | |||
|damage=70 | |||
|stun=70 | |||
|startup=9 | |||
|active=4 | |||
|recovery=27 | |||
|hitAdv=-10 | |||
|blockAdv=-12 | |||
|hitbox=[https://drive.google.com/open?id=1wPHv_N8zjgytygyoUSVVl1M4JkOAZCXa Hitbox] | |||
|invul= | |||
|description= *Hits mid. | |||
*Lowers hitbox plus moves her forward a bit. | |||
*Her best heavy normal combo starter especially into f+B. | |||
}} | |||
}} | |||
{{MoveData | |||
|image=Blue_Mary_Crouch_D.jpg | |||
|caption= | |||
|name=Crouch D | |||
|data= | |||
{{AttackData-KOFXIV | |||
|damage=80 | |||
|stun=70 | |||
|startup=6 | |||
|active=4 | |||
|recovery=25 | |||
|hitAdv=SKD | |||
|blockAdv=-10 | |||
|hitbox=[https://drive.google.com/open?id=17QrGh7vpxDEctFxjX2F36DwFSvzf0mI1 Hitbox] | |||
|invul= | |||
|description= *Hits low and fast. | |||
*Punishable if done at close range, but has a lot of pushback. So it's better to use at mid to the furthest range of cr. D. Especially useful as a frame trap at mid-screen from cr.B (x3) or cr. B(x2), cr. A. | |||
}} | |||
}}</div> | |||
</div> | |||
<div class="toccolours mw-collapsible mw-collapsed">'''Jump Normals''' | |||
<div class="mw-collapsible-content"> | |||
{{MoveData | |||
|image=Blue_Mary_Jump_A.jpg | |||
|caption= | |||
|name=Jump A | |||
|data= | |||
{{AttackData-KOFXIV | |||
|damage=45 | |||
|stun=30 | |||
|startup=4 | |||
|active=9 | |||
|recovery=(Landing)+1 | |||
|hitAdv= | |||
|blockAdv= | |||
|hitbox=[https://drive.google.com/open?id=1Ty_ZAeIKmn9sSONxqL1JXfJlB5bmJQ6g Hitbox] | |||
|invul= | |||
|description= *Has a good diagonal hitbox. | |||
*It's useful as a jump-in confirmation and a quick poke in air-to-air situations. | |||
}} | |||
}} | |||
{{MoveData | |||
|image=Blue_Mary_Jump_B.jpg | |||
|caption= | |||
|name=Jump B | |||
|data= | |||
{{AttackData-KOFXIV | |||
|damage=45 | |||
|stun=30 | |||
|startup=6 | |||
|active=8 | |||
|recovery=(Landing)+1 | |||
|hitAdv= | |||
|blockAdv= | |||
|hitbox=[https://drive.google.com/open?id=1pKFKKoW7XtUFIm3XW3NRTbaLosJrJ78T Hitbox] | |||
|invul= | |||
|description= *A great cross-up tools during hops and jumps. | |||
}} | |||
}} | |||
{{MoveData | |||
|image=Blue_Mary_Jump_C.jpg | |||
|caption= | |||
|name=Jump C | |||
|data= | |||
{{AttackData-KOFXIV | |||
|damage=70 | |||
|stun=70 | |||
|startup=7 | |||
|active=7 | |||
|recovery=(Landing)+1 | |||
|hitAdv= | |||
|blockAdv= | |||
|hitbox=[https://drive.google.com/open?id=1j6YmsjjIkyWZY3Ruxzwbl1hftHOVXjZG Hitbox] | |||
|invul= | |||
|description= *Useful for air-to-air situations. | |||
}} | |||
}} | |||
{{MoveData | |||
|image=Blue_Mary_Jump_D.jpg | |||
|caption= | |||
|name=Jump D | |||
|data= | |||
{{AttackData-KOFXIV | |||
|damage=70 | |||
|stun=70 | |||
|startup=8 | |||
|active=7 | |||
|recovery=(Landing)+1 | |||
|hitAdv= | |||
|blockAdv= | |||
|hitbox=[https://drive.google.com/open?id=1j6YmsjjIkyWZY3Ruxzwbl1hftHOVXjZG Hitbox] | |||
|invul= | |||
|description= *Useful jump-in normal. | |||
*Can cross-up on standing and crouching opponents depending on spacing. | |||
}} | |||
}}</div> | |||
</div> | |||
<div class="toccolours mw-collapsible mw-collapsed">'''Hop Normals''' | |||
<div class="mw-collapsible-content"> | |||
{{MoveData | |||
|image=Blue_Mary_Hop_A.jpg | |||
|caption= | |||
|name=Hop A | |||
|data= | |||
{{AttackData-KOFXIV | |||
|damage=40 | |||
|stun=30 | |||
|startup=4 | |||
|active=7 | |||
|recovery=(Landing)+1 | |||
|hitAdv= | |||
|blockAdv= | |||
|hitbox=[https://drive.google.com/open?id=1lFgbAJqhant-RrRgLBTadWBIWIQbK7TM Hitbox] | |||
|invul= | |||
|description= *Nearly the same as jump A except less active frames and damage. | |||
*Has a good diagonal hitbox. | |||
*It's useful as a jump-in confirmation and a quick poke in air-to-air situations. | |||
}} | |||
}} | |||
{{MoveData | |||
|image=Blue_Mary_Hop_B.jpg | |||
|caption= | |||
|name=Hop B | |||
|data= | |||
{{AttackData-KOFXIV | |||
|damage=40 | |||
|stun=30 | |||
|startup=6 | |||
|active=6 | |||
|recovery=(Landing)+1 | |||
|hitAdv= | |||
|blockAdv= | |||
|hitbox=[https://drive.google.com/open?id=1mCA_zPC5bux4cnkXoFSZwZdJ_tvRKmsm Hitbox] | |||
|invul= | |||
|description= *Nearly the same as jump B except less active frames and damage. | |||
*A great cross-up tools during hops and jumps. | |||
}} | |||
}} | |||
{{MoveData | |||
|image=Blue_Mary_Hop_C.jpg | |||
|caption= | |||
|name=Hop C | |||
|data= | |||
{{AttackData-KOFXIV | |||
|damage=70 | |||
|stun=70 | |||
|startup=7 | |||
|active=5 | |||
|recovery=(Landing)+1 | |||
|hitAdv= | |||
|blockAdv= | |||
|hitbox=[https://drive.google.com/open?id=18l4-UL6WKMCSAvJztfMDhJ6-EJoN0SjI Hitbox] | |||
|invul= | |||
|description= *Nearly the same as jump C except less active frames. | |||
*Useful for air-to-air situations. | |||
}} | |||
}} | |||
{{MoveData | |||
|image=Blue_Mary_Hop_D.jpg | |||
|caption= | |||
|name=Hop D | |||
|data= | |||
{{AttackData-KOFXIV | |||
|damage=70 | |||
|stun=70 | |||
|startup=8 | |||
|active=5 | |||
|recovery=(Landing)+1 | |||
|hitAdv= | |||
|blockAdv= | |||
|hitbox=[https://drive.google.com/open?id=1LvBKf0P0N0dSb0p3hYGAoO1J1leqoyxG Hitbox] | |||
|invul= | |||
|description= *Nearly the same as jump D except less active frames. | |||
*Useful jump-in normal. | |||
*Can cross-up on standing and crouching opponents depending on spacing. | |||
}} | |||
}}</div> | |||
</div> | |||
''' | <div class="toccolours mw-collapsible mw-collapsed">'''Blowback''' | ||
<div class="mw-collapsible-content"> | |||
{{MoveData | |||
|image=Blue_Mary_Stand_CD.jpg | |||
|caption= | |||
|name=Stand CD | |||
|data= | |||
{{AttackData-KOFXIV | |||
|damage=75 | |||
|stun=100 | |||
|startup=15 | |||
|active=5 | |||
|recovery=22 | |||
|hitAdv=HKD (Gnd)/ SKD (Air) | |||
|blockAdv=-4 | |||
|hitbox=[https://drive.google.com/open?id=1O2CmsL4WKGZy2vv27TVS19d1uCfToTby Hitbox] | |||
|invul= | |||
|description= *Can cancel ending frames into her command normals. | |||
}} | |||
}} | |||
{{MoveData | |||
|image=Blue_Mary_Jump_CD.jpg | |||
|caption= | |||
|name=Jump CD | |||
|data= | |||
{{AttackData-KOFXIV | |||
|damage=90 | |||
|stun=80 | |||
|startup=13 | |||
|active=7 | |||
|recovery=(Landing)+1 | |||
|hitAdv=SKD | |||
|blockAdv= | |||
|hitbox=[https://drive.google.com/open?id=1vO8fod0JCeywkJJ0buM2uvTLVH7gwnwD Hitbox] | |||
|invul= | |||
|description= *Great hit box for jump in pressure. | |||
*Blue Mary can abuse her hop CD, which has a wide hitbox around her foot. | |||
*It’s good as an air-to-ground normal. | |||
*Only invincible moves can beat it clean, so be cautious of opponents that are good at anti-airing. | |||
}} | |||
}} | |||
{{MoveData | |||
|image=Blue_Mary_Hop_CD.jpg | |||
|caption= | |||
|name=Hop CD | |||
|data= | |||
{{AttackData-KOFXIV | |||
|damage=80 | |||
|stun=80 | |||
|startup=13 | |||
|active=5 | |||
|recovery=(Landing)+1 | |||
|hitAdv=SKD | |||
|blockAdv= | |||
|hitbox=[https://drive.google.com/open?id=1kTOVCe0IIHwSshedoD648Lm9QofyYiLb Hitbox] | |||
|invul= | |||
|description= *Nearly the same as jump CD except less active frames and damage. | |||
*Great hitbox for jump-in pressure. | |||
*Blue Mary can abuse her hop CD, which has a wide hitbox around her foot. | |||
*It’s good as an air-to-ground normal. | |||
*Only invincible moves can beat it clean, so be cautious of opponents that are good at anti-airing. | |||
}} | |||
}}</div> | |||
</div> | |||
==Throws== | |||
<div class="toccolours mw-collapsible mw-collapsed">'''Normal Throws''' | |||
<div class="mw-collapsible-content"> | |||
{{MoveData | |||
|image=Blue_Mary_Forward_Throw.jpg | |||
|caption= | |||
|name=Lock Kick (close, ←/→ + C) | |||
|data= | |||
{{AttackData-KOFXIV | |||
|damage=100 | |||
|stun=0 | |||
|startup=1 | |||
|active=1 | |||
|recovery=0 | |||
|hitAdv=SKD | |||
|blockAdv=Unblockable | |||
|hitbox=[https://drive.google.com/open?id=1ZR9eA4w2l4za8pXTruXndA5nNfkadrcR Hitbox] | |||
|invul= | |||
|description= *Forward throw. | |||
}} | |||
}} | |||
{{MoveData | |||
|image=Blue_Mary_Back_Throw.jpg | |||
|caption= | |||
|name=Viktor Throw (close, ←/→ + D) | |||
|data= | |||
{{AttackData-KOFXIV | |||
|damage=100 | |||
|stun=0 | |||
|startup=1 | |||
|active=1 | |||
|recovery=0 | |||
|hitAdv=HKD | |||
|blockAdv=Unblockable | |||
|hitbox=[https://drive.google.com/open?id=1l-uesZGCpjqODdAZovCdafZB-tUJI1Ur Hitbox] | |||
|invul= | |||
|description= *Back throw. | |||
}} | |||
}}</div> | |||
</div> | |||
''' | ==Command Moves== | ||
<div class="toccolours mw-collapsible mw-collapsed">'''Command Moves''' | |||
<div class="mw-collapsible-content"> | |||
{{MoveData | |||
|image=Blue_Mary_f+A.jpg | |||
|caption= | |||
|name=Hammer Arch - (→ + A) | |||
|data= | |||
{{AttackData-KOFXIV | |||
|version=Without Cancel | |||
|damage=70 | |||
|stun=60 | |||
|startup=22 | |||
|active=4 | |||
|recovery=26 | |||
|hitAdv=-9 | |||
|blockAdv=-11 | |||
|hitbox=[https://drive.google.com/open?id=1NNCMjQHaRV8PQEZzHNFomqOqS3qA_Bww Hitbox] | |||
|invul= Low: 3 to 19 (17 Frames) | |||
|description= *Overhead. | |||
*Special/super cancel-able. | |||
*Great range. | |||
*Can start max mode combos after hit (not hit confirm-able). | |||
}} | |||
{{AttackData-KOFXIV | |||
|version=With Cancel | |||
|damage=30 | |||
|stun=40 | |||
|startup=15 | |||
|active=4 | |||
|recovery=23 | |||
|hitAdv=-6 | |||
|blockAdv=-8 | |||
|hitbox=[https://drive.google.com/open?id=12woRLQ-xVkdD4Qgggt5sozHyGmzu22OQ Hitbox] | |||
|invul= Low: 3 to 11 (9 Frames) | |||
|description= *Hits mid. | |||
*Special/super cancel-able. | |||
*Great range. | |||
*Can start max mode combos after hit (not hit confirm-able). | |||
}} | |||
}} | |||
:: | {{MoveData | ||
|image=Blue_Mary_b_or_f+B.jpg | |||
' | |caption= | ||
|name=Double Rolling - (←/→ + B) | |||
|data= | |||
{{AttackData-KOFXIV | |||
|damage=78 | |||
|stun=70 | |||
|startup=16 | |||
|active=3 (17) 5 | |||
|recovery=26 | |||
|hitAdv=-10 | |||
|blockAdv=-12 | |||
|hitbox=[https://drive.google.com/open?id=19NeGOih-e2e9OQQF9qW3MkreZDfwX_oJ Hitbox] | |||
|invul= Low: 16 to 21 (6 Frames) | |||
|description= *Hits mid then low. Mostly used for combo filler. | |||
*Special cancel-able. | |||
*Doesn't crush lows. | |||
*If 1st hit connects on hit or guard, 2nd hit can whiff cancel and empty quickmax. | |||
}} | |||
}} | |||
{{MoveData | |||
|image=Blue_Mary_df+B.jpg | |||
|caption= | |||
|name=Climbing Arrow - (↘ +B) | |||
|data= | |||
{{AttackData-KOFXIV | |||
|damage=60 | |||
|stun=60 | |||
|startup=14 | |||
|active=5 | |||
|recovery=29 | |||
|hitAdv=SKD | |||
|blockAdv=-15 | |||
|hitbox=[https://drive.google.com/open?id=1dB6tWOiLWi1GfNn51ChHqPP8Ig-Fii7E Hitbox] | |||
|invul= | |||
|description= * Hits mid. Special cancel-able. | |||
*Launches opponent. Can combo into super on trade. | |||
*Can combo into max mode on hit. | |||
*Best used during quick max combos. | |||
}} | |||
}}</div> | |||
</div> | |||
''' | ==Special Moves== | ||
<div class="toccolours mw-collapsible mw-collapsed"> '''Special Moves''' | |||
<div class="mw-collapsible-content"> | |||
{{MoveData | |||
|image=Blue_Mary_Straight_Slicer.jpg | |||
|caption= | |||
|name=Straight Slicer - (← charge → + B/D) | |||
|data= | |||
{{AttackData-KOFXIV | |||
|version=B | |||
|damage=60 | |||
|stun=60 | |||
|startup=14 | |||
|active=8 | |||
|recovery=18 | |||
|hitAdv=SKD | |||
|blockAdv=-7 | |||
|hitbox=[https://drive.google.com/open?id=1WxPxfeW13zX0ng0od4JPgVSwPpQkhm2h Hitbox] | |||
|invul=Low: 7 to 9 (3 Frames) | |||
|description= *Main special in Blue Mary's bnb from a light normal attack. | |||
*Hits low. | |||
}} | |||
{{AttackData-KOFXIV | |||
|version=D | |||
|damage=60 | |||
|stun=60 | |||
|startup=18 | |||
|active=11 | |||
|recovery=22 | |||
|hitAdv=-12 | |||
|blockAdv=-14 | |||
|hitbox=[https://drive.google.com/open?id=1CFjT1uOsDwwLH5KOigUUxMHc1jLT8F-L Hitbox] | |||
|invul=Low: 7 to 11 (5 Frames) | |||
|description= *Main special in Blue Mary's bnb from a heavy normal attack. | |||
*Hits low. | |||
*Can cancel into Crab Clutch, qcf+B/D. Requires more charge than light Straight Slicer. | |||
}} | |||
}} | |||
{{MoveData | |||
|image= | |||
|caption= | |||
|name=↳ Crab Clutch (↓↘→ + B/D) | |||
|data= | |||
{{AttackData-KOFXIV | |||
|damage=60 | |||
|stun=0 | |||
|startup= | |||
|active= | |||
|recovery= | |||
|hitAdv= HKD | |||
|blockAdv= | |||
|hitbox= | |||
|invul= | |||
|description= Gives Blue Mary enough time to do meaty jump attack. | |||
}} | |||
}} | |||
{{MoveData | |||
|image=Blue_Mary_EX_Straight_Slicer.jpg | |||
|caption= | |||
|name=EX Straight Slicer - (← charge → + BD) | |||
|data= | |||
{{AttackData-KOFXIV | |||
|damage=80 | |||
|stun=0 | |||
|startup=14 | |||
|active=9 | |||
|recovery=22 | |||
|hitAdv=-10 | |||
|blockAdv=-12 | |||
|hitbox=[https://drive.google.com/open?id=1qLBpB8-UoV7aKbbF82Lo6J2L_hH1V2eY Hitbox] | |||
|invul=Full: 1 to 11 (11 Frames) | |||
|description= Main special in Blue Mary's bnb in quick max combos. Hits low. Cancels only into Stung Fang, qcf+A/C. | |||
}} | |||
}} | |||
{{MoveData | |||
|image= | |||
|caption= | |||
|name=↳ Stun Fang (↓↘→ + A/C) | |||
|data= | |||
{{AttackData-KOFXIV | |||
|damage=60 | |||
|stun=0 | |||
|startup= | |||
|active= | |||
|recovery= | |||
|hitAdv=SKD | |||
|blockAdv=-6 | |||
|hitbox= | |||
|invul= | |||
|description= Stuns the opponent in place. Can hit once in the ground and once in the air in the same combo. | |||
}} | |||
}} | |||
::* ( | {{MoveData | ||
|image=Blue_Mary_Dp.jpg | |||
|caption= | |||
|name=Vertical Arrow - (→↓↘ + B/D) | |||
|data= | |||
{{AttackData-KOFXIV | |||
|version= B | |||
|damage=78 | |||
|stun=40 + 40 | |||
|startup=6 | |||
|active=11 | |||
|recovery=38 | |||
|hitAdv=SKD | |||
|blockAdv=-28 | |||
|hitbox=[https://drive.google.com/open?id=1fwSsS3fZMGrYziAOCFzkvQfc7tNQycyj Hitbox] | |||
|invul=Full: 1 to 6 (6 Frames) | |||
|description= *Blue Mary's fastest meterless reversal. | |||
*Can cancel into M. Snatcher (→↓↘ + B/D) on hit. | |||
*Best ender for quick max combos. | |||
}} | |||
{{AttackData-KOFXIV | |||
|version= D | |||
|damage=97 | |||
|stun=40 + 60 | |||
|startup=8 | |||
|active=17 | |||
|recovery=45 | |||
|hitAdv=SKD | |||
|blockAdv=-41 | |||
|hitbox=[https://drive.google.com/open?id=13p7aeGB7inDWvbGRUzQsirgAhkT7_NVP Hitbox] | |||
|invul=Full: 1 to 12 (12 Frames) | |||
|description= *Blue Mary's reversal. | |||
*Can cancel into M. Snatcher (→↓↘ + B/D) on hit. | |||
*Best ender for quick max combos | |||
}} | |||
}} | |||
{{MoveData | |||
|image= | |||
|caption= | |||
|name=↳ M. Snatcher (→↓↘ + B/D) | |||
|data= | |||
{{AttackData-KOFXIV | |||
|damage=63 | |||
|stun=0 | |||
|startup= | |||
|active= | |||
|recovery= | |||
|hitAdv=HKD | |||
|blockAdv= | |||
|hitbox= | |||
|invul= | |||
|description= *A follow-up that makes B/D Vertical Arrow a strong reversal since it's a hkd knockdown. | |||
*Gives Blue Mary enough to do a meaty jump D attack that is difficult for many characters to counter. | |||
}} | |||
}} | |||
{{MoveData | |||
|image=Blue_Mary_EX_DP.jpg | |||
|caption= | |||
|name=EX Vertical Arrow - (→↓↘ + BD) | |||
|data= | |||
{{AttackData-KOFXIV | |||
|damage=176 | |||
|stun=0 | |||
|startup=4 | |||
|active=5 (3) 2 (3) 2 (3) 2 (3) 3 | |||
|recovery=43 | |||
|hitAdv=SKD | |||
|blockAdv=-48 | |||
|hitbox=[https://drive.google.com/open?id=1zOzPeAmU9e011r0QPqPtAa7YnrMGnN7l Hitbox] | |||
|invul=Full: 1 to 8 (8 Frames) | |||
|description= *Blue Mary's fastest antiair reversal in max mode. | |||
*Not really useful in combos over regular Vertical Arrow unless you are guarantee to win the round or match. | |||
}} | |||
}} | |||
* (description | {{MoveData | ||
|image=Blue_Mary_Spin_Fall.jpg | |||
|caption= | |||
|name=Spin Fall (↓↘→ + A/C) | |||
|data= | |||
{{AttackData-KOFXIV | |||
|version=A | |||
|damage=60 | |||
|stun=60 | |||
|startup=25 | |||
|active=3 | |||
|recovery=23 | |||
|hitAdv=-5 | |||
|blockAdv=-7 | |||
|hitbox=[https://drive.google.com/open?id=1IxlH0zKmAOHDloNv8FVzykltccy--NQP Hitbox] | |||
|invul=Low: 7 to 28 (22 Frames) | |||
|description= *An overhead attack that allows Blue Mary to move forward. | |||
*The move is airborne. | |||
*Can cancel into M. Spider (↓↘→ + A/C). | |||
}} | |||
{{AttackData-KOFXIV | |||
|version=C | |||
|damage=60 | |||
|stun=60 | |||
|startup=24 | |||
|active=3 | |||
|recovery=26 | |||
|hitAdv=-8 | |||
|blockAdv=-10 | |||
|hitbox=[https://drive.google.com/open?id=12ozIBDZhRgV02SXjbhDuSx9budxYTvt3 Hitbox] | |||
|invul=Low: 8 to 27 (20 Frames) | |||
|description= *An overhead attack that allows Blue Mary to move forward. | |||
*Further than light Spin Fall. | |||
*The move is airborne. | |||
*Can cancel into M. Spider (↓↘→ + A/C) on hit. | |||
}} | |||
}} | |||
{{MoveData | |||
|image= | |||
|caption= | |||
|name=↳ M. Spider (↓↘→ + A/C) | |||
|data= | |||
{{AttackData-KOFXIV | |||
|damage=57 | |||
|stun=0 | |||
|startup= | |||
|active= | |||
|recovery= | |||
|hitAdv=- | |||
|blockAdv= | |||
|hitbox= | |||
|invul= | |||
|description= *Switches sides with opponent when move connects. | |||
}} | |||
}} | |||
{{MoveData | |||
|image=Blue_Mary_EX_Spin_Fall.jpg | |||
|caption= | |||
|name=EX Spin Fall (↓↘→ + AC) | |||
|data= | |||
{{AttackData-KOFXIV | |||
|damage=107 | |||
|stun=0 | |||
|startup=15 / Hits crouching opponent at 18 | |||
|active=6 | |||
|recovery=18 | |||
|hitAdv=HKD | |||
|blockAdv=-3 | |||
|hitbox=[https://drive.google.com/open?id=1b6Y_4ei6N3KCVq1o3MAkifL8SE_KqYPp Hitbox] | |||
|invul= Low: 1 to 22 (22 Frames) | |||
|description= *An overhead attack that has no follow-up since it will ground bound the opponent. | |||
*The first hit will whiff on crouching opponents which will greatly cut this move's damage in half. | |||
*It's a useful move for quick max combos after Stun Fang. | |||
}} | |||
}} | |||
{{MoveData | |||
|image=Blue_Mary_Real_Counter.jpg | |||
|caption= | |||
|name=Real Counter (↓↙← + A/C) | |||
|data= | |||
{{AttackData-KOFXIV | |||
|damage=0 | |||
|stun=0 | |||
|startup=12 (To Cancel Window) | |||
|active= 12 to 31 (Cancel Windows 20 Frames) | |||
|recovery=19 | |||
|hitAdv= | |||
|blockAdv= | |||
|hitbox=[https://drive.google.com/open?id=1o02HjfO626stWIC5rZQYI6607R7-umpK Hitbox] | |||
|invul= Full: 1 to 20 (20 Frames) | |||
|description= * Can be considered a dodge that cancels into a command grab. | |||
}} | |||
}} | |||
{{MoveData | |||
|image=Blue_Mary_Backdrop.jpg | |||
|caption= | |||
|name=↳ Backdrop Real (In close, ↓↘→ + A/C) | |||
|data= | |||
{{AttackData-KOFXIV | |||
|damage=140 | |||
|stun=0 | |||
|startup=1 | |||
|active= 1 | |||
|recovery=30 | |||
|hitAdv=HKD | |||
|blockAdv=Unblockable | |||
|hitbox=[https://drive.google.com/open?id=16L6Z4bt4DBLFmzun3aOcMelY91c2T1v0 Hitbox] | |||
|invul= Full: 1 (1 Frame) | |||
|description= * Blue Mary does one german suplex. | |||
* Command Grab | |||
}} | |||
}} | |||
{{MoveData | |||
|image=Blue_Mary_EX_RC.jpg | |||
|caption= | |||
|name=EX Real Counter (↓↙← + AC) | |||
|data= | |||
{{AttackData-KOFXIV | |||
|damage=0 | |||
|stun=0 | |||
|startup=1 (To Cancel Window) | |||
|active= 1 to 31 (Cancel Windows 20 Frames) | |||
|recovery=19 | |||
|hitAdv= | |||
|blockAdv= | |||
|hitbox=[https://drive.google.com/open?id=1mD_xZfSu_fso53CODkIUzmjq2b3oHc58 Hitbox] | |||
|invul= Full: 1 to 31 (31 Frames) | |||
|description= * Just like normal Real Counter, EX Real Counter can be considered a dodge that cancels into a command grab. | |||
* It can immediately cancel into a command grab. | |||
}} | |||
}} | |||
{{MoveData | |||
|image=Blue_Mary_EX_Backdrop.jpg | |||
|caption= | |||
|name=↳ EX Backdrop Real (In close, ↓↘→ + A/C) | |||
|data= | |||
{{AttackData-KOFXIV | |||
|damage=160 | |||
|stun=0 | |||
|startup=1 | |||
|active= 2 | |||
|recovery=27 | |||
|hitAdv=HKD | |||
|blockAdv=Unblockable | |||
|hitbox=[https://drive.google.com/open?id=1WzScXrUoSwf6DkD0pa9lUx3-b-yn14YH Hitbox] | |||
|invul= Full: 1 (1 Frame) | |||
|description= * Blue Mary does two german suplexes. | |||
* Command Grab | |||
}} | |||
}} | |||
* | {{MoveData | ||
|image=Blue_Mary_M_Breaker.jpg | |||
|caption= | |||
|name=M. Breaker (→↓↘ + A/C) | |||
|data= | |||
{{AttackData-KOFXIV | |||
|version=A | |||
|damage=120 | |||
|stun=0 | |||
|startup=23 | |||
|active=4 | |||
|recovery=29 | |||
|hitAdv=HKD | |||
|blockAdv=Unblockable | |||
|hitbox=[https://drive.google.com/open?id=1Lfu4yjXVFX7nxBgpz7gizmVrGOMeB31K Hitbox] | |||
|invul= | |||
|description= *Blue Mary lunges forward with this command grab. | |||
* It is useful as a tick throw after a light block strings. | |||
* It is not an air grab. | |||
* Blue Mary can perform a 4 frame safe jump anywhere on the screen after this move: [https://www.youtube.com/watch?v=YMg7Max6RgI&feature=youtu.be Video Link] | |||
}} | |||
{{AttackData-KOFXIV | |||
|version= C | |||
|damage=120 | |||
|stun=0 | |||
|startup=25 | |||
|active=6 | |||
|recovery=27 | |||
|hitAdv=HKD | |||
|blockAdv=Unblockable | |||
|hitbox=[https://drive.google.com/open?id=1w8fMU4D1SeshUaER0vWASt9AwkC74ka0 Hitbox] | |||
|invul= | |||
|description= *Blue Mary lunges forward with this command grab. | |||
* This version lunges a bit further than the light version. | |||
* It is useful as a tick throw after a light block strings. | |||
* It is not an air grab. | |||
* Blue Mary can perform a 4 frame safe jump anywhere on the screen after this move: [https://www.youtube.com/watch?v=YMg7Max6RgI&feature=youtu.be Video Link] | |||
* Immediately jump to do a 4-frame safe jump. | |||
}} | |||
}} | |||
= | {{MoveData | ||
|image=Blue_Mary_ex_M_Breaker.jpg | |||
|caption= | |||
|name=EX M. Breaker (→↓↘ + AC) | |||
|data= | |||
{{AttackData-KOFXIV | |||
|damage=150 | |||
|stun=0 | |||
|startup=20 | |||
|active=8 | |||
|recovery=27 | |||
|hitAdv=HKD | |||
|blockAdv=Unblockable | |||
|hitbox=[https://drive.google.com/open?id=1u-s8dV6zIfvFkYpUGMOvs4RVc1ygN7gp Hitbox] | |||
|invul=Full: 1 to 10 (10 Frames)/ Low: 11 to 30 (20 Frames) | |||
|description= *Blue Mary lunges forward with this command grab. | |||
* It is useful as a tick throw after a light block strings. | |||
* It is not an air grab. | |||
* Blue Mary can perform a 4-frame safe jump anywhere on the screen after this move: [https://www.youtube.com/watch?v=5Z1BXIHRUZE&feature=youtu.be Video Link] | |||
* Immediately hyperjump to do a 4-frame safe jump. | |||
}} | |||
}}</div> | |||
</div> | |||
''' | ==Super Special Moves== | ||
<div class="toccolours mw-collapsible mw-collapsed">'''Super Special Moves''' | |||
<div class="mw-collapsible-content"> | |||
{{MoveData | |||
|image=Blue_Mary_M_Typhoon.jpg | |||
|caption= | |||
|name=M. Typhoon (In close, →↘↓↙←→↘↓↙← + B/D) | |||
|data= | |||
{{AttackData-KOFXIV | |||
|damage=180 | |||
|stun=0 | |||
|startup=1 | |||
|active=2 | |||
|recovery=60 | |||
|hitAdv=HKD | |||
|blockAdv=Unblockable | |||
|hitbox=[https://drive.google.com/open?id=1WhUTiVINvPZVPmoL6wWuDn-G9xWC17WN Hitbox] | |||
|invul=Full: 1 to 2 (2 Frames) | |||
|description= *1-frame command grab. | |||
* Useful for punished close -1 moves. | |||
* Cannot Advance or Climax Cancel. | |||
}} | |||
}} | |||
{{MoveData | |||
|image=Blue_Mary_Max_M_Typhoon.jpg | |||
|caption= | |||
|name=Max M. Typhoon (In close, →↘↓↙←→↘↓↙← + BD) | |||
|data= | |||
{{AttackData-KOFXIV | |||
|damage=320 | |||
|stun=0 | |||
|startup=1 | |||
|active=2 | |||
|recovery=49 | |||
|hitAdv=HKD | |||
|blockAdv=Unblockable | |||
|hitbox=[https://drive.google.com/open?id=1pt4Q2wlK1OZc7e4oCfeeqkNeg6II_6oP Hitbox] | |||
|invul=Full: 1 to 2 (2 Frames) | |||
|description= *1-frame command grab. | |||
* Useful for punished close -1 moves. | |||
* Cannot Climax Cancel. | |||
}} | |||
}} | |||
* ( | {{MoveData | ||
|image=Blue_Mary_M_Splash.jpg | |||
|caption= | |||
|name=M. Splash Rose (↓↘→↘↓↙← + A/C) | |||
|data= | |||
{{AttackData-KOFXIV | |||
|damage=184 | |||
|stun=0 | |||
|startup=11 | |||
|active=11 | |||
|recovery=34 | |||
|hitAdv=HKD | |||
|blockAdv=-13 | |||
|hitbox=[https://drive.google.com/open?id=1aRkFQsEbzoFFfx_K2RR4aZ2j48b2_6eh Hitbox] | |||
|invul=Full: 1 to 6 (6 Frames)/ Low: 7 to 25 (19 Frames) | |||
|description= *Blue Mary's Ranbu super. | |||
* Can Advance Cancel into Max M. Typhoon (In close, →↘↓↙←→↘↓↙← + BD). It's best to cancel after Blue Mary kicks the opponent. | |||
* Can Climax Cancel in M. Dynamite Swing (↓↘→↓↘→ + BD) at the end of the super after Blue Mary lands on the ground. | |||
* This is the best version to climax cancel for the maximum amount of damage in quick max combos. | |||
}} | |||
}} | |||
=Combos= | {{MoveData | ||
|image=Blue_Mary_Max_M_Splash.jpg | |||
|caption= | |||
|name=Max M. Splash Rose (↓↘→↘↓↙← + AC) | |||
|data= | |||
{{AttackData-KOFXIV | |||
|damage=349 | |||
|stun=0 | |||
|startup=6 | |||
|active=13 | |||
|recovery=45 | |||
|hitAdv=HKD | |||
|blockAdv=-18 | |||
|hitbox=[https://drive.google.com/open?id=1IeSh5qkOPPsv-aX02_-0PXPAXKwdaqBc Hitbox] | |||
|invul=Full: 1 to 7 (7 Frames) | |||
|description= *Blue Mary's Max Ranbu super. | |||
* Can Climax Cancel in M. Dynamite Swing (↓↘→↓↘→ + BD). It's best to climax cancel during the first two hits of Blue Mary's final launch into the air. | |||
* If done in the corner, Blue Mary will be there instead of the opponent, but she has enough time to perform a meaty setup or cross-up. | |||
}} | |||
}}</div> | |||
</div> | |||
==Climax Super Special Moves== | |||
<div class="toccolours mw-collapsible mw-collapsed">'''Climax Super Special Moves''' | |||
<div class="mw-collapsible-content"> | |||
{{MoveData | |||
|image=Blue_Mary_Climax.jpg | |||
|caption= | |||
|name=M. Dynamite Swing (↓↘→↓↘→ + BD) | |||
|data= | |||
{{AttackData-KOFXIV | |||
|damage=460 | |||
|stun=0 | |||
|startup=6 | |||
|active=9 | |||
|recovery=61 | |||
|hitAdv=HKD | |||
|blockAdv=-51 | |||
|hitbox=[https://drive.google.com/open?id=1BniHWVr7kK9iHMMGYGwx4S2jOYXLW2cU Hitbox] | |||
|invul=Full: 1 to 15 (15 Frames) | |||
|description= *Best to use to win the match. | |||
* There's not enough time to do anything after this moves hit. | |||
* Can cancel from both versions of M. Splash Rose. | |||
}} | |||
}}</div> | |||
</div> | |||
==Combos== | |||
===Combo starter:=== | |||
* '''cr. B (x1 or x2), cr. A''' – The stable combo starter that connects only to b~f+B, the light slide kick. | |||
* '''cl. C (1 hit), b+B''' – Cl. (1 hit) is one of two heavy normals that connects to f+B consistently, without f+B whiffing, at most ranges. After doing b+B, hold back to charge for the slide kick, b~f+B/D. | |||
* '''cr. C, b+B''' – cr. C connects to f+B consistently without f+B whiffing all ranges. It can be considered the best combo to do after quick max to connect to ex slide kick, b~f+BD. | |||
* '''cl. D, f+A''' – This is a combo to do after quick max in the anchor position. It leads to her most damaging mid-screen 2-meter anchor combo without spending any additional meter. It’s possible to do slide kick after this combo by immediately holding back during f+A. Delay f+K after f+A by a couple of frames to connect to slide kick. | |||
* '''cl. D, b+B''' – Her most damaging combo starter, but requires cl. D to hit deep to connect f+B. It’s best to do this combo after a cross-up j. B or cross-up j. D. Also, it’s is useful after quick max for 1-meter max mode combos. | |||
[http://dreamcancel.com/wiki/index.php?title=The_King_of_Fighters_XIV#Notation Notation] | [http://dreamcancel.com/wiki/index.php?title=The_King_of_Fighters_XIV#Notation Notation] | ||
| Line 252: | Line 1,295: | ||
===Rush Auto Combo=== | ===Rush Auto Combo=== | ||
'''Meterless:''' | '''Meterless:''' Rush combo, b~f+D, qcfB/D = 172 dmg | ||
'''1 Meter:''' | '''1 Meter:''' Rush combo, qcf, hcb+A/C = 222 dmg | ||
'''EX:''' | '''EX:''' Rush combo, qcf, hcb+AC = 363 dmg | ||
==0 meter== | ==0 meter== | ||
* ( | '''Anywhere''' | ||
( | * cr. B (x2 to x3), Far B = (85 to 110 dmg) | ||
* cr. B (x1 to x2), cr. A, b~f+B = (107 to 131 dmg) | |||
(Main bread and butter combo. It's best to hold db while at the start of the combo to charge for b~f+B.) | |||
* cl. C (1 hit), f+A, dp+B (x2) = (194 dmg) | |||
* cl. D, f+A, b~f+D, qcf+B/D = (216 dmg) | |||
* cl. D f+A, dp+B, dp+B (x2) = (234 dmg) | |||
(cl. D has to hit very close against the opponent in order for b+B not to whiff. It's easier to do this combo after cross-up j. B or j. D.) | |||
* cr. C, b+B (2 hits), b~f+D, qcf+B/D = (246 dmg) | |||
(Along with cl. C (1 hit), cr. C seems to connect to b+B more consistently at any range.) | |||
* cl. D b+B (2 hits), b~f+D, qcf+B/D = (256 dmg) | |||
(cl. D has to hit very close against the opponent in order for b+B not to whiff. It's easier to do this combo after cross-up j. B or j. D.) | |||
==1 meter== | ==1 meter== | ||
* ( | '''1000 Max Mode and up/ All Positions/ Anywhere''' | ||
( | |||
* cr. B (x2 to x3), Far B, qcf, hcb+A/C = (237 to 254 dmg) | |||
* cr. B (x1-x2), cr. A, b~f+B (SC), qcf, hcb+A/C = (259 to 275 dmg) | |||
* cl. C (1 hit), b+B (2 hits), b~f+B(SC), qcf, hcb+A/C = (309 dmg) | |||
* cr. C, b+B (2 hits), b~f+B(SC), qcf, hcb+A/C = (339 dmg) | |||
* cr. B, cr. B, (BC), cr. C, b+B (2 hits), b~f+BD, delay qcf+A/C, df+B, qcf+AC (2 hits), dp+D (x2) = (355 dmg) | |||
'''1500 Max Mode/ 3rd Position/ Corner ''' | |||
* cr. B, cr. B, (BC), cr. C, b+B (2 hits), qcf+AC, df+B, qcf+AC, dp+BD = (360 to 372 dmg) | |||
==2 meters== | ==2 meters== | ||
* ( | '''1000 Max Mode and up/ All Positions/ Anywhere''' | ||
( | |||
* cr. B (x2 to x3), Far B, qcf, hcb+AC = (378 to 386 dmg) | |||
* cr. B (x1-x2), cr. A, b~f+B (SC), qcf, hcb+AC = (400 to 407 dmg) | |||
* cl. C (1 hit), b+B (2 hits), b~f+B(SC), qcf, hcb+AC = (441 dmg) | |||
* cr. C, b+B (2 hits), b~f+B(SC), qcf, hcb+AC = (471 dmg) | |||
* cr. B, cr. B, (BC), cr. C, b+B (2 hits), b~f+BD, delay qcf+A/C, df+B, qcf, hcb+AC = (483 dmg) | |||
'''1250 Max Mode and up/ 2nd and 3rd Positions/ Corner''' | |||
* cr. B, cr. B, (BC), cr. C, b+B (2 hits), b~f+BD, delay qcf+A/C, df+B, delay dp+B (1 hit, SC), qcf, hcb+AC = (497 dmg) | |||
'''1500 Max Mode and up/ 3rd Position/ Anywhere ''' | |||
* cr. B, cr. B, (BC), cl. D, f+A, b~f+BD, qcf+A/C, qcf+AC (2 hits), df+B, qcf, hcb+AC = (506 dmg) | |||
'''1500 Max Mode and up/ 3rd Position/ Corner''' | |||
* cr. B, cr. B, (BC), cl. D, b+B, b~f+BD, qcf+A/C, df+B, delay dp+B (1 hit, SC), qcf, hcb+AC = (505 dmg) | |||
==3 meters== | ==3 meters== | ||
* ( | '''1000 Max Mode and up/ All Positions/ Anywhere''' | ||
( | |||
* cr. B (x2 to x3), Far B, qcf, hcb+A/C(AC), hcb(x2)+BD = (404 to 407 dmg) | |||
* cr. B (x1-x2), cr. A, b~f+B (SC), qcf, hcb+AC(AC), hcb(x2)+BD = (426 to 428 dmg) | |||
* cl. C (1 hit), b+B (2 hits), b~f+B(SC), qcf, hcb+A/C(AC), hcb(x2)+BD = (462 dmg) | |||
* cr. C, b+B (2 hits), b~f+B(SC), qcf, hcb+AC(AC), hcb(x2)+BD = (492 dmg) | |||
* cr. B (x1-x2), cr. A, b~f+B(SC), qcf(x2)+BD = (494 to 493 dmg) | |||
* cr. C, b+B (2 hits), b~f+B(SC), qcf(x2)+BD = (557 dmg) | |||
* cr. B, cr. B, (BC), cr. C, b+B (2 hits), b~f+BD, qcf+A/C, df+B, qcf(x2)+BD = (528 dmg) | |||
* cr. B, cr. B, (BC), cr. C, b+B (2 hits), b~f+BD, delay qcf+A/C, df+B, qcf+AC (2 hits), dp+B/D (1 hit, SC), qcf, hcb+AC = (529 dmg) | |||
'''1250 Max Mode and up/ 2nd and 3rd Positions/ Corner''' | |||
* cr. B, cr. B, (BC), cr. C, b+B (2 hits), b~f+BD, delay qcf+A/C, df+B, delay dp+B (1 hit, SC), qcf(x2)+BD = (542 dmg) | |||
'''1500 Max Mode and up/ 3rd Position/ Anywhere ''' | |||
* cr. B, cr. B, (BC), cl. D, f+A, b~f+BD, qcf+A/C, qcf+AC (2 hits), df+B, qcf(x2)+BD = (551 dmg) | |||
==4 meters== | ==4 meters== | ||
* ( | '''1250 Max Mode and up/ 2nd and 3rd Positions/ Anywhere''' | ||
( | |||
* cr. B (x2 to x3), Far B, qcf, hcb+A/C(AC), hcb(x2)+BD = (526 to 518 dmg) | |||
* cr. B (x1-x2), cr. A, b~f+B (SC), qcf, hcb+AC(AC), hcb(x2)+BD = (548 to 539 dmg) | |||
* cl. C (1 hit), b+B (2 hits), b~f+B(SC), qcf, hcb+A/C(AC), hcb(x2)+BD = (573 dmg) | |||
* cr. C, b+B (2 hits), b~f+B(SC), qcf, hcb+AC(AC), hcb(x2)+BD = (603 dmg) | |||
* cr. B, cr. B, (BC), cr. C, b+B (2 hits), b~f+BD, delay qcf+A/C, df+B, qcf+AC (2 hits), dp+B/D (1 hit, SC) qcf, hcb+A/C (AC), hcb(x2)+BD = (549 dmg) | |||
* cr. B, cr. B, (BC), cl. D, f+A, b~f+BD, qcf+A/C, qcf+AC (2 hits), delay b~f+BD, qcf+A/C, dash dp+B (1 hit, SC) qcf(x2)+BD = (580 dmg) | |||
'''1250 Max Mode and up/ 2nd and 3rd Positions/ Corner''' | |||
* cr. B, cr. B, (BC), cr. C, b+B (2 hits), b~f+BD, delay qcf+A/C, qcf+AC (2 hits), df+B, delay dp+B (1 hit, SC) qcf, hcb+A/C (AC), hcb(x2)+BD = (548 dmg) | |||
'''1500 Max Mode and up/ 3rd Position/ Anywhere ''' | |||
* cr. B, cr. B, (BC), cl. D, f+A, b~f+BD, qcf+A/C, qcf+AC (2 hits), delay b~f+BD, qcf+A/C, dash dp+B (1 hit, SC) qcf, hcb+A/C (AC), hcb(x2)+BD = (555 dmg) | |||
'''1500 Max Mode and up/ 3rd Position/ Corner ''' | |||
* cr. B, cr. B, (BC), cl. D, f+A, b~f+BD, qcf+A/C, qcf+AC (2 hits), b~f+BD, qcf+A/C, df+B, delay dp+B (1 hit, SC) qcf, hcb+A/C (AC), hcb(x2)+BD = (567 dmg) | |||
* cr. B, cr. B, (BC), cl. D, f+A, b~f+BD, qcf+A/C, qcf+AC (2 hits), b~f+BD, qcf+A/C, df+B, delay dp+B (1 hit, SC) qcf(x2)+BD = (592 dmg) | |||
==5 meters== | ==5 meters== | ||
* ( | '''1500 Max Mode and up/ 3rd Position/ Anywhere''' | ||
( | |||
* cr. B (x2 to x3), Far B, qcf, hcb+AC(CC), qcf(x2)+BD = (609 to 601 dmg) | |||
* cr. B (x1-x2), cr. A, b~f+B(SC), qcf, hcb+AC(CC), qcf(x2)+BD = (631 to 622 dmg) | |||
* cl. C (1 hit), b+B (2 hits), b~f+B(SC), qcf, hcb+AC(CC), qcf(x2)+B = (656 dmg) | |||
* cr. C, b+B (2 hits), b~f+B(SC), qcf, hcb+AC(CC), qcf(x2)+B = (686 dmg) | |||
* cr. B, cr. B, (BC), cr. C, b+B (2 hits), b~f+BD, delay qcf+A/C, df+B, qcf, hcb+AC(CC), qcf(x2)+B = (638 dmg) | |||
* cr. B, cr. B, (BC), cl. D, f+A, b~f+BD, delay qcf+A/C, df+B, qcf, hcb+AC(CC), qcf(x2)+B = (656 dmg) | |||
* cr. B, cr. B, (BC), cl. D, f+A, b~f+BD, qcf+A/C, qcf+AC (2 hits), delay b~f+BD, qcf+A/C, dash dp+B (1 hit, SC) qcf, hcb+A/C(CC), qcf(x2)+B = (681 dmg) | |||
'''1500 Max Mode and up/ 3rd Position/ Corner''' | |||
* cr. B, cr. B, (BC), cl. D, f+A, b~f+BD, qcf+A/C, qcf+AC (2 hits), b~f+BD, qcf+A/C, df+B, delay dp+B (1 hit, SC) qcf, hcb+A/C(CC), qcf(x2)+B = (693 dmg) | |||
==Misc== | |||
===Meaty Jump Attack Set-ups:=== | |||
Color Legend: | |||
* Blue (Safe Jump Set-up): None of the opponent’s non-super reversals are fast enough to punish the offensive character’s jump attack on wake-up. | |||
* Green (Pseudo Safe Jump Set-up): A set-up that can beat the defending characters’ fastest non-super reversal on wake-up. It is a safe jump against slower reversals. | |||
* Red (Won’t work): The opponent has a non-super reversal that can beat the offensive character’s jump attack on wake-up. | |||
'''1.''' [https://youtu.be/iiXYnWMpg_g b~f+B at the corner- forward or neutral hop j. B:] Only useful if the opponent does recovery rolls in the corner. | |||
{| class="wikitable" style="text-align: Left;" | |||
|- style="color: Blue;" | |||
!Safe Jump Set-up: | |||
|Xanadu, Joe, Kensou, Blue Mary | |||
|- style="color: Green;" | |||
!Pseudo Safe Jump Set-up: | |||
|Kyo, Sylvie, Zarina, Iori, Kim, Nakoruru, Love Heart, Shun'Ei, Meitenkun, Leona, Billy, Terry, Andy, Alice, Athena, Robert, Yuri, Antonov, Rock, Heidern | |||
|- style="color: Red;" | |||
!Won’t work: | |||
|Choi, K', Kula, Ryo | |||
|} | |||
'''2.''' [https://youtu.be/pv8DbSNSmuQ dp+B/D, dp+K at the corner- forward jump j. B or j. D:] | |||
{| class="wikitable" style="text-align: Left;" | |||
|- style="color: Blue;" | |||
!Safe Jump Set-up: | |||
|Xanadu, Joe, Kensou, Blue Mary | |||
|- style="color: Green;" | |||
!Pseudo Safe Jump Set-up: | |||
|Kyo, Sylvie, Zarina, Iori, Kim, Nakoruru, Love Heart, Shun'Ei, Meitenkun, Leona, Billy, Terry, Andy, Alice, Athena, Robert, Antonov, Heidern | |||
|- style="color: Red;" | |||
!Won’t work: | |||
|Choi, K', Kula, Ryo, Yuri, Rock | |||
|} | |||
'''3.''' [https://youtu.be/xGKt6ubZdOA dp+B/D, dp+K anywhere on screen - forward hyper jump j. D:] | |||
{| class="wikitable" style="text-align: Left;" | |||
|- style="color: Blue;" | |||
!Safe Jump Set-up: | |||
|Xanadu, Joe, Kensou, Blue Mary | |||
|- style="color: Green;" | |||
!Pseudo Safe Jump Set-up: | |||
|Kyo, Sylvie, Zarina, Iori, Kim, Nakoruru, Love Heart, Shun'Ei, Leona, Billy, Terry, Andy, Alice, Athena, Robert, Antonov, Heidern | |||
|- style="color: Red;" | |||
!Won’t work: | |||
|Choi, Meitenkun, K', Kula, Ryo, Yuri, Rock | |||
|} | |||
'''4.''' [https://youtu.be/2NMg-cJyorI qcf+A/C(x2) anywhere on screen - forward hyper jump j. B or j. D:] | |||
{| class="wikitable" style="text-align: Left;" | |||
|- style="color: Blue;" | |||
!Safe Jump Set-up: | |||
|Xanadu, Joe, Kensou, Blue Mary | |||
|- style="color: Green;" | |||
!Pseudo Safe Jump Set-up: | |||
|Kyo, Sylvie, Zarina, Iori, Kim, Nakoruru, Love Heart, Shun'Ei, Leona, Billy, Terry, Andy, Alice, Athena, Robert, Antonov, Heidern | |||
|- style="color: Red;" | |||
!Won’t work: | |||
|Choi, Meitenkun, K', Kula, Ryo, Yuri, Rock | |||
|} | |||
==Frame Data and Hitbox== | |||
= | [https://docs.google.com/spreadsheets/d/1v1Iy2d7Bc2YwwTqW34InN2X2TvegowxVh9G8Rn6l4vA/edit#gid=32263301 Blue Mary KOFXIV Frama Data Link] | ||
[https://drive.google.com/drive/folders/1rOFFv0NDzTXVxZ84zf5ct6za2TqH220b Blue Mary KOFXIV Hitbox Gallery] | |||
=Videos= | =Videos= | ||
{{#ev:youtube| | Mary Combos ver.3.1 ➤ KOF14 | ||
=Contributors= | {{#ev:youtube|ZyXzI6e2OG4}} | ||
==Contributors== | |||
Amedo310 | |||
=External Links= | ==External Links== | ||
=Discussion Threads= | Twitter feed: | ||
https://docs.google.com/spreadsheets/d/13__zMttExHJYETA4eCtObFypvZZJr1TDRsZZZHWjZIo/edit#gid=189594355 | |||
==Discussion Threads== | |||
Discuss at [add character section link here Dream Cancel] | Discuss at [add character section link here Dream Cancel] | ||
{{Navbox XIV}} | {{Navbox XIV}} | ||
[[Category:The King of Fighters XIV]] | [[Category:The King of Fighters XIV]] | ||
[[Category:Blue Mary]] | |||
Latest revision as of 01:23, 27 May 2021
Movelist
(*) = EX OK
(!) = MAX OK
Throws
Command Normals
Special Moves
Straight Slicer - charge briefly ![]() then
then ![]() +
+ ![]() /
/![]() (*)
(*)
Super Special Moves
Climax Super Special Move
Quick Combo Reference
| 0 Meter |
Low, Anywhere |
(cr. B (x2 to x3), Far B) = 85 to 110 dmg |
| 1 Meter |
Anywhere |
(cr. B (x1-x2), cr. A, b~f+B (SC), qcf, hcb+A/C) = 259 to 275 dmg |
| 2 Meters |
Anywhere |
(cr. B (x2 to x3), Far B, qcf, hcb+AC) = 378 to 386 dmg |
Gameplay Overview
Health: 1000
Blue Mary is a very strong character in KOFXIV. She has many tools such as:
- An invincible dodge that leads into a command grab.
- A wide air CD that is good for pressure.
- Plenty of easy mix-ups.
- An invincible reversal, dp+K, that puts the opponent in a hard knockdown state.
She can make the opponent second guess their approach easily, with her invincible moves, while forcing her way in neutral.
Normals
Throws
Command Moves
Special Moves
| Straight Slicer - (← charge → + B/D) |
|---|
| ↳ Crab Clutch (↓↘→ + B/D) |
|---|
| EX Straight Slicer - (← charge → + BD) |
|---|
| ↳ Stun Fang (↓↘→ + A/C) |
|---|
| Vertical Arrow - (→↓↘ + B/D) |
|---|
| ↳ M. Snatcher (→↓↘ + B/D) |
|---|
| EX Vertical Arrow - (→↓↘ + BD) |
|---|
| Spin Fall (↓↘→ + A/C) |
|---|
| ↳ M. Spider (↓↘→ + A/C) |
|---|
| EX Spin Fall (↓↘→ + AC) |
|---|
| Real Counter (↓↙← + A/C) |
|---|
| ↳ Backdrop Real (In close, ↓↘→ + A/C) |
|---|
| EX Real Counter (↓↙← + AC) |
|---|
| ↳ EX Backdrop Real (In close, ↓↘→ + A/C) |
|---|
| M. Breaker (→↓↘ + A/C) |
|---|
| EX M. Breaker (→↓↘ + AC) |
|---|
Super Special Moves
Climax Super Special Moves
Combos
Combo starter:
- cr. B (x1 or x2), cr. A – The stable combo starter that connects only to b~f+B, the light slide kick.
- cl. C (1 hit), b+B – Cl. (1 hit) is one of two heavy normals that connects to f+B consistently, without f+B whiffing, at most ranges. After doing b+B, hold back to charge for the slide kick, b~f+B/D.
- cr. C, b+B – cr. C connects to f+B consistently without f+B whiffing all ranges. It can be considered the best combo to do after quick max to connect to ex slide kick, b~f+BD.
- cl. D, f+A – This is a combo to do after quick max in the anchor position. It leads to her most damaging mid-screen 2-meter anchor combo without spending any additional meter. It’s possible to do slide kick after this combo by immediately holding back during f+A. Delay f+K after f+A by a couple of frames to connect to slide kick.
- cl. D, b+B – Her most damaging combo starter, but requires cl. D to hit deep to connect f+B. It’s best to do this combo after a cross-up j. B or cross-up j. D. Also, it’s is useful after quick max for 1-meter max mode combos.
Rush Auto Combo
Meterless: Rush combo, b~f+D, qcfB/D = 172 dmg
1 Meter: Rush combo, qcf, hcb+A/C = 222 dmg
EX: Rush combo, qcf, hcb+AC = 363 dmg
0 meter
Anywhere
- cr. B (x2 to x3), Far B = (85 to 110 dmg)
- cr. B (x1 to x2), cr. A, b~f+B = (107 to 131 dmg)
(Main bread and butter combo. It's best to hold db while at the start of the combo to charge for b~f+B.)
- cl. C (1 hit), f+A, dp+B (x2) = (194 dmg)
- cl. D, f+A, b~f+D, qcf+B/D = (216 dmg)
- cl. D f+A, dp+B, dp+B (x2) = (234 dmg)
(cl. D has to hit very close against the opponent in order for b+B not to whiff. It's easier to do this combo after cross-up j. B or j. D.)
- cr. C, b+B (2 hits), b~f+D, qcf+B/D = (246 dmg)
(Along with cl. C (1 hit), cr. C seems to connect to b+B more consistently at any range.)
- cl. D b+B (2 hits), b~f+D, qcf+B/D = (256 dmg)
(cl. D has to hit very close against the opponent in order for b+B not to whiff. It's easier to do this combo after cross-up j. B or j. D.)
1 meter
1000 Max Mode and up/ All Positions/ Anywhere
- cr. B (x2 to x3), Far B, qcf, hcb+A/C = (237 to 254 dmg)
- cr. B (x1-x2), cr. A, b~f+B (SC), qcf, hcb+A/C = (259 to 275 dmg)
- cl. C (1 hit), b+B (2 hits), b~f+B(SC), qcf, hcb+A/C = (309 dmg)
- cr. C, b+B (2 hits), b~f+B(SC), qcf, hcb+A/C = (339 dmg)
- cr. B, cr. B, (BC), cr. C, b+B (2 hits), b~f+BD, delay qcf+A/C, df+B, qcf+AC (2 hits), dp+D (x2) = (355 dmg)
1500 Max Mode/ 3rd Position/ Corner
- cr. B, cr. B, (BC), cr. C, b+B (2 hits), qcf+AC, df+B, qcf+AC, dp+BD = (360 to 372 dmg)
2 meters
1000 Max Mode and up/ All Positions/ Anywhere
- cr. B (x2 to x3), Far B, qcf, hcb+AC = (378 to 386 dmg)
- cr. B (x1-x2), cr. A, b~f+B (SC), qcf, hcb+AC = (400 to 407 dmg)
- cl. C (1 hit), b+B (2 hits), b~f+B(SC), qcf, hcb+AC = (441 dmg)
- cr. C, b+B (2 hits), b~f+B(SC), qcf, hcb+AC = (471 dmg)
- cr. B, cr. B, (BC), cr. C, b+B (2 hits), b~f+BD, delay qcf+A/C, df+B, qcf, hcb+AC = (483 dmg)
1250 Max Mode and up/ 2nd and 3rd Positions/ Corner
- cr. B, cr. B, (BC), cr. C, b+B (2 hits), b~f+BD, delay qcf+A/C, df+B, delay dp+B (1 hit, SC), qcf, hcb+AC = (497 dmg)
1500 Max Mode and up/ 3rd Position/ Anywhere
- cr. B, cr. B, (BC), cl. D, f+A, b~f+BD, qcf+A/C, qcf+AC (2 hits), df+B, qcf, hcb+AC = (506 dmg)
1500 Max Mode and up/ 3rd Position/ Corner
- cr. B, cr. B, (BC), cl. D, b+B, b~f+BD, qcf+A/C, df+B, delay dp+B (1 hit, SC), qcf, hcb+AC = (505 dmg)
3 meters
1000 Max Mode and up/ All Positions/ Anywhere
- cr. B (x2 to x3), Far B, qcf, hcb+A/C(AC), hcb(x2)+BD = (404 to 407 dmg)
- cr. B (x1-x2), cr. A, b~f+B (SC), qcf, hcb+AC(AC), hcb(x2)+BD = (426 to 428 dmg)
- cl. C (1 hit), b+B (2 hits), b~f+B(SC), qcf, hcb+A/C(AC), hcb(x2)+BD = (462 dmg)
- cr. C, b+B (2 hits), b~f+B(SC), qcf, hcb+AC(AC), hcb(x2)+BD = (492 dmg)
- cr. B (x1-x2), cr. A, b~f+B(SC), qcf(x2)+BD = (494 to 493 dmg)
- cr. C, b+B (2 hits), b~f+B(SC), qcf(x2)+BD = (557 dmg)
- cr. B, cr. B, (BC), cr. C, b+B (2 hits), b~f+BD, qcf+A/C, df+B, qcf(x2)+BD = (528 dmg)
- cr. B, cr. B, (BC), cr. C, b+B (2 hits), b~f+BD, delay qcf+A/C, df+B, qcf+AC (2 hits), dp+B/D (1 hit, SC), qcf, hcb+AC = (529 dmg)
1250 Max Mode and up/ 2nd and 3rd Positions/ Corner
- cr. B, cr. B, (BC), cr. C, b+B (2 hits), b~f+BD, delay qcf+A/C, df+B, delay dp+B (1 hit, SC), qcf(x2)+BD = (542 dmg)
1500 Max Mode and up/ 3rd Position/ Anywhere
- cr. B, cr. B, (BC), cl. D, f+A, b~f+BD, qcf+A/C, qcf+AC (2 hits), df+B, qcf(x2)+BD = (551 dmg)
4 meters
1250 Max Mode and up/ 2nd and 3rd Positions/ Anywhere
- cr. B (x2 to x3), Far B, qcf, hcb+A/C(AC), hcb(x2)+BD = (526 to 518 dmg)
- cr. B (x1-x2), cr. A, b~f+B (SC), qcf, hcb+AC(AC), hcb(x2)+BD = (548 to 539 dmg)
- cl. C (1 hit), b+B (2 hits), b~f+B(SC), qcf, hcb+A/C(AC), hcb(x2)+BD = (573 dmg)
- cr. C, b+B (2 hits), b~f+B(SC), qcf, hcb+AC(AC), hcb(x2)+BD = (603 dmg)
- cr. B, cr. B, (BC), cr. C, b+B (2 hits), b~f+BD, delay qcf+A/C, df+B, qcf+AC (2 hits), dp+B/D (1 hit, SC) qcf, hcb+A/C (AC), hcb(x2)+BD = (549 dmg)
- cr. B, cr. B, (BC), cl. D, f+A, b~f+BD, qcf+A/C, qcf+AC (2 hits), delay b~f+BD, qcf+A/C, dash dp+B (1 hit, SC) qcf(x2)+BD = (580 dmg)
1250 Max Mode and up/ 2nd and 3rd Positions/ Corner
- cr. B, cr. B, (BC), cr. C, b+B (2 hits), b~f+BD, delay qcf+A/C, qcf+AC (2 hits), df+B, delay dp+B (1 hit, SC) qcf, hcb+A/C (AC), hcb(x2)+BD = (548 dmg)
1500 Max Mode and up/ 3rd Position/ Anywhere
- cr. B, cr. B, (BC), cl. D, f+A, b~f+BD, qcf+A/C, qcf+AC (2 hits), delay b~f+BD, qcf+A/C, dash dp+B (1 hit, SC) qcf, hcb+A/C (AC), hcb(x2)+BD = (555 dmg)
1500 Max Mode and up/ 3rd Position/ Corner
- cr. B, cr. B, (BC), cl. D, f+A, b~f+BD, qcf+A/C, qcf+AC (2 hits), b~f+BD, qcf+A/C, df+B, delay dp+B (1 hit, SC) qcf, hcb+A/C (AC), hcb(x2)+BD = (567 dmg)
- cr. B, cr. B, (BC), cl. D, f+A, b~f+BD, qcf+A/C, qcf+AC (2 hits), b~f+BD, qcf+A/C, df+B, delay dp+B (1 hit, SC) qcf(x2)+BD = (592 dmg)
5 meters
1500 Max Mode and up/ 3rd Position/ Anywhere
- cr. B (x2 to x3), Far B, qcf, hcb+AC(CC), qcf(x2)+BD = (609 to 601 dmg)
- cr. B (x1-x2), cr. A, b~f+B(SC), qcf, hcb+AC(CC), qcf(x2)+BD = (631 to 622 dmg)
- cl. C (1 hit), b+B (2 hits), b~f+B(SC), qcf, hcb+AC(CC), qcf(x2)+B = (656 dmg)
- cr. C, b+B (2 hits), b~f+B(SC), qcf, hcb+AC(CC), qcf(x2)+B = (686 dmg)
- cr. B, cr. B, (BC), cr. C, b+B (2 hits), b~f+BD, delay qcf+A/C, df+B, qcf, hcb+AC(CC), qcf(x2)+B = (638 dmg)
- cr. B, cr. B, (BC), cl. D, f+A, b~f+BD, delay qcf+A/C, df+B, qcf, hcb+AC(CC), qcf(x2)+B = (656 dmg)
- cr. B, cr. B, (BC), cl. D, f+A, b~f+BD, qcf+A/C, qcf+AC (2 hits), delay b~f+BD, qcf+A/C, dash dp+B (1 hit, SC) qcf, hcb+A/C(CC), qcf(x2)+B = (681 dmg)
1500 Max Mode and up/ 3rd Position/ Corner
- cr. B, cr. B, (BC), cl. D, f+A, b~f+BD, qcf+A/C, qcf+AC (2 hits), b~f+BD, qcf+A/C, df+B, delay dp+B (1 hit, SC) qcf, hcb+A/C(CC), qcf(x2)+B = (693 dmg)
Misc
Meaty Jump Attack Set-ups:
Color Legend:
- Blue (Safe Jump Set-up): None of the opponent’s non-super reversals are fast enough to punish the offensive character’s jump attack on wake-up.
- Green (Pseudo Safe Jump Set-up): A set-up that can beat the defending characters’ fastest non-super reversal on wake-up. It is a safe jump against slower reversals.
- Red (Won’t work): The opponent has a non-super reversal that can beat the offensive character’s jump attack on wake-up.
1. b~f+B at the corner- forward or neutral hop j. B: Only useful if the opponent does recovery rolls in the corner.
| Safe Jump Set-up: | Xanadu, Joe, Kensou, Blue Mary |
|---|---|
| Pseudo Safe Jump Set-up: | Kyo, Sylvie, Zarina, Iori, Kim, Nakoruru, Love Heart, Shun'Ei, Meitenkun, Leona, Billy, Terry, Andy, Alice, Athena, Robert, Yuri, Antonov, Rock, Heidern |
| Won’t work: | Choi, K', Kula, Ryo |
2. dp+B/D, dp+K at the corner- forward jump j. B or j. D:
| Safe Jump Set-up: | Xanadu, Joe, Kensou, Blue Mary |
|---|---|
| Pseudo Safe Jump Set-up: | Kyo, Sylvie, Zarina, Iori, Kim, Nakoruru, Love Heart, Shun'Ei, Meitenkun, Leona, Billy, Terry, Andy, Alice, Athena, Robert, Antonov, Heidern |
| Won’t work: | Choi, K', Kula, Ryo, Yuri, Rock |
3. dp+B/D, dp+K anywhere on screen - forward hyper jump j. D:
| Safe Jump Set-up: | Xanadu, Joe, Kensou, Blue Mary |
|---|---|
| Pseudo Safe Jump Set-up: | Kyo, Sylvie, Zarina, Iori, Kim, Nakoruru, Love Heart, Shun'Ei, Leona, Billy, Terry, Andy, Alice, Athena, Robert, Antonov, Heidern |
| Won’t work: | Choi, Meitenkun, K', Kula, Ryo, Yuri, Rock |
4. qcf+A/C(x2) anywhere on screen - forward hyper jump j. B or j. D:
| Safe Jump Set-up: | Xanadu, Joe, Kensou, Blue Mary |
|---|---|
| Pseudo Safe Jump Set-up: | Kyo, Sylvie, Zarina, Iori, Kim, Nakoruru, Love Heart, Shun'Ei, Leona, Billy, Terry, Andy, Alice, Athena, Robert, Antonov, Heidern |
| Won’t work: | Choi, Meitenkun, K', Kula, Ryo, Yuri, Rock |
Frame Data and Hitbox
Blue Mary KOFXIV Frama Data Link
Blue Mary KOFXIV Hitbox Gallery
Videos
Mary Combos ver.3.1 ➤ KOF14
Contributors
Amedo310
External Links
Twitter feed: https://docs.google.com/spreadsheets/d/13__zMttExHJYETA4eCtObFypvZZJr1TDRsZZZHWjZIo/edit#gid=189594355
Discussion Threads
Discuss at [add character section link here Dream Cancel]
