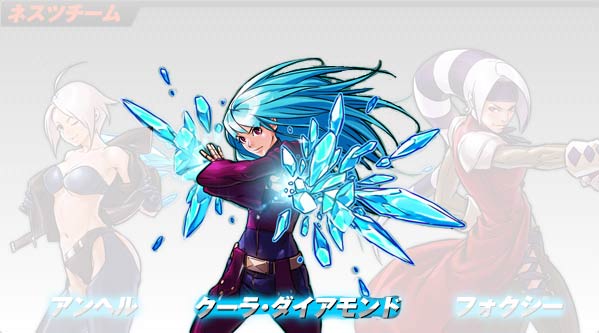
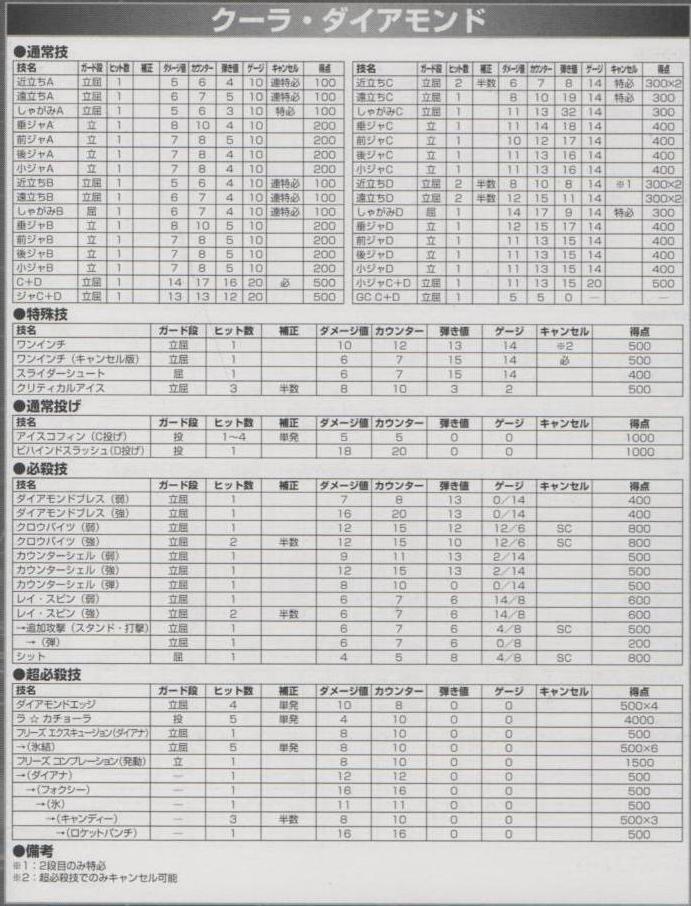
The King of Fighters 2002 UM/Kula Diamond
Movelist
Normals
Close
- cl.A/B/C/D are all cancellable
- cl.A/B are chain-able into themselves and each other
- cl.C has two hit points both of which are cancellable
- cl.D has two hit points both of which are cancellable
- very good set of close normals to keep pressure on opponents
Stand
- s.A/B/C are special cancellable
- s.A/B/C are all whiff cancellable
- s.D has two hits, neither of which are cancellable
- s.A/B/C are all very decent horizontal pokes allowing Kula to control the space in front of her well
Crouch
- cr.A/B are cancellable
- cr.B is chains into itself
- cr.C works as a preemptive anti air with a large upward diagonal hitbox
- cr.B has great range as a low poke
- cr.D her sweep is very slow and extremely unsafe on block
- overall Kula has a weak set of crouching normals compared to her stand/close ones
Jump
- j.A/C look identical, j.C has slightly more startup. Both have cool (hah) downward angles and function as jump ins
- j.D has another nice downward angle and good crossup potential
- j.B has a far reaching horizontal property that makes it a good air to air tool
- j.CD mostly functions mostly as an air to air option as its hitbox priority leaves crouching and some standing opponents hard to hit
Blowback
- soft knockdown
- Kula's CD hits from about 1.5 characters distance away and though it hits mid her leg goes straight up making it a poor pressure tool
- the vertical hitbox makes it a decent anti air option
- whiff cancellable
Throw
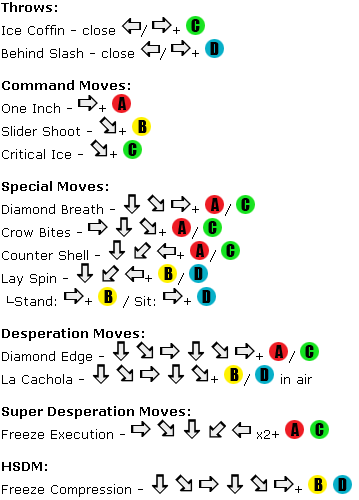
Ice Coffin - close b/f + C
- soft knockdown
Behind Slash - close b/f + D
- soft knockdown
- with help Kula tosses the opponent all the way to the other corner
Command Moves
One Inch Punch - (f + A)
- Kula seems to grab the opponent and bite them!
- hard knockdown
- can combo into it (loses the knockdown property) and then cancel from it
- very unsafe on block if done raw
Slider Shoot - (df + B)
- Kula slides on a bed of self made ice tripping the opponent up
- soft knockdown
- can combo into it
- pretty safe on block if spaced correctly
- great option if you want a hit confirmed knock down to start your okizeme
Critical Ice - (df + C)
- Kula creates a far reaching ball of ice spikes
- hard knockdown
- can combo into it, but it will not actually connect a combo with it
- another great pressure tool for Kula
- you can use it by whiff cancel normals into it to hide its long startup
Special Moves
Diamond Breath - (qcf + A/C)
- Kula blows a mist of ice at the opponent freezing the opponent
- A version is comboable and causes a soft knockdown
- A version causes a brief juggle state where Kula can follow up create a reset opportunity or get further damage
- A version will destroy normal fireballs, but only well into its active frames. C version too slow to be effective at this
- C version is not comboable and causes a freeze state allowing time to get a full follow up combo
- C version's hitbox will whiff if directly next to the opponent in either a standing or crouching state
- both versions are + on block
Crow Bites - (dp + A/C)
- Kula's ice sparkle version of the old fighting game standby the dp
- A version hits once, is comboable and causes soft knockdown
- A version is Kula's go to reversal option
- C version hits twice, is comboable and causes soft knockdown
- C versions 2nd hit will whiff on crouching opponents even if comboed into. Leaving Kula open to heavy punishment
- the first hit of C version is super cancellable though to use in combo strings
- C version has a very long diagonal arc that covers most of the screen which makes it an intriguing, but risky anti air
Counter Shell - (qcb + A/C)
- Kula hits the opponent with a lethal mist of ice
- causes hard knockdown
- can combo into it
- hitbox hits from slightly less than a full character away
- the mist will also reflect most projectile in its active frames, sending a shard of ice back to the opponent
- both versions are equally unsafe on block
- great combo ender to get a knockdown and run a mixup
Lay Spin - (qcb + B/D)
- Kula spins in the air landing a kick on the opponent
- both versions are comboable
- both versions are 0 or -1 on block
- B version lands one hit that can be followed up
- D version is two hits that you can follow up in the second hit
- D version will whiff the first hit on crouching opponents
- D version causes soft knockdown if you don't follow up
┗ Stand - (f + B)
- Kula follows up her spinning kick with an icy projectile
- following B version the projectile won't combo
- during B version you can follow up the kick with projectile on whiff or block
- if the projectile hits from B version it causes soft knockdown
- from D version you can cancel into the projectile from the 2nd hit, but not on whiff.
- if you land a full combo into D version the follow up projectile whiffs, but if you land just the 2nd hit of D version the follow up hits and causes a soft knockdown.
- both versions' projectile follow ups are super cancellable
┗ Sit - (f + D)
- Kula follows up her spinning kick by going into a slide
- following B version the slide will combo and cause soft knockdown
- following B version it can be whiff cancelled into
- slide is very unsafe on block
- D version will whiff the slide during a full combo, but if you land just the 2nd hit of D version the slide hits and puts the opponent in a juggle state
- in a full combo with D version the slide serves a great purpose of keep pressure on by closing distance
- both versions of the slide are super cancellable
Desperation Moves
Diamond Edge - (qcf x 2 + A/C)
- Kula summons large shards of ice from the ground hurling them in a wave to the opponent
- can combo into it
- causes soft knockdown
- the ice wave can negate other projectiles, but it's slow to use as a punish in that regard
La Cachola - (qcf x 2 + B/D, in air)
- Kula grabs the opponent and summons help from Candy, Foxy and Diana and they surround the opponent cheering: 'La Cachola!'
- counts as unblockable command grab
- causes hard knockdown
- done raw does very minimal damage
- drains one meter from the opponent
- you can easily tiger knee the move if you are next to the opponent and want to spend the bar for a knockdown
- has a slow short diagonal window so has to be done pretty much on top of the opponent
- has minimal invulnerability so Kula can be hit out of the throw
Super Desperation Moves
Freeze Execution -(hcb x 2 + AC)
- Kula calls Diana who dashes forth with a rapier knocking the opponent up into a powerful freeze
- can be comboed into
- causes soft knockdown
- will go through other projectile if done fast enough, still a costly punish though
- great way to end some of Kula's combos
HDSM
Freeze Compression = (qcf x 2 + BD)
- Kula does her One Inch bite then calls Diana cut for a sword slash, then freezes the opponent setting them up to be pummeled by Candy
- can be comboed into easily
- causes soft knockdown
- decent expensive way to end a combo or finish someone off
Notes
Changes from OG2k2
Combos
0 Stock
- j.X, cr.B×1~2, Far B, dp+C
- cr. Bx2, Far B, df+B
- j.X, cl.C (1), qcf+A, hh.D
- cl.C/D (2), f+A, qcb+B~f+D~dp+C
- j.C/D, cl.C (1), f+A, qcb+B~f+D, qcb+P
- (corner) j.C/D, cl.C (1), f+A, qcf+A, delay qcb+B~f+B, dp+C/qcb+P
(you can omit the delayed qcb+B into a normal time but you will need to substitute the f+B follow up with just dp+C or qcb+P for lesser damaging combo)
- (corner) cl.C/D (2), f+A, qcf+A, qcb+B~f+B, qcb+B, dp+C
(the opponent can be frozen with qcf+C first)
1 Stock
- j.X, st.C (1), qcfx2+P
- j.X (cross-up), st.C (1), f+A, qcfx2+P
- (corner) cl.C/D (2), f+A, qcf+A, qcfx2+P
- j.X, st.C (2), (BC run) st.C (1), f+A, dp+A, (DC) qcb+B~f+D, (DC) qcb+P
- j.X, cr.B×1~2, Far B, dp+C, (SC) qcfx2+P
- j.X, st.C (2), (BC run) cr.B×1~2, Far B, dp+C, (SC) qcfx2+P
- j.X, st.C (2), (BC run) st.C (1), f+A, dp+A, (DC) qcf+A, qcb+B~f+B, qcb+B~f+B, dp+C, (DC) qcb+P
2 Stock
- j.X, st.C (1), f+A, (BC) st.C (1), f+A, dp+C, (DC) qcb+B, (SC) qcfx2+K
3 Stock
(combos ending with qcfx2+BD must be done with your health at 30% percent)
- j.X, st.C (2), f+A, hcbx2+AC
- j.X, st.C (1), f+A, (BC) st.C (2), f+A, hcbx2+AC
- j.X, cr.B×1~2, (BC) Far B, dp+C, (SC) hcbx2+AC
- j.X, st.C (2), (BC) st.C (1), f+A, dp+C, (SC) hcbx2+AC
- cl.C/D (2), f+A, hcbx2+AC
- j.X, st.C (1), qcfx2+BD
- j.X (cross-up), st.C (1), f+A, qcfx2+BD
- (corner) j.X, st.C (1), qcf+A, qcfx2+BD
- (corner) j.X, st.C (2), (BC) st.C (1), f+A, dp+C, (DC) qcf+A, qcfx2+BD
- cl.C (1), f+A, qcfx2+P / df+C (2), qcfx2+BD
- Far C, qcb+B~f+D~dp+C / hcbx2+AC
- cl.C (2), (BC) cl.C (2), hcbx2+AC
- f+A/df+C(3)/qcb+P, dp+C/qcb+P/qcfx2+P
- st.C (1), f+A, (BC run) cl.C(1), df+C(2), [dp+C (1),(SC) qcfx2+P/hcbx2+AC] qcfx2+BD
- (corner) cr.B×1~2, (BC), Far B, dp+C (1), (DC) qcf+A, qcfx2+BD
Combo Animations
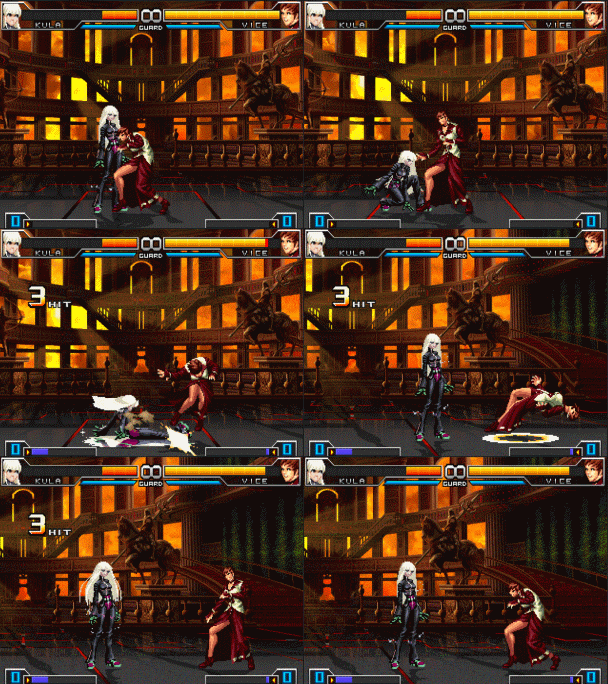
- cr.B, cr. B, df+B
---
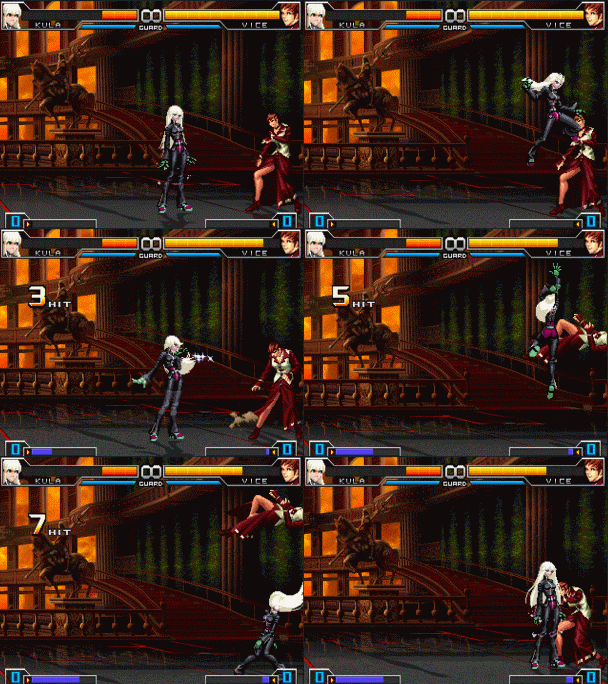
- j.D, cl. C (2), qcf+A, qcb+D, cr. C
Frame Specifics
Frame Data
Close Normals
cl.A - 4 (5)
cl.B - 4 (5)
cl.C - 5+2 (6+2)
cl.D - 7+3 (9+3)
Far Normals
st.A - 5 (6)
st.B - 5 (6)
st.C - 7 (9)
st.D - 11+5 (14+5)
CD - 13 (15)
Crouch Normals
cr.A - 4 (5)
cr.B - 5 (6)
cr.C - 10 (12)
cr.D - 13 (15)
Jump Normals
j.A - 6 (7)
j.B - 6 (7)
j.C - 9 (11)
j.D - 10 (12)
j.CD - 12 (12)
Short Hop Normals
sh.A - 6 (7)
sh.B - 6 (7)
sh.C - 10 (12)
sh.D - 10 (12)
Neutral Jump Normals
nj.A - 7 (9)
nj.B - 7 (9)
nj.C - 10 (13)
nj.D - 11 (14)
Super Jump Normals
sj.CD - 10 (12)
Command Normals
One Inch - 9 (11)
[close] - 5 (6)
Slider Shoot - 5 (6)
Critical Ice - 7+3+1 (9+3+1)
Throws
Ice Coffin - 3*1~4
Behind Slash - 10
Special Attacks
Diamond Breath (weak) - 5 (7)
Diamond Breath [strong] - 9 (13)
Counter Shell [weak] - 8 (10)
Counter Shell [strong] - 11 (14)
[Counter Ice Bullet] - 7 (9)
Crow Bites [weak] - 11 (14)
Crow Bites [strong] - 11+5 (14+5)
Lay Spin [weak] - 5 (6)
Lay Spin [strong] - 5+2 (6+2)
"Stand"
[Kick]…7(9)
[Ice Bullet] - 3 (5)
"Sit" - 3 (4)
DM
La Cachola - 10
Diamond Edge [1] - 9 (7)
[2~3] - 9+4 (7+4)
[4] - 9 (7)
[Total] - 31 (29)
SDM
Freeze Execution
[Breakdown] - 7*6~10(9+7*5~9)
[Total] - 42~70(44~72)
HSDM
Freeze Compression - 52 (52)
Frame Advantage
Close Normals
cl. A - 6F (-2F)
cl. B - 7F (-5F)
cl. C - 4F (-9F)→[2] Guard
cl. D - 7F (-6F)→[2] Guard
Far Normals
st. A - 6F (-7F)
st. B - 4F (-5F)
st. C - 14F (-21F)
st. D - 9F (-1F)→[2] Guard
CD - 12F (-23F)
Crouch Normals
cr. A - 7F (-5F)
cr. B - 5F (-2F)
cr. C - 5F (-17F)
cr. D - 8F (-15F)
Command Normals
One Inch (f+A) - 18F (-25F)
One Inch (f+A) Canceled - 13F(-26F)
Slider Shoot (df+B) - 10F (-12F~-3F)
Critical Ice (df+C) [1] - 18F
[total] - 29F (-14F)
Special Attacks
Diamond Breath (weak) - 19F (+4F)→Guard
Diamond Breath (strong) - 36F (+10F)→Guard
Crow Bites (weak) [1] - 6F (-33F)
[2] - 18F (-21F)
Crow Bites (strong) [1] - 3F
[2] - 13F
Counter Shell - 8F (-11F)
Lay Spin (weak) - 14F (-6F~-2F)
Lay Spin (strong) [1] - 15F
[2] - 31F (-2F)
"Stand" - (-5F~-2F)
"Sit" - (-17F~-6F)
DMs
Diamond Edge - 12F
SDMs
Freeze Execution [1] - 15F
[Distance] - (-21F)
[Close, Corner Start-up] - (-19F)
HSDM
Freeze Compression - 16F (-13F)
Kula KOF 2002 Mook
Videos
Kula Master Class
Discussion Threads
Discuss at Dream Cancel or Orochinagi
References
More combo animations here: http://tieba.baidu.com/p/3592940025
